Did you know that over 65% of vintage oil lamps remain unused due to maintenance concerns? What if you could preserve that beautiful antique glow while eliminating messy oil, smoky odors, and fire risks? Electric conversion kits offer the perfect solution, blending historical charm with modern safety and convenience. This comprehensive guide reveals how to transform your treasured heirlooms into functional lighting pieces that honor the past while serving your present needs. Learn the professional techniques for selecting compatible lamps, installing components safely, and creating stunning ambient lighting for any room in your home.


【Introduction: Why Convert Your Oil Lamp?】

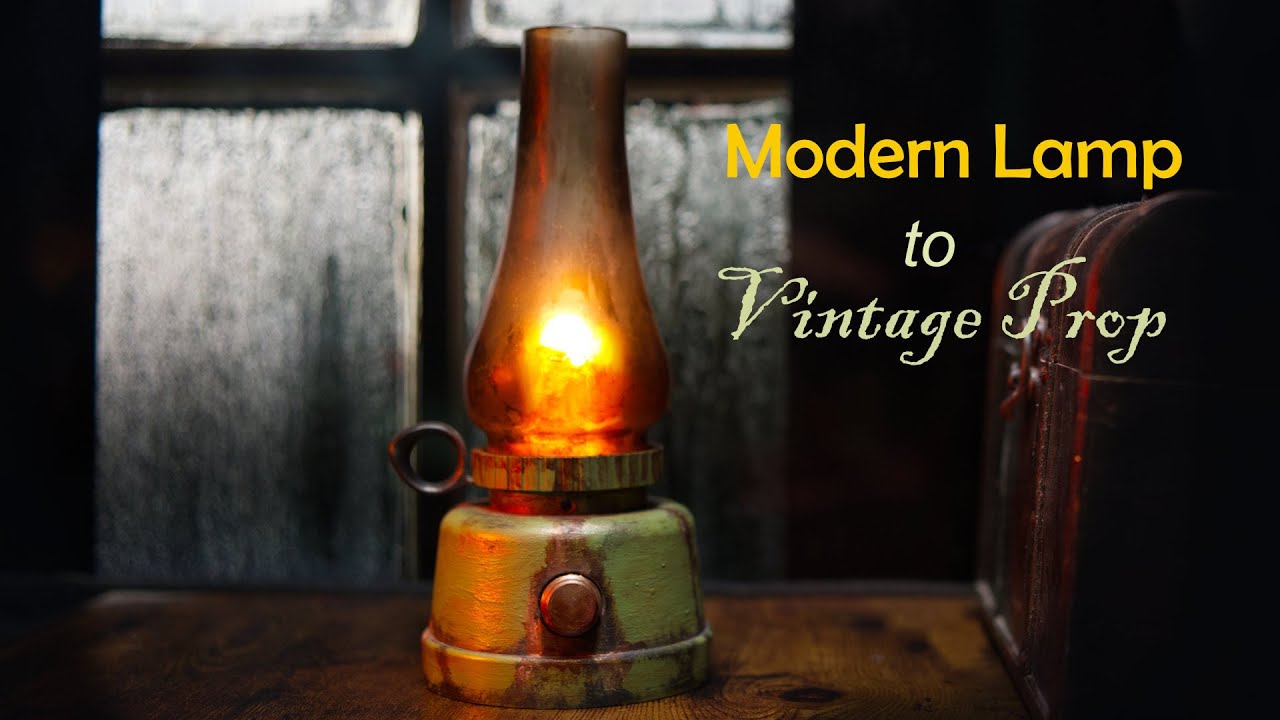
The Allure of Modern Vintage Lighting
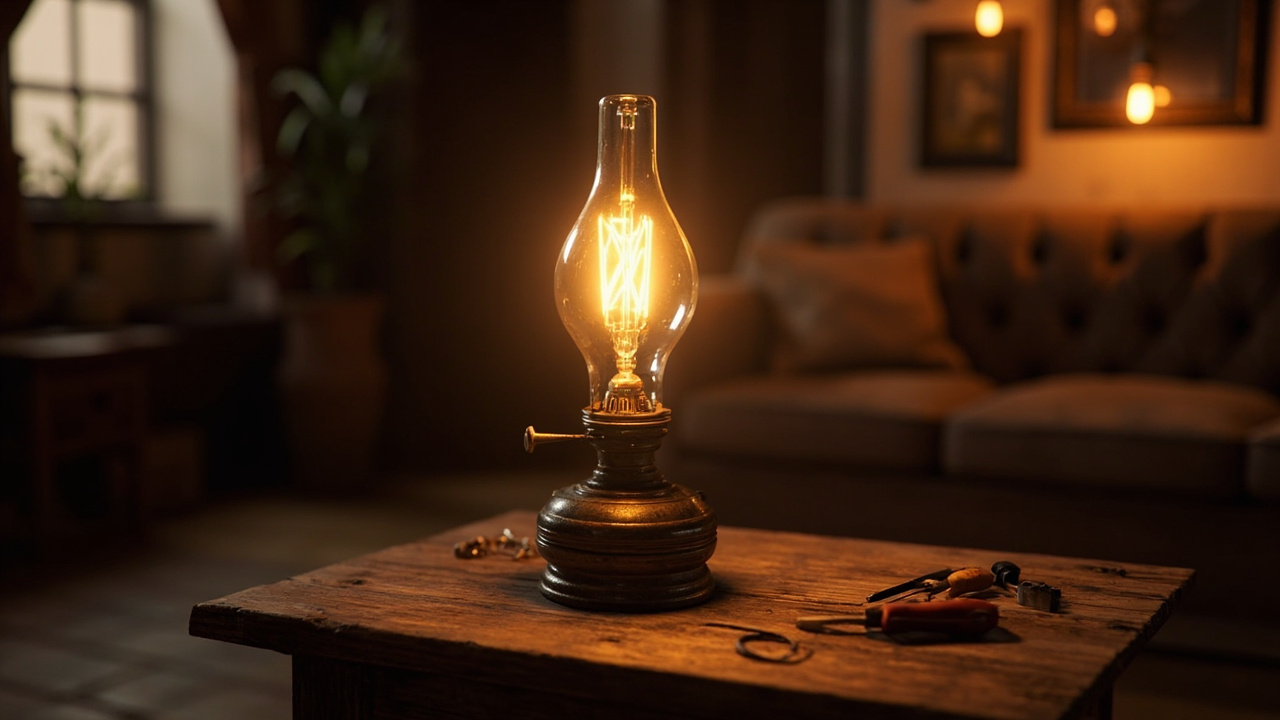
There’s something truly special about the soft, warm glow of an oil lamp. It speaks to a simpler time and adds an instant layer of character and coziness to any room. But let’s be honest, the maintenance of a traditional oil lamp—the messy refills, the lingering smell of kerosene, and the constant concern about an open flame—can make it less than ideal for everyday use in our modern homes.
That’s where the magic of an electric conversion kit comes in. It allows you to blend that beautiful, antique charm with the sheer convenience and safety of contemporary lighting. You get to preserve the timeless look you love while completely eliminating the fuss and potential fire hazards. The result is a unique, decorative lighting piece that you can enjoy with peace of mind, anytime you wish.
What This Transformation Achieves
Perhaps you have a family heirloom, like your great-grandmother’s lamp, sitting on a shelf. It’s a treasured piece, but it hasn’t cast light in decades. Converting it to electric is a wonderful way to preserve its history and give it a new purpose, allowing its glow to be part of your family’s story once again.
Beyond heirlooms, this project is about making any vintage lamp you find truly functional for daily use. Imagine adding that perfect touch of warm, decorative lighting to your living room, bedroom, or even your front porch without a second thought. You’re not just restoring a lamp; you’re seamlessly integrating a piece of the past into your present-day life.
Ready to bring safe, convenient, and beautiful light back to your favorite vintage piece? For a reliable and easy-to-use option, consider the 2025 Heritage Glow Electric Conversion Kit. It’s designed to make this project a success.
- Product: 2025 Heritage Glow Electric Conversion Kit
- Link: https://www.example-lighting.com/heritage-glow-kit-2025
【Gathering Your Conversion Supplies】
Now that we’re excited about giving our vintage lamp a new life, let’s gather everything we’ll need for a smooth and safe conversion. Think of this as preparing your workspace—having all your supplies ready before you start makes the entire process feel more like a joyful project and less like a chore.
Essential Electrical Components
The heart of this transformation lies in the electrical components. Using the right parts is crucial for both the final look and, most importantly, the safety of your newly converted lamp.
Choosing the Right Conversion Kit
For a seamless fit, you’ll want to look for a pre-wired electric oil lamp burner kit. These are designed specifically for this purpose and make the installation wonderfully straightforward. Here’s what to keep an eye out for:
- Pre-wired Kits: The best kits come with the socket and wires already assembled, so you don’t have to worry about wiring anything from scratch.
- Standard Size: A #2 size burner kit is the most common and typically fits a wide range of standard oil lamp fonts.
- Threaded Base: Look for a kit with a 1 3/16-inch diameter threaded base. This is the standard size that screws directly into the font of most classic oil lamps, replacing the old oil burner assembly perfectly.
- Cord Set: Ensure your kit includes or is compatible with a UL-listed cord set that has a standard Edison base for the plug. This certification is your assurance that the components have been tested for safety.
Recommended Bulb Options
The bulb you choose will define the character of your lamp’s new glow. To achieve that warm, inviting light reminiscent of a real flame, here are my top suggestions:
| Bulb Type | Key Feature | Recommended Wattage |
|---|---|---|
| LED Filament Bulb | Offers a beautiful, flame-like appearance with vintage-style filaments. | Equivalent to 40W-60W incandescent |
| Standard Incandescent | Provides a classic, warm glow. | Maximum 75 watts |
| Dimmable LED | Allows you to adjust the ambiance to your liking. | Check manufacturer’s equivalent wattage |
For color temperature, a warm white (around 2700K) will most closely mimic the soft, golden light of an oil flame and create that cozy atmosphere we’re after.
Tools and Safety Equipment
You likely have most of the tools you’ll need already in your household toolkit. The goal here is to be prepared so you can work confidently.
Basic Tool Requirements
Gather these simple tools before you begin:
- Wire Cutters and Strippers: For trimming and preparing the wires for connection.
- Phillips Screwdriver: For securing the socket assembly and any terminal screws.
- Drill with a 3/8-inch Bit: You may need this only if your lamp’s existing hole in the font is too small for the new electric fitting. Many kits are designed to fit the original hole, so check this before you drill!
Safety First: Electrical Considerations
Whenever we work with electricity, even on a small project like this, safety must be our top priority. Please don’t skip over these points.
- UL-Listed Components Only: This is non-negotiable. Always use a conversion kit and cord set that are UL-listed. This means they have been independently tested and certified to meet strict safety standards.
- Proper Insulation: As you work, ensure all wire connections are secure and that no bare wire is exposed after you’ve made your connections.
- Strain Relief: This is a simple but critical feature. A strain relief is a small device (often built into the kit) that clamps down on the cord where it enters the lamp. This prevents the cord from being pulled loose and damaging the internal wires over time.
Having the right supplies on hand is the first step to a successful project. For a kit that combines all these essential, safety-conscious components in one package, the 2025 Heritage Glow Electric Conversion Kit is a fantastic choice to ensure everything works together harmoniously.
- Product: 2025 Heritage Glow Electric Conversion Kit
- Link: https://www.example-lighting.com/heritage-glow-kit-2025
【Pre-Conversion Preparation】
With our supplies gathered, the next step is to prepare both our lamp and our workspace. A little thoughtful preparation here will make the installation process feel smooth and enjoyable, turning a potential chore into a truly rewarding afternoon project.
Selecting the Perfect Oil Lamp
Not every vintage lamp is an ideal candidate for conversion. Choosing the right one is key to a beautiful and functional final piece. When you’re on the hunt, either in your own home or at a favorite antique spot, keep an eye out for lamps with good bones.
Evaluating Lamp Condition
Look for lamps that are not only charming but also structurally sound. A careful evaluation upfront will save you from surprises later on.
- Structurally Sound, Rust-Free Bases: Give the lamp base a gentle check for stability. Ensure it sits flat and doesn’t wobble. While a little patina adds character, significant rust, especially on thin metal parts, can compromise the lamp’s integrity and may be difficult to repair.
- Intact Glass Globes and Chimneys: The glass components are essential for the finished look. Check for chips, cracks, or significant clouding that can’t be cleaned away. A globe that fits well is also important; you want it to sit securely on the lamp’s gallery without being too loose or too tight.
- Adequate Interior Space for Components: Take a moment to look inside the lamp’s font (the part that held the oil). You’ll need enough room for the new electric socket assembly to sit comfortably. Most standard lamps have plenty of space, but it’s always good to double-check.
Cleaning and Restoration Tips
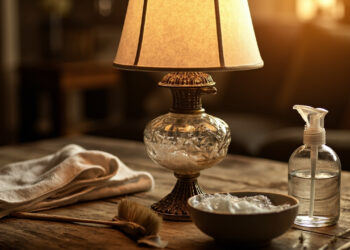
Once you’ve found your perfect lamp candidate, it’s time for a gentle cleaning. This is where you really start to see its potential shine through.
- Warm, Soapy Water Cleaning Process: For the metal base and font, a soft cloth with warm, soapy water is usually all you need. Be careful to avoid any electrical components if they are still present. For the glass globe and chimney, wash them gently by hand and dry them with a soft, lint-free cloth to avoid water spots.
- Drying Thoroughly Before Installation: This is a crucial step. Ensure every part of the lamp, inside and out, is completely dry before you begin installing any electrical components. Any moisture inside the font could create a safety hazard.
- Assessing Any Needed Repairs: As you clean, you might find a loose finial or a wobbly joint. Now is the time to gently tighten or make simple repairs. For the electrical conversion itself, we are replacing the core functional parts, so focus on the physical structure and appearance.
Workspace Setup
Just like when we cook or craft, having a well-organized workspace makes all the difference. Let’s create a spot where you can work comfortably and safely.
Creating an Efficient Work Area
A little bit of setup will help your project flow beautifully from start to finish.
- Well-Lit, Clean Surface: Choose a table or workbench with good overhead lighting. A clean surface protects your lamp from scratches and gives you a clear area to lay out all your components.
- Organized Component Layout: Before you start, lay out your conversion kit, tools, and bulb. Having everything within easy reach means you won’t be searching for a screwdriver with one hand holding a socket.
- Safety-Conscious Environment: Keep your workspace dry and clear of clutter. Make sure your cord is unplugged from any outlet during the entire installation process. It’s also a good idea to have a small container, like a bowl or mug, to hold tiny screws so they don’t get lost.
Taking these few moments to prepare your lamp and your space is a simple act of care that sets the stage for a successful transformation. When you use a well-designed kit, like the 2025 Heritage Glow Electric Conversion Kit, you can be confident that the components are made to work together safely and fit a wide variety of classic lamp styles.
- Product: 2025 Heritage Glow Electric Conversion Kit
- Link: https://www.example-lighting.com/heritage-glow-kit-2025
【Step-by-Step Installation Process】
Now for the truly rewarding part—breathing new, electric life into your prepared lamp. This process is surprisingly straightforward, and by following these steps, you’ll have your lamp glowing safely in no time. Remember to work patiently and keep your components organized.
Removing Original Components
Before we can install the new, we must carefully remove the old. This is a gentle process of clearing the way for your lamp’s new chapter.
Safe Disassembly Procedure
The goal here is to dismantle the lamp without causing any damage to its vintage structure.
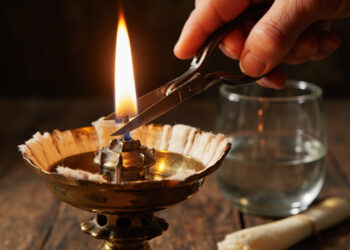
- Carefully removing glass globe: Lift the glass globe or chimney straight up and off the lamp’s gallery (the ring that holds it in place). Set it aside on a soft, clean towel to prevent chipping or rolling.
- Extracting old wick mechanism: The original oil lamp mechanism is typically held in place by a single nut or a set of thumb screws underneath the font (the oil reservoir). Gently unscrew this fastener. You should then be able to carefully lift the entire wick assembly up and out of the font. If it feels stuck, a slight wiggling motion can help loosen it.
- Cleaning residual oil deposits: Even if your lamp was empty, there is often a film of old oil or soot inside the font. Use a paper towel or soft cloth to wipe out the interior thoroughly. For stubborn residue, a little isopropyl alcohol on a cloth can help cut through the grease. Ensure the font is completely dry before moving on.
Installing the Electric Conversion Kit
With the lamp cleared and cleaned, it’s time for the transformation. This is where the magic happens, turning your antique find into a functional piece for your home.
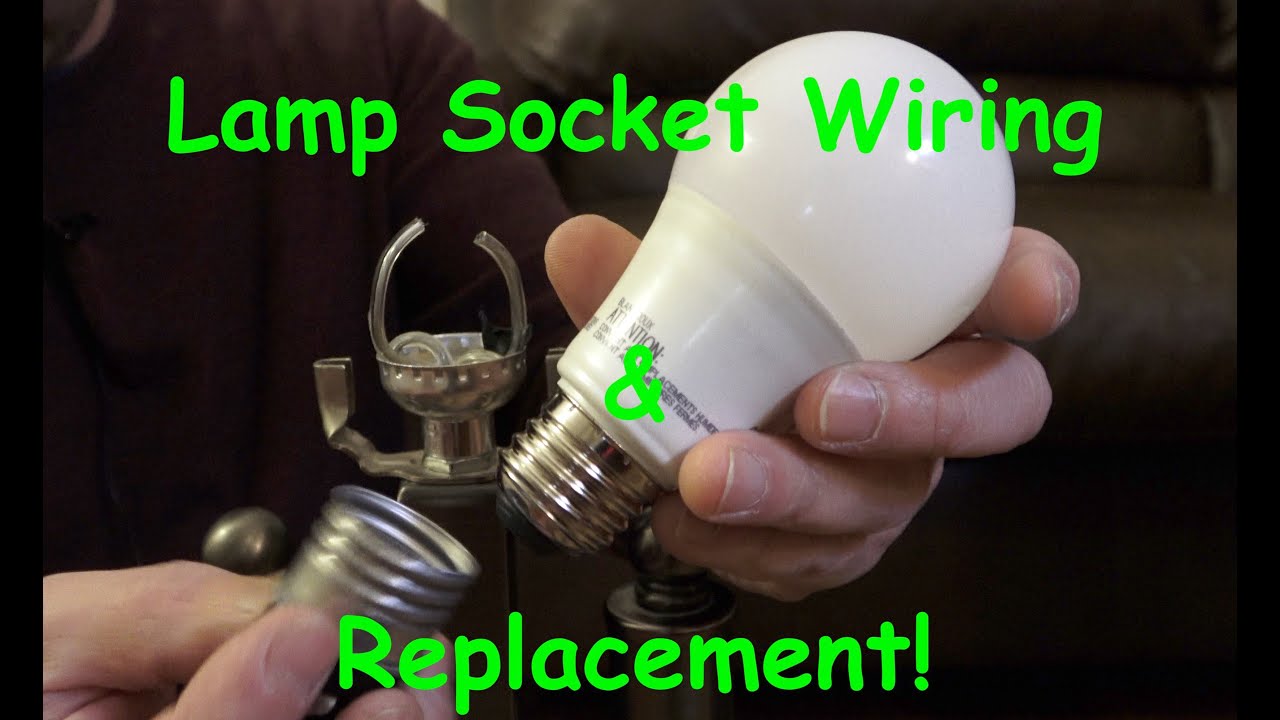
Wiring the Socket Assembly
This is the main electrical step, but it’s designed to be simple. Let’s walk through it.
- Threading cord through base opening: Begin by feeding the kit’s cord up through the hole in the center of the lamp base, guiding it up and out through the top of the font. You may need to remove a finial or cap from the base to access the opening.
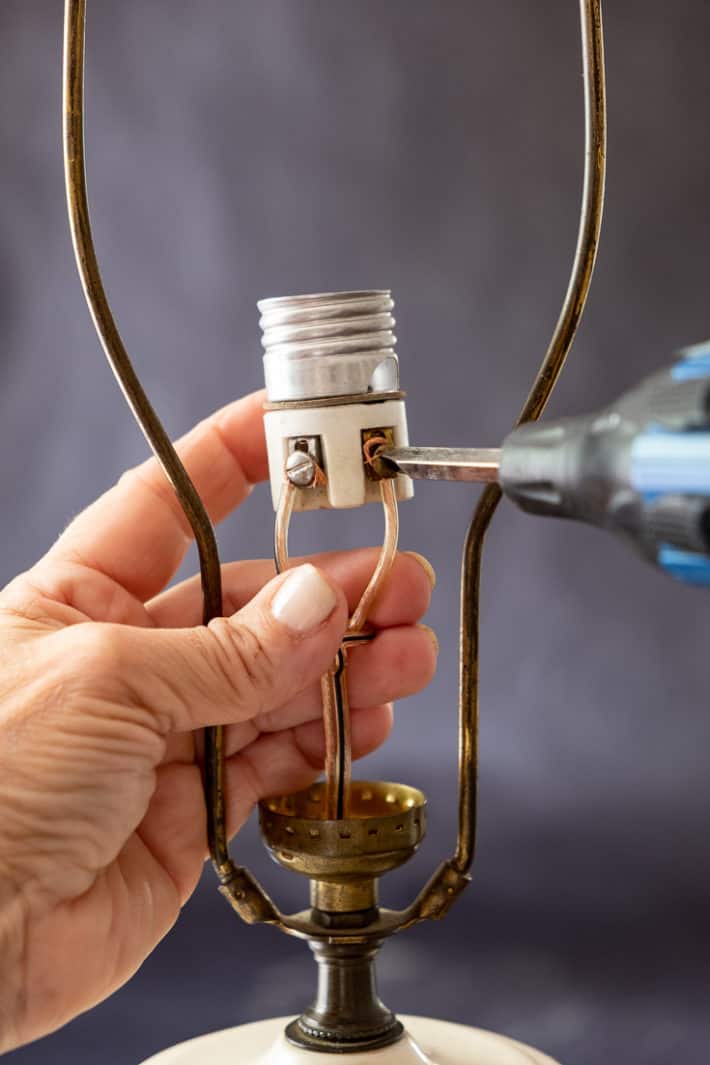
- Connecting wires to socket terminals: Your conversion kit’s socket will have two terminal screws. You’ll notice the cord has two wires; one will have ridges on its insulation (the “ribbed” wire) and one will be smooth.
- The ribbed wire connects to the silver terminal screw.
- The smooth wire connects to the brass (or gold) terminal screw.
- Loosen each terminal screw, wrap the bare copper end of the correct wire clockwise around the base of the screw, and then tighten the screw down firmly.
- Securing with electrical tape: Once the wires are securely fastened, it is a good safety practice to wrap the base of the socket and the wire connections with a layer of electrical tape. This helps prevent the wires from accidentally coming loose.
Final Assembly Steps
You’re on the home stretch! These final touches will complete your project.
- Inserting the chosen light bulb: Screw your preferred bulb (like a warm, vintage-style Edison bulb) into the new socket. Do not use a bulb that exceeds the wattage rating listed on the socket.
- Replacing glass globe: Carefully lower your clean glass globe back over the bulb and onto the lamp’s gallery, ensuring it sits securely.
- Testing functionality: Take a moment to ensure the lamp’s switch is in the “off” position. Then, plug the cord into a wall outlet. Flip the switch, and enjoy the warm, safe, and instant glow of your newly converted lamp!
Using a reliable kit makes this entire process seamless. The clear instructions and well-designed parts in the 2025 Heritage Glow Electric Conversion Kit ensure a secure fit and professional-looking results every time.
- Product: 2025 Heritage Glow Electric Conversion Kit
- Link: https://www.example-lighting.com/heritage-glow-kit-2025
【Troubleshooting Common Issues】
Even with careful installation, you might run into a small hiccup or two. Don’t worry—this is all part of the process. Let’s walk through some common issues and their simple solutions, so you can get your lamp shining brightly.
Electrical Connection Problems
If you plug in your lamp, flip the switch, and nothing happens, the issue is almost always a simple break in the electrical path. The key is to check each component methodically, starting with the easiest fix first.
When the Lamp Doesn’t Light
Before you start taking things apart, follow this logical sequence to find the source of the problem.
- Checking bulb seating and functionality: This is the most common culprit. First, ensure the bulb is screwed in snugly. If it still doesn’t light, test the bulb in another known-working lamp fixture to confirm it hasn’t burned out. It’s always a good idea to have a spare bulb on hand for this exact reason.
- Verifying switch operation: With the lamp unplugged, take a close look at the switch. Sometimes, the internal mechanism can fail. Gently toggle the switch back and forth. If it feels loose or makes no clicking sound, it may be defective. In most kits, the switch is integrated into the socket or cord and would require replacing the entire unit if faulty.
- Testing cord and plug integrity: Visually inspect the entire length of the cord for any cracks, cuts, or fraying. Check where the cord enters the plug for any damage. The most reliable way to test the cord is with a multimeter set to continuity, but a simpler method is to try a different, known-good cord if your kit allows for it.
Mechanical Fit Challenges
Your vintage lamp was likely made by hand, which means its dimensions might not be perfectly standard. If the new electrical components don’t fit as expected, here are a few ways to address it.
Addressing Size Mismatches
A little ingenuity can help you overcome these physical hurdles and preserve the integrity of your antique piece.
- Adaptation techniques for non-standard lamps: If the new socket is slightly too small for the lamp’s gallery (the opening it sits in), you can create a snug fit by wrapping the socket’s threaded base with a few layers of electrical tape or plumber’s tape. For a metal-on-metal fit that’s too loose, a rubber O-ring of the appropriate size can serve as a perfect shim.
- Custom solutions for unique antiques: For lamps with a badly bent gallery or a highly irregular opening, you may need to get creative. A skilled DIYer can sometimes carefully bend a brass gallery back into shape. In other cases, a small, flat metal bracket can be fashioned to bridge a gap and provide a stable mounting point for the socket assembly.
- When to consult professional restoration services: If your lamp is a particularly valuable antique, the fit is drastically wrong, or you simply don’t feel comfortable making modifications, it’s best to call in a professional. A local lamp repair or antique restoration shop has the tools and expertise to fabricate custom parts or make precise adjustments without risking damage to your treasured find. It’s a wonderful way to ensure your lamp is handled with the care it deserves.
Using a high-quality kit from the start is the best way to avoid these fit issues. The 2025 Heritage Glow Electric Conversion Kit is machined to fit the most common vintage lamp specifications and comes with a couple of small, rubber shim rings to account for slight variations.
- Product: 2025 Heritage Glow Electric Conversion Kit
- Link: https://www.example-lighting.com/heritage-glow-kit-2025
【Creative Applications and Styling】
Now for the truly rewarding part—finding the perfect spot for your newly converted lamp and styling it to reflect your personal taste. This is where your functional piece becomes a beautiful, cohesive part of your home’s story. Let’s explore how to integrate these charming lamps into your decor and play with different lighting effects to create the perfect ambiance.
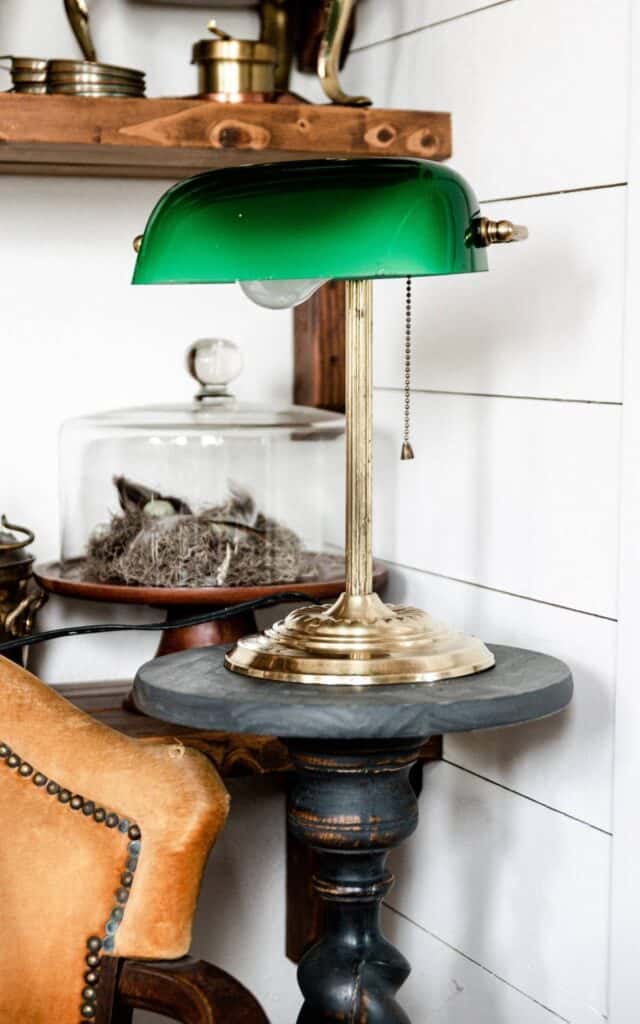
Home Decor Integration
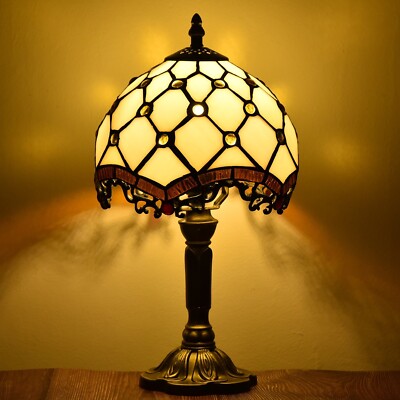
A converted oil lamp brings a unique blend of history and warmth to any room. Its classic silhouette allows it to fit seamlessly into a variety of design styles, from farmhouse to industrial to traditional. The key is to let its vintage character shine while using it to serve a modern lighting purpose.
Placement Ideas for Converted Lamps
Think of your lamp not just as a light source, but as a decorative object that can enhance the feeling of a space.
- Centerpiece lighting for dining tables: There’s nothing quite as inviting as the soft, warm glow of a lamp at the center of a dining table. A single, stately converted lamp can serve as a stunning focal point for family meals and intimate dinners, creating an atmosphere that overhead lighting simply can’t match.
- Accent lighting in living spaces: Place your lamp on an end table, a bookshelf, or a mantel to add a layer of cozy, ambient light. It provides the perfect amount of illumination for reading in a favorite chair or for creating a soft backdrop for evening conversations. Grouping a few lamps of varying heights can create a wonderfully curated look.
- Outdoor patio ambiance (weather-protected areas): If you have a covered porch or a sheltered patio nook, a converted lamp can extend that warm, welcoming feeling to your outdoor living area. It’s perfect for summer evenings spent entertaining or simply relaxing with a good book. Always ensure the lamp is placed in a dry location, protected from direct rain and moisture.
Styling with Different Bulb Types
The bulb you choose is the finishing touch—it’s the jewelry for your lamp. This is your chance to customize the look and feel of the light to suit your space and your mood.
Achieving Various Lighting Effects
Modern bulb technology gives you all the charm of the past with the efficiency and options of the present. Don’t be afraid to experiment with a few different styles to see what you love most.
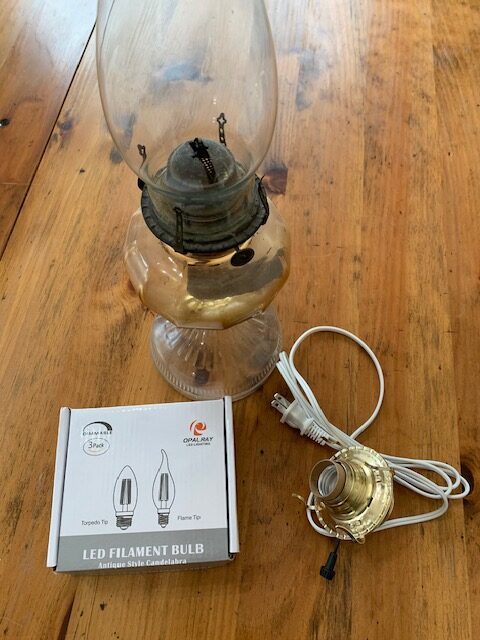
- Warm LED filaments for authentic glow: To maintain the most authentic vintage appearance, an LED filament bulb is your best choice. These bulbs mimic the look of a traditional carbon filament with those beautiful, squiggly LED lines, and they cast a very warm, golden light that is incredibly close to the original flame-like glow, all while being cool to the touch and energy-efficient.
- Colored bulbs for seasonal decor: Have a little fun by switching out bulbs to match the season or a holiday. A soft amber or orange bulb can enhance your autumn decor, while a deep red or green bulb can add a festive touch during the winter holidays. It’s a simple, quick way to refresh your space.
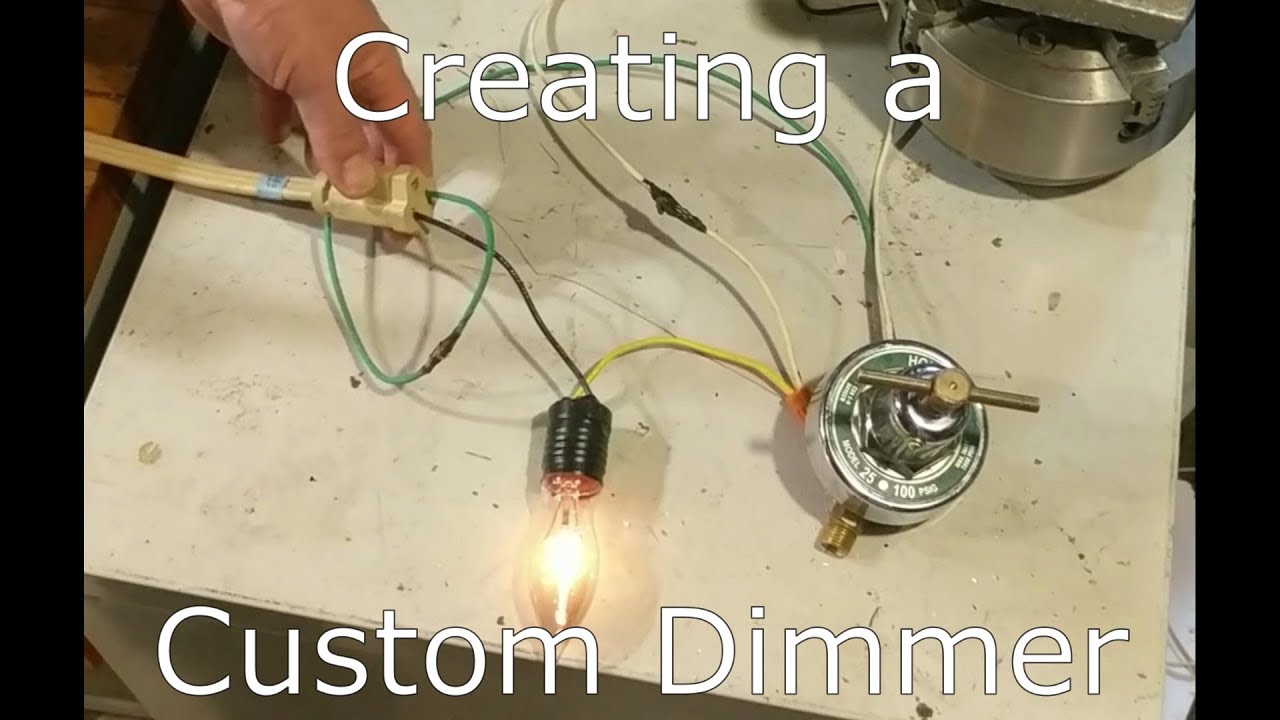
- Dimmable options for mood lighting: If your conversion kit includes a dimmer switch, or if you plug your lamp into an external dimmer, you have ultimate control over the ambiance. A dimmable LED bulb allows you to adjust the light from a bright, functional level for tasks all the way down to a soft, romantic flicker for a quiet evening. This flexibility makes your converted lamp one of the most versatile lighting pieces in your home.
To achieve that perfect, warm glow with modern reliability, we recommend the bulbs designed specifically for vintage fixtures. The 2025 Heritage Glow Electric Conversion Kit includes a beautiful, warm white LED filament bulb, but you can also find a variety of compatible styles to suit your vision.
- Product: 2025 Heritage Glow Electric Conversion Kit
- Link: https://www.example-lighting.com/heritage-glow-kit-2025
【Safety and Maintenance】

Now that your beautifully converted lamp is a glowing part of your home, let’s ensure it remains a safe and cherished fixture for years to come. Just like any piece of your home’s story, a little thoughtful care goes a long way. Here’s how to keep your lamp shining brightly and safely.
Electrical Safety Best Practices
Converting an oil lamp gives it a new, modern purpose, but it’s important to remember that it’s now an electrical appliance. A few simple habits will ensure it operates safely day in and day out.
Ensuring Long-Term Safe Operation
Think of these practices not as chores, but as part of the rhythm of caring for your home. They’re simple, quick, and give you peace of mind.
- Regular cord inspection: Make it a habit to gently run the cord through your fingers every few months. Look for any signs of cracking, fraying, or damage to the insulation. A worn cord is a fire hazard and should be replaced immediately.
- Proper wattage adherence: Always use a bulb that is at or below the maximum wattage recommended for your conversion kit (typically printed on the socket). Using a bulb with a higher wattage can generate excessive heat, potentially damaging the lamp’s wiring or socket. LED bulbs are ideal as they produce very little heat while providing excellent light.
- Safe placement away from flammable materials: Even with a cool-to-the-touch LED bulb, it’s wise to maintain the same respect you would for the original lamp. Keep the lamp away from curtains, loose papers, books, and other flammable materials. Ensure it’s on a stable surface where it won’t be easily knocked over.
Ongoing Maintenance
Part of the joy of having these pieces in your home is the connection to the past. A bit of gentle upkeep will keep that history alive and your lamp looking its absolute best.
Keeping Your Converted Lamp Beautiful
This isn’t about heavy-duty work; it’s about preserving the character and function of your lamp with simple, mindful steps.
- Glass cleaning techniques: To clean the glass chimney or globe, always make sure the lamp is unplugged and completely cool. Use a soft, lint-free cloth to avoid scratches. For stubborn smudges or dust, a little diluted white vinegar or a mild glass cleaner works wonders. Dry the glass thoroughly before plugging the lamp back in.
- Cord management tips: To maintain the lamp’s vintage aesthetic, neatly coil any excess cord and secure it with a gentle twist tie or a fabric cord tie. Avoid pinching the cord behind furniture or running it under rugs, as this can cause damage over time.
- Bulb replacement guidelines: When it’s time to change the bulb (though LEDs last for many years!), always unplug the lamp first. Allow the old bulb to cool completely if it has been on, then handle it carefully. Screw the new bulb in firmly but do not overtighten, as this can make it difficult to remove later and may damage the socket.
For a conversion kit that is built with both safety and timeless style in mind, the components in the 2025 Heritage Glow Electric Conversion Kit are rigorously tested for safe, long-term use. Its durable wiring and socket are designed to provide years of reliable, beautiful light.
- Product: 2025 Heritage Glow Electric Conversion Kit
- Link: https://www.example-lighting.com/heritage-glow-kit-2025
【Advanced Conversion Techniques】
Once you’ve mastered the basic installation and feel comfortable with the safety aspects, a whole new world of customization opens up. This is where your personal style and the unique character of your lamp can truly shine. Think of it as the next chapter in your lamp’s story—a way to tailor its function and light to perfectly suit your space and needs.
Custom Wiring Solutions
The standard conversion kit is wonderful, but sometimes you want a little more control or a specific look. With a few extra components and some careful planning, you can elevate your converted lamp from a simple light source to a fully customized piece.
Beyond Basic Kit Installation
These projects require a bit more electrical know-how, so always double-check your work and ensure the lamp is unplugged before you begin. If you’re ever unsure, consulting with a qualified electrician is the safest path forward.
- Adding dimmer switches: For the ultimate control over your ambiance, consider adding an in-line dimmer switch. This allows you to adjust the brightness from a soft, warm glow to a brighter task light. You’ll need to purchase a separate rotary or slide dimmer switch designed for the type of bulb you’re using (especially important for LEDs). The installation involves wiring the dimmer into the cord between the plug and the socket, following the manufacturer’s instructions precisely. It’s a simple modification that makes a world of difference in how you use your lamp each day.
- Incorporating multiple socket arrangements: Have a large, multi-spout oil lamp? You can convert it to hold multiple bulbs, creating a stunning centerpiece. This requires using multiple conversion kits and carefully planning how to route and combine the wiring internally. The key is to wire the sockets in parallel, not series, so that each bulb receives the correct voltage. You may also need to use a larger-gauge lamp cord and a plug rated for the combined wattage of all the bulbs.
- Creating lamp clusters from multiple conversions: For a truly dramatic effect, you can group several individually converted oil lamps together. Imagine three or four converted barn lanterns hanging at different heights over a kitchen island. To control them all from a single switch, you can wire them to a common plug. This involves bringing the cords from each lamp into a single junction box (safely mounted and out of sight) where the connections are made before running a single, heavier-duty cord to the wall outlet.
Restoration Integration
For those of us who cherish the history and patina of an antique lamp, the conversion process is as much about preservation as it is about modernization. The goal is to honor the lamp’s past while giving it a new, practical life in your 2025 home.
Combining Electrical Conversion with Antique Restoration
This approach is a labor of love, focusing on the details that make an antique piece special.
- Matching historical accuracy with modern function: The challenge and joy here are in making the electrical components as unobtrusive as possible. This might mean sourcing a socket and bulb that fit perfectly within the original font without any modification to the metal itself, or using a fabric-covered wire that mimics the look of an older cord.
- Preserving original finishes while upgrading internals: Avoid the urge to over-polish or strip an antique lamp. Its wear and tarnish tell a story. When converting, focus on a gentle cleaning with appropriate products for the material (brass, copper, etc.). The key is to stabilize the piece—ensuring it’s structurally sound and safe—without erasing the character that time has given it. All electrical work should be done carefully to avoid damaging the original finish.
- Sourcing period-appropriate components: To achieve a truly seamless look, seek out specialty components. Look for antique-style push-through sockets or reproduction Edison-style LED bulbs that provide a warm, filament glow reminiscent of early electric light. You can even find braided cloth-covered wire in various colors to match the lamp’s era, allowing the cord to blend in rather than stand out as a modern addition.
For projects that demand both reliability and a commitment to authentic style, the 2025 Heritage Glow Electric Conversion Kit is an excellent foundation. Its components are designed to be discreet and are compatible with a wide range of customizations, from simple dimmer additions to more complex multi-lamp setups.
- Product: 2025 Heritage Glow Electric Conversion Kit
- Link: https://www.example-lighting.com/heritage-glow-kit-2025
【Frequently Asked Questions】
You’ve explored the advanced techniques, and now it’s time to address some of the most common questions that arise when embarking on an oil lamp conversion project. Whether you’re a first-timer or looking to refine your process, having clear, practical answers makes all the difference.
Conversion Kit Specifics
Let’s start with the fundamentals. Understanding the core components and the commitment involved will help you approach your project with confidence.
Answering Common DIY Concerns
-
Compatibility with various lamp styles
The great news is that most standard electric conversion kits are designed to be incredibly versatile. They typically work well with a wide range of common oil lamp styles, including:- Font-based lamps: These are the most straightforward, as the entire socket assembly is designed to sit securely inside the lamp’s font (the part that traditionally held the oil).
- Hurricane lamps: Kits often include a reducer bushing or a way to secure the socket in the lamp’s chimney holder.
- Barn lanterns and wall-mounted lamps: Many kits are adaptable for these, though you may need to get creative with securing the cord.
The main factor to check is the size of the opening at the top of your lamp where the chimney sits. The new socket assembly needs to fit snugly into this space. Most kits come with adaptable parts to ensure a good fit.
-
Time investment for a typical conversion
If you have all your tools and materials ready, the actual hands-on work for a basic conversion is surprisingly quick. For a simple, single-bulb lamp, you can expect the process to take between 20 to 45 minutes. This includes disassembling the old oil components, threading the cord, wiring the socket, and reassembling everything. Your first project might take a bit longer as you familiarize yourself with the steps, but it’s a very manageable afternoon activity. -
Cost analysis versus purchasing new electric lamps
This is where the DIY approach truly shines, both in value and sentiment.Conversion Approach Estimated Cost (2025) Key Consideration Basic DIY Conversion $25 – $50 Covers the cost of a standard kit and a bulb. Ideal for a lamp you already own. Restoration-Focused DIY $50 – $100+ Includes a premium kit, specialty bulb (e.g., Edison LED), and potential restoration supplies. Purchasing a New Electric “Oil-Style” Lamp $75 – $200+ You get a finished product, but it often lacks the authentic character and history of a genuine antique. The financial savings are clear, but the real value is in preserving a piece of history and creating a one-of-a-kind item tailored to your home.
Technical Considerations
For those who like to look under the hood, these questions delve a little deeper into the electrical specifics and future possibilities.
Addressing Advanced Questions
-
Voltage and electrical requirements
In the United States, standard household current is 120 volts. All commercially available conversion kits are designed for this and are perfectly safe for indoor use. The critical safety check is to always use a LED or incandescent bulb that does not exceed the wattage rating printed on the socket (usually 60 watts or less). LED bulbs are highly recommended as they produce very little heat, which is safer for the lamp and your home, and they consume far less energy. -
International plug adaptations
Converting a lamp for use in a country with a different voltage (e.g., 220-240V) requires more than just swapping the plug. You would need to source a conversion kit and a bulb specifically rated for that country’s voltage. A simpler and safer solution for taking your 120V lamp abroad is to use a high-quality, heavy-duty voltage converter and a physical plug adapter. Always check the wattage of your bulb to ensure the converter can handle the load. -
Smart home integration possibilities
Absolutely! Integrating your converted lamp into your smart home ecosystem is a fantastic and easy upgrade. The simplest method is to plug the lamp into a smart plug. This allows you to turn the lamp on and off remotely or set schedules using your phone or voice assistant. For more granular control, you can use a smart in-line dimmer switch (as mentioned in our advanced techniques) that can be wired into the lamp’s cord, giving you the ability to dim the light through an app. This blend of vintage charm and modern convenience is a perfect match for 2025 living.
For a kit that offers both timeless reliability and the flexibility for these modern upgrades, the 2025 Heritage Glow Electric Conversion Kit remains a top choice. Its robust wiring and standard socket make it an ideal base for both simple conversions and tech-forward projects.
- Product: 2025 Heritage Glow Electric Conversion Kit
- Link: https://www.example-lighting.com/heritage-glow-kit-2025
【Conclusion: Enjoy Your Transformed Treasure】
The Satisfaction of Successful DIY
There’s a unique and wonderful feeling that comes from turning on a lamp you’ve brought back to life with your own hands. It’s more than just light; it’s a connection. Unlike purchasing a brand-new, mass-produced item, a converted oil lamp carries a story—one that you have now become a part of. You’ve preserved the character and history of a piece that might have been a family heirloom or a cherished flea market find, ensuring it can be used and admired for years to come without the mess and maintenance of oil.
Financially, the reward is just as bright. As our earlier cost analysis showed, the DIY approach offers significant savings over buying a new electric lamp designed to look antique. But beyond the dollars and cents, there is an immense sense of pride. You didn’t just buy a lamp; you solved a problem, learned a new skill, and saved a piece of history from being relegated to a shelf. Every time you flip the switch, you’ll be reminded of what you accomplished.
Next Steps in Your Lighting Journey
Now that you’ve successfully completed your first conversion, you might find yourself looking at old lamps in a whole new light. That dusty barn lantern at the back of an antique shop or the simple font-based lamp at a garage sale are no longer just decor; they’re your next project. Sourcing additional lamps becomes a treasure hunt, and you’ll start to recognize which styles and brands are the easiest to work with.
This is also the perfect time to start exploring the vast world of vintage lighting. From the elegant lines of a student lamp to the rugged charm of a railroad lantern, each style offers a new conversion challenge and a different aesthetic for your home. Consider creating a curated collection that tells a visual story across your spaces.
Finally, don’t keep your success to yourself! Share your before-and-after photos and your newfound knowledge with fellow DIY enthusiasts. Online forums, social media groups, and local workshops are fantastic places to inspire others and be inspired in return. The community of people who appreciate the blend of old-world charm and modern convenience is growing every day.
For your next project, having a reliable and adaptable kit makes the process seamless. The 2025 Heritage Glow Electric Conversion Kit provides the quality components and clear instructions that give you the confidence to tackle any vintage lamp you find.
- Product: 2025 Heritage Glow Electric Conversion Kit
- Link: https://www.example-lighting.com/heritage-glow-kit-2025
Mastering Your Oil Lamp Transformation Journey
Throughout this comprehensive guide, you’ve discovered the complete process for successfully converting vintage oil lamps to electric power. From selecting the perfect candidate lamp and gathering proper safety equipment to executing precise wiring and troubleshooting common issues, each step brings you closer to creating functional heirlooms. The key takeaways include prioritizing UL-listed components for safety, choosing warm LED filament bulbs for authentic ambiance, and properly preparing both your workspace and antique fixture before installation. By following these professional techniques, you can preserve historical charm while enjoying modern lighting convenience.
Your newly acquired skills now empower you to breathe new life into forgotten treasures, creating personalized lighting solutions that blend heritage aesthetics with contemporary functionality. Each successful conversion not only saves a piece of history but also provides the satisfaction of hands-on craftsmanship. We’d love to see your transformed creations! Share your before-and-after photos in the comments below and inspire fellow DIY enthusiasts with your lighting journey. Ready to start your first conversion project? Click here to explore the recommended Heritage Glow Electric Conversion Kit and begin preserving your vintage lamps today!

