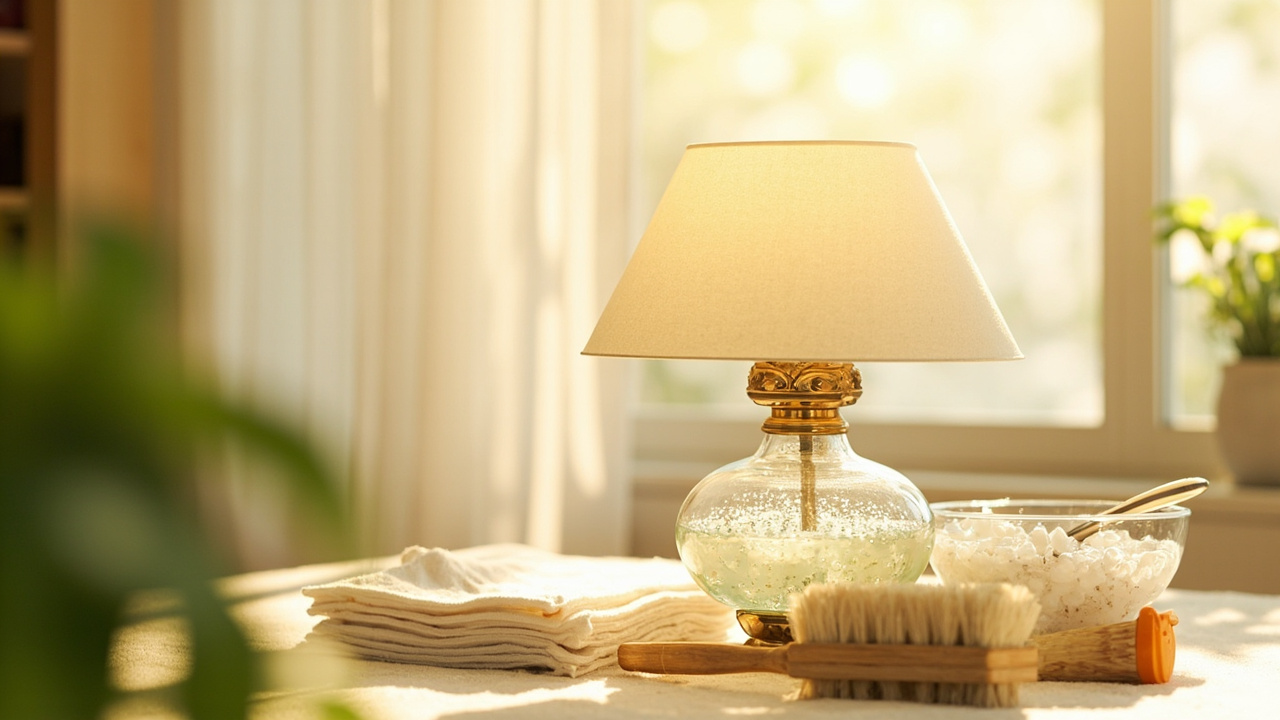
Did you know that using the wrong cleaning method can permanently damage your favorite lampshade in seconds? The secret to pristine lamp care isn’t vigorous scrubbing—it’s a ‘material-first’ strategy that aligns your technique with the unique properties of fabric, paper, glass, or plastic. This definitive 2025 guide demystifies the entire process, from identifying your shade’s construction to executing safe, effective cleaning routines that preserve its structure and beauty for years.
【Understanding Your Lampshade Materials】
Identifying Different Lampshade Types
Fabric Lampshades
The charm of a fabric lampshade lies in its texture, but this also demands a considered cleaning approach. Common materials you will encounter include:
- Cotton and Linen: These natural fibers are relatively sturdy but can shrink or become misshapen if overwet.
- Silk: This is a delicate material that can water-spot easily and may require professional cleaning.
- Polyester and Blended Fabrics: These synthetic materials are often more resilient and can tolerate gentle cleaning solutions better than their natural counterparts.
Before any cleaning attempt in 2025, always look for a manufacturer’s care tag, usually tucked inside the shade’s frame. This tag is your most reliable guide for preserving the shade’s appearance and structure.
Paper and Parchment Shades
These shades offer a beautiful, diffuse glow but are the most temperamental. Their primary characteristic is a high sensitivity to moisture.
- Paper Shades: Any liquid can cause immediate staining, warping, or disintegration of the material.
- Parchment Shades: While slightly more durable than paper, they are similarly vulnerable to water damage and can become brittle.
For these, dry cleaning methods are your only safe option. Furthermore, always handle them with impeccably clean, dry hands or wear cotton gloves to prevent transferring natural skin oils to the surface, which can attract dust and cause permanent marks.
Glass and Plastic Shades
For the practical homeowner, these are the most forgiving materials to maintain.
- Glass Shades: Being non-porous, they can be safely immersed in water for a thorough cleaning. However, they are heavy and can chip or crack if handled carelessly.
- Plastic Shades: Modern acrylics are lightweight and durable, but their surfaces scratch easily. A soft touch is essential.
Both types can withstand gentle washing with a solution of mild dish soap and warm water. Their resistance to water damage makes the cleaning process straightforward, but one must always be mindful of their fragility against abrasive pads or harsh chemicals.
Determining Construction Methods
How your lampshade is assembled is just as critical as what it is made from. A misstep here can lead to a shade that is clean but falling apart.
Sewn vs. Glued Shades
- Sewn Shades: You will typically find this construction on higher-quality fabric shades. The seams are stitched, which allows for more confident cleaning. You can use slightly damp methods without the immediate fear of the shade coming apart, though excessive moisture is still an enemy of the fabric itself.
- Glued Shades: This is a common construction for many paper, parchment, and some budget-friendly fabric shades. The adhesives used can soften, dissolve, or lose their grip when exposed to moisture or the chemicals in some cleaners. This leads to seams peeling and trim falling off.
The universal rule, especially for any shade you suspect is glued, is to first test your chosen cleaning method in a small, inconspicuous area, such as an inside seam. This simple step can prevent a cleaning disaster. For a truly effortless clean, consider the LumiCare Dusting Kit, which includes specialized tools for gentle, dry dusting that is safe for all shade types. You can find this practical set here: LumiCare Dusting Kit.
【Essential Cleaning Tools and Materials】
Basic Cleaning Toolkit
Having the correct tools at your disposal is the first step toward a successful and safe cleaning session. A well-prepared kit prevents damage and makes the task more efficient.
Dust Removal Tools
For the initial and most frequent form of upkeep, these tools are indispensable for lifting dust without harming delicate surfaces.
| Tool | Best Use Case |
|---|---|
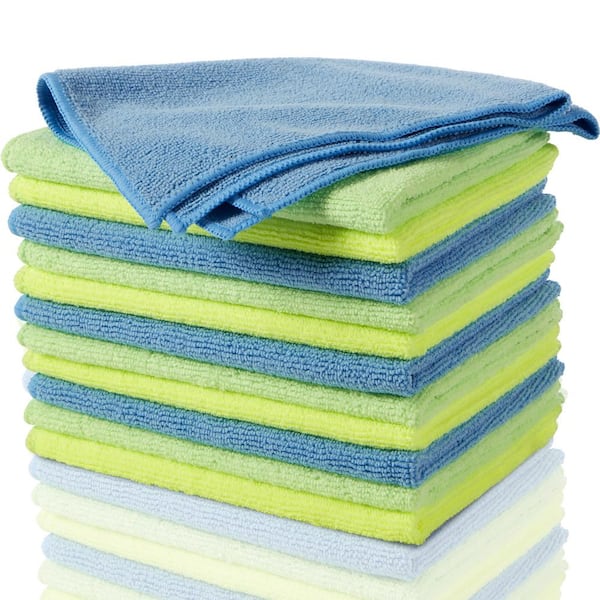
| Microfiber cloths (white, lint-free recommended) | Ideal for all shade types. The electrostatic properties attract and hold dust. White is recommended to avoid color transfer. |
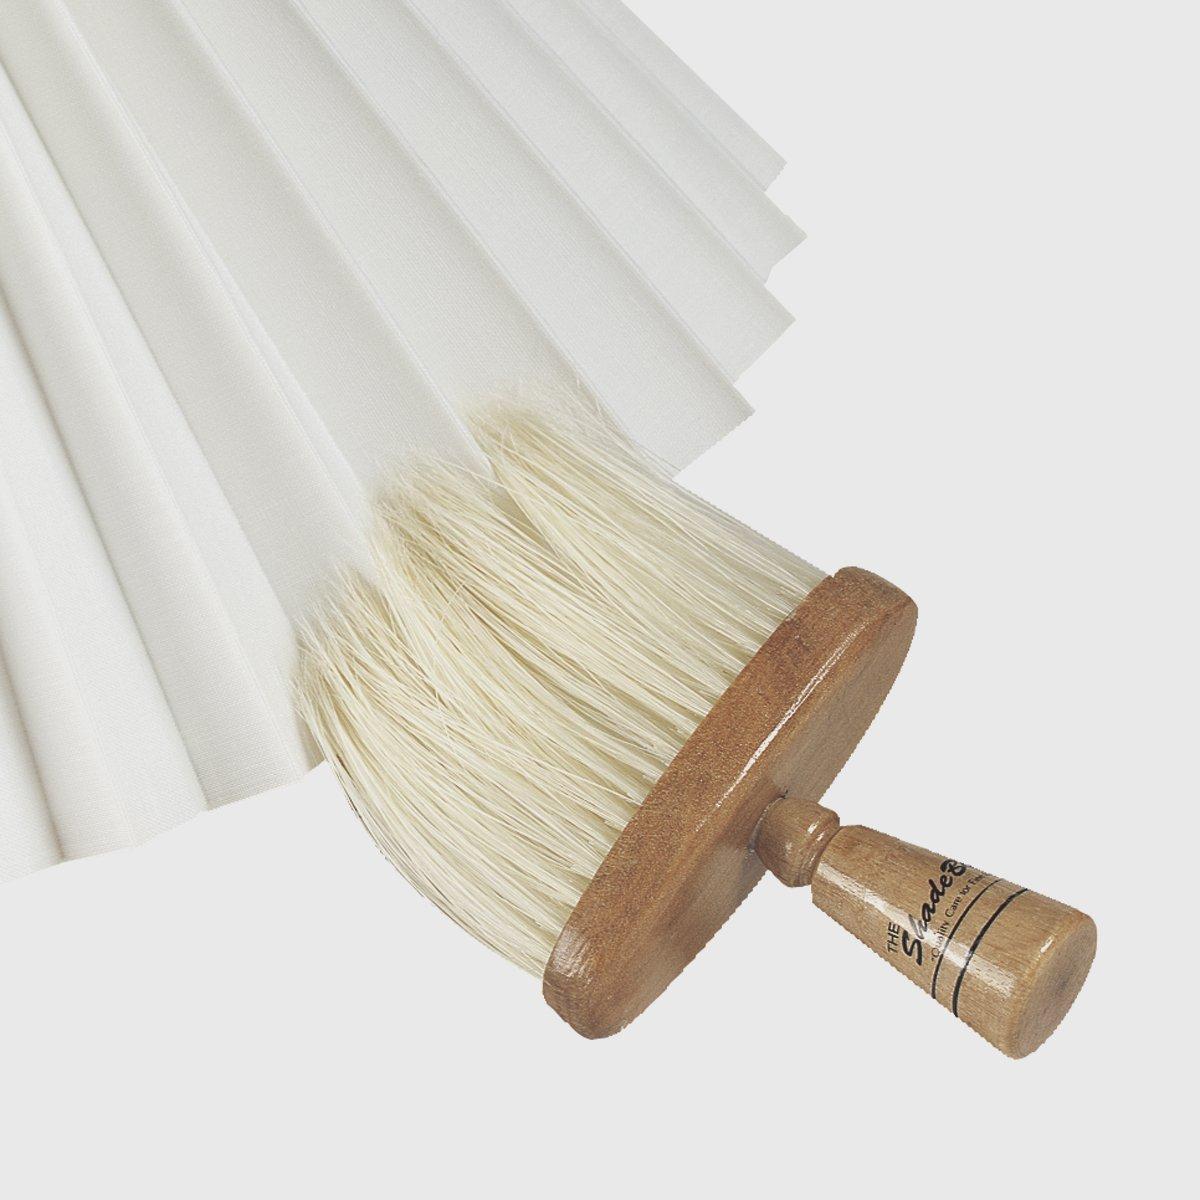
| Soft-bristled brushes or natural paint brushes | Perfect for intricate pleats, delicate seams, and hard-to-reach areas on fabric and paper shades. |
| Lint rollers and static dusters | Excellent for quickly removing pet hair and surface lint from fabric shades. Use a gentle, rolling motion. |
| Vacuum with upholstery attachment | The most effective method for a initial, thorough dust removal from fabric shades. Use on the lowest suction setting. |
Deep Cleaning Supplies
When a simple dusting is not enough, these gentle, common household products will handle most grime without risking damage to your lampshades or glass.
- Mild dish soap or laundry detergent: A few drops in a basin of warm water creates a gentle cleaning solution for fabric, glass, and plastic shades.
- Baking soda for stain treatment: For stubborn spots on fabric shades, create a paste with a small amount of water, apply gently, and let it sit before brushing off.
- White vinegar for grease removal: Effective for cutting through the oily film that can accumulate on glass shades. Always dilute with an equal part of water.
- Distilled water to prevent mineral deposits: This is crucial for the final rinse of glass shades to avoid unsightly water spots from tap water minerals, ensuring a streak-free finish.
Safety Equipment
Protecting your lampshade during cleaning is as important as the cleaning itself. These simple precautions safeguard against accidental damage.
Protection for Delicate Shades
- Cotton gloves for handling paper shades: As noted with paper and parchment shades, your skin’s natural oils can cause permanent marks. Wearing soft cotton gloves whenever you handle these materials is a simple yet effective preventative measure.
- Clean work surface with towel protection: Before you begin, lay a clean, white towel on your workspace. This provides a soft landing spot should the shade slip and prevents scratches on glass or plastic.
- Proper lighting for thorough inspection: Always work in a well-lit area. This allows you to see the dust, grime, and stains you are targeting, as well as any pre-existing weak spots in the frame or fabric that need extra care.
For a curated collection of these essential tools, including premium white microfiber cloths and a selection of soft-bristled brushes, the HomeCare Essentials Toolset offers a convenient solution. This set is designed with the careful homeowner in mind: HomeCare Essentials Toolset.
【Weekly Maintenance Routine】
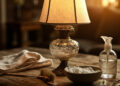
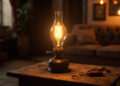
A consistent weekly routine is the most effective defense against the accumulation of dust and grime on your oil lamp shades and glass. This proactive approach minimizes the need for intensive deep cleaning and preserves the beauty and integrity of your lighting fixtures for years to come.
Dust Prevention Strategies
The primary goal of weekly maintenance is to prevent dust from settling and bonding to surfaces. A light, frequent touch is far more effective and safer than allowing layers to build up.
Regular Dusting Schedule
Adhering to a simple schedule ensures your lamps remain a source of beauty, not dust.
- Recommended frequency: every 1-2 weeks: In most household environments, a bi-weekly dusting is sufficient to maintain a fresh appearance. In dustier areas or during pollen season, a weekly schedule may be preferable.
- Always ensure lamp is unplugged and cooled: Safety is paramount. Before any cleaning, always unplug the lamp from the electrical outlet and allow the bulb and glass shade to cool completely to avoid the risk of electric shock or burns.
- Work from top to bottom, inside and out: This method ensures that any dislodged dust falls onto areas you have not yet cleaned. Begin by dusting the top of the shade and the fitter (the metal frame that connects the shade to the lamp), then move to the interior, and finish with the exterior.
Material-Specific Dusting Techniques
Using the correct technique for each material prevents damage and ensures a thorough clean.
| Material | Recommended Technique |
|---|---|
| Fabric shades | Use your vacuum’s soft brush attachment on the lowest suction setting. Gently glide it over the surface without pressing deeply. |
| Paper shades | A static duster or a dry, white microfiber cloth is the only safe option. Gently wipe the surface, avoiding any moisture. |
| Glass shades | A dry or slightly dampened microfiber cloth will effectively capture dust and polish the surface to a shine without leaving lint behind. |
| Pleated shades | A soft-bristled brush is essential. Gently run the brush along the folds, following the pleats to dislodge dust from the crevices. |
Preventive Care Measures
Beyond simple dusting, a few thoughtful habits can significantly extend the life of your lampshades and protect them from environmental damage.
Environmental Protection
The environment in which your lamp resides has a direct impact on its longevity.
- Rotate lamps every 6 months to prevent uneven fading: If a lamp is positioned in a way that one side receives more light, periodically rotating it by a quarter-turn will ensure that any fading from ambient light occurs evenly, preserving its uniform color.
- Use low-wattage bulbs to reduce heat damage: Excessive heat is a primary enemy of fabric, paper, and even the seals on glass shades. Always use a bulb wattage that is at or below the manufacturer’s recommendation to minimize heat exposure and prevent drying, cracking, or discoloration.
- Keep away from direct sunlight when possible: Just as with heat from a bulb, prolonged exposure to direct sunlight will accelerate the fading of fabric and paper shades. Position your lamps in areas where they are shielded from harsh, direct rays.
Integrating these simple steps into your regular home care regimen will keep your oil lamps looking their best. For a selection of low-wattage, energy-efficient LED bulbs that produce minimal heat, consider the Ambient Glow LED Bulb Collection, which offers a range of warm tones suitable for any decor: Ambient Glow LED Bulb Collection.
【Deep Cleaning Fabric Lampshades】
When your weekly dusting is no longer sufficient to restore the fresh appearance of your fabric lampshades, a more thorough deep cleaning is in order. This process, while requiring more care, can effectively remove ingrained dust and address common stains, ensuring your lamps continue to cast a warm, clean glow.
Dry Cleaning Methods
For shades that are not heavily soiled but need more than a light dusting, dry cleaning methods are the safest first line of defense. These techniques effectively lift dirt without introducing moisture, which can cause shrinkage or water spots.
Surface Cleaning Techniques
A gentle, systematic approach will yield the best results without damaging the fabric’s fibers or shape.
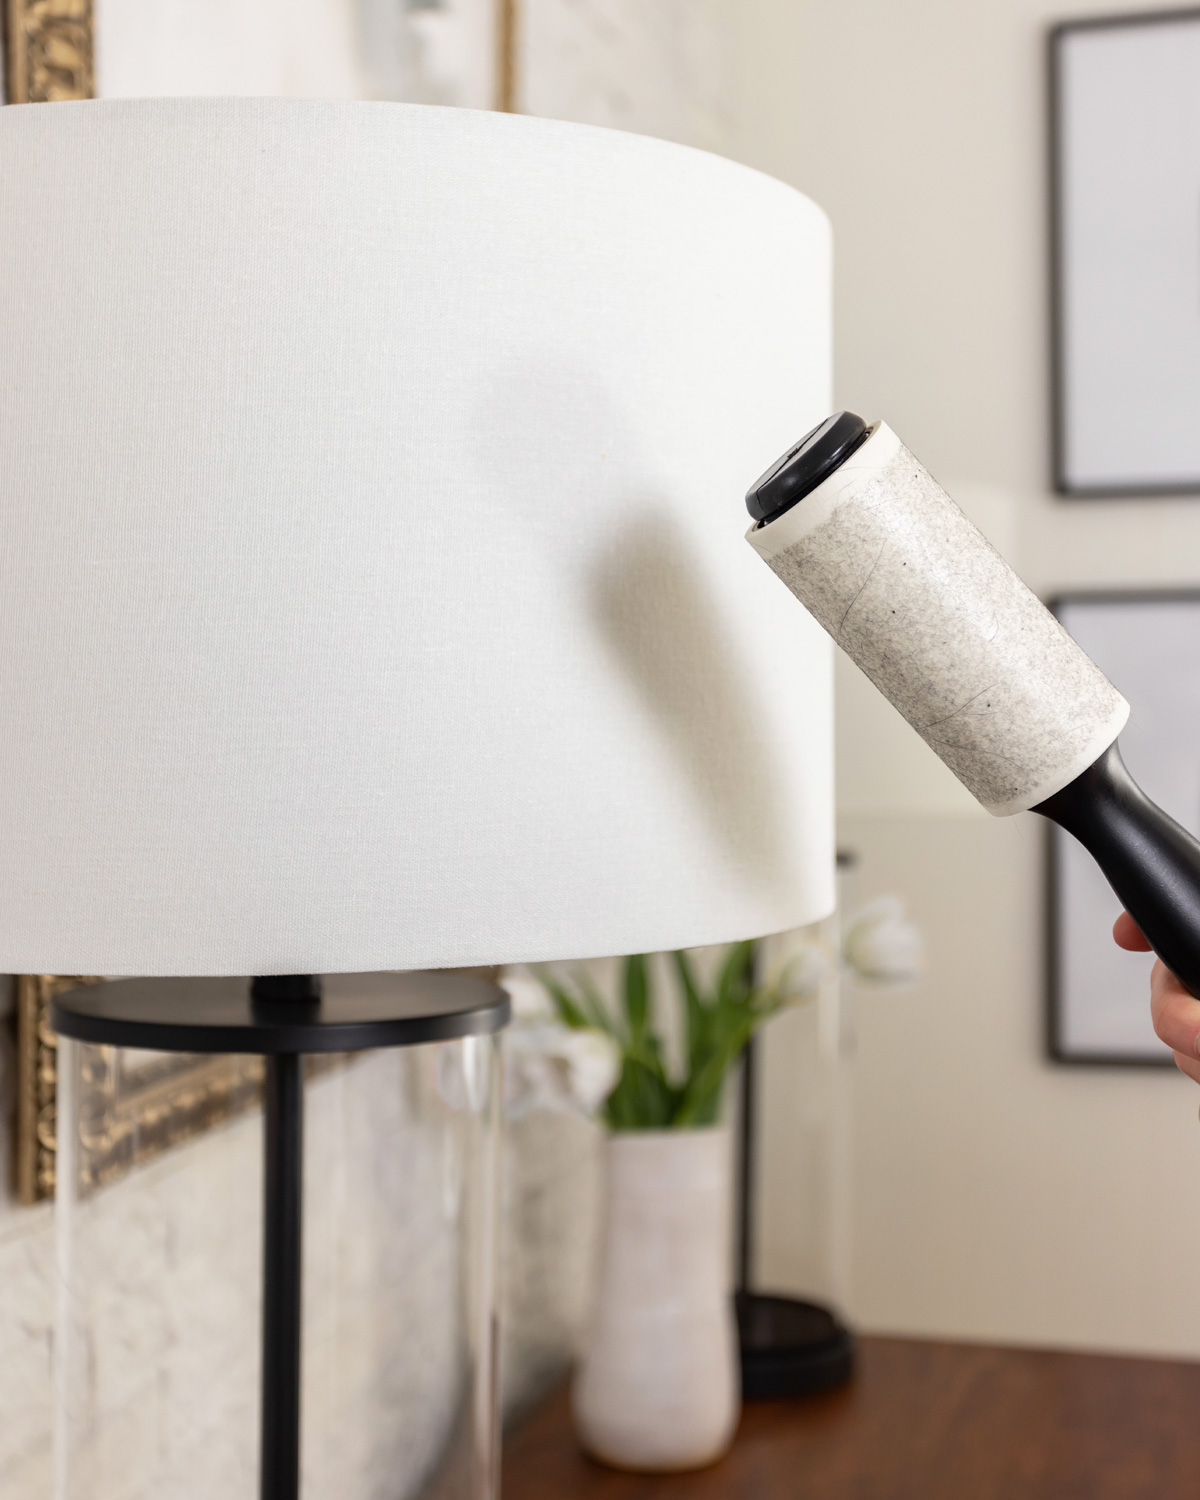
- Lint roller method for quick dust removal: For a quick refresh between deeper cleanings, a standard lint roller is remarkably effective. Gently roll it over the entire surface of the shade to pick up surface dust, lint, and pet hair. This is particularly useful for pleated or textured fabrics.
- Vacuum with upholstery brush on lowest setting: Using your vacuum cleaner’s soft upholstery brush attachment on the lowest possible suction setting is one of the most thorough dry cleaning methods. Hold the brush slightly above the fabric surface and move it in slow, overlapping strokes to pull dust from the weave without distorting the shade’s shape.
- Static duster for delicate fabric types: For very delicate or vintage fabrics that might be snagged by a roller, a disposable electrostatic duster is ideal. The static charge attracts and holds dust particles as you lightly wipe the shade, from the top to the bottom.
Wet Cleaning Procedures
Reserve wet cleaning for fabric shades that are visibly stained or have a general dinginess that dry methods cannot address. Always check that the shade is sewn, not glued, as moisture will dissolve adhesive and cause the shade to fall apart.
Hand Washing Process
A gentle hand wash can revitalize a sewn fabric shade, but patience is key to preventing damage.
- Mix lukewarm water with mild detergent: Fill a clean basin with lukewarm water and add a few drops of a mild, clear dish soap or a dedicated textile cleaner. Swirl the water to create suds.
- Soak for 10-15 minutes (sewn shades only): Submerge the entire shade in the soapy water and let it soak for no more than 15 minutes. This helps to loosen dirt without weakening the fabric or stitching.
- Gently wipe with microfiber cloth from top to bottom: After soaking, use a soft, white microfiber cloth dipped in the soapy water to gently wipe the surface of the shade, always working from the top downward. Avoid scrubbing, which can fray fibers.
- Rinse thoroughly with clean water: Empty the basin and refill it with clean, lukewarm water. Gently dip and swish the shade in the clean water to rinse out all soap residue. You may need to change the water once or twice until it runs clear.
Stain Treatment Methods
For localized issues, targeted treatments can be applied before the general hand wash.
- Baking soda paste for tough stains (15-minute treatment): Create a thick paste from baking soda and a small amount of water. Using a soft-bristled toothbrush, gently apply the paste to the stain and let it sit for 15 minutes. The mild abrasive and cleaning properties of baking soda can lift many organic stains. Brush away the dried paste and proceed with hand washing.
- White vinegar solution for grease stains: For greasy spots, mix one part white vinegar with two parts water. Dampen a clean corner of a microfiber cloth with the solution and gently blot the stain from the outside in to prevent it from spreading. Allow it to air dry completely; the vinegar smell will dissipate.
- Oxygenated cleaner for yellowing treatment: General yellowing, often caused by age or heat exposure, can be treated with an oxygen-based bleach (like OxiClean™). Follow the package directions to create a soaking solution. Submerge the shade for the recommended time, then rinse and air dry thoroughly away from direct heat.
After any wet cleaning, it is crucial to allow the shade to air dry completely in a well-ventilated area, away from direct sunlight or heat sources, before placing it back on the lamp. For maintaining the pristine condition of your fabric shades, using a low-heat bulb is essential. The Ambient Glow LED Bulb Collection provides beautiful, warm light while generating minimal heat, protecting your cleaning efforts: Ambient Glow LED Bulb Collection.
【Cleaning Paper and Delicate Shades】

Paper and other exceptionally delicate shades, such as those made of parchment or vellum, require a fundamentally different cleaning philosophy than their fabric counterparts. The introduction of any liquid almost certainly will cause irreparable damage, including warping, staining, or disintegration. Therefore, a strictly dry cleaning approach is not just recommended; it is mandatory for preserving their structure and beauty.
Dry Cleaning Only Approach
The goal with these materials is to remove surface dust and address minor blemishes without compromising the integrity of the shade. Every action should be gentle, deliberate, and performed with the understanding that the material is fragile.
Dust Removal Techniques
A systematic, top-to-bottom approach ensures that dislodged dust falls away from clean areas.
- Soft-bristled brush for gentle dusting: A clean, soft-bristled brush, such as a makeup brush or a dedicated artist’s dusting brush, is the primary tool. Using light, sweeping strokes from the top of the shade to the bottom, the bristles can coax dust out of crevices and off the surface without scratching or tearing.
- Compressed air for hard-to-reach areas: For intricate pleats, glued seams, or inner frameworks where a brush cannot reach, use a can of compressed air. Hold the can upright and use short, controlled bursts from a distance of several inches to blow dust away. Avoid prolonged spraying, as the propellant can sometimes be extremely cold and cause condensation.
- Microfiber cloth with light pressure: A clean, dry microfiber cloth can be used for final, overall dusting on smooth paper or parchment surfaces. Lightly drape the cloth over your fingers and wipe with minimal pressure, again working from top to bottom to prevent grinding dust into the material.
Stain Removal Methods
Addressing stains on paper shades is a delicate art. Success is never guaranteed, and these methods should be tested on a small, inconspicuous area first. The principle is always one of absorption and gentle lifting, never rubbing or scrubbing.
Non-Liquid Solutions
These pantry and office staples can work wonders on specific types of dry debris and stains.
- White gum eraser for pencil marks and light stains: A pristine white gum eraser (avoid colored erasers that may transfer dye) can gently lift pencil marks, scuffs, and other dry, superficial stains. Erase with a very light touch to avoid abrading the paper’s surface.
- Corn starch for oil stain absorption: For a fresh oil-based stain, such as from fingertips, immediately cover the spot with a generous mound of corn starch or talcum powder. The powder will absorb the oil over several hours. Gently tip the shade to pour off the powder.
- Dry cleaning sponge for stubborn debris: A dry cleaning sponge (also known as a soot sponge or chemical sponge) is a vulcanized rubber sponge designed to lift grime and soot from delicate surfaces. Lightly rub the sponge over the stained area, using a fresh section of the sponge as it becomes soiled.
- White bread slice for grease absorption: An age-old book conservation trick, the soft, absorbent interior of a slice of white bread (crusts removed) can be gently rolled into a ball and dabbed or lightly rolled over a grease stain. The bread absorbs the grease without introducing moisture.
Special Handling Requirements
The longevity of a delicate shade depends as much on how it is handled as on how it is cleaned. Prevention is the most powerful tool.
Prevention of Damage
Adhering to these simple rules will prevent the most common forms of damage.
- Never use water or liquid cleaners: This bears repeating. Water will cause paper to warp, buckle, and become structurally weak. Liquid cleaners, even mild soaps, will likely cause staining and permanent discoloration.
- Handle with clean, dry hands only: The natural oils on your skin can transfer to the shade and create stains over time. Always ensure your hands are clean and completely dry before touching a paper or parchment shade.
- Support structure during cleaning to prevent dents: Paper shades have little structural strength. Always support the shade from the inside with your hand while cleaning the outside. Avoid gripping the shade tightly, as this can easily cause creases or dents that are impossible to remove.
The most effective way to protect these delicate shades is to manage their environment. Using a low-heat bulb is non-negotiable, as excess heat will dry out, brittle, and yellow the paper. The Ambient Glow LED Bulb Collection is perfectly suited for this task, offering a warm, inviting light that produces virtually no heat, thereby safeguarding your delicate shades for years to come: Ambient Glow LED Bulb Collection.
【Glass and Plastic Shade Cleaning】
Glass and plastic lamp shades offer a wonderful opportunity for a more thorough and satisfying clean than their delicate paper counterparts. While they are far more resilient, a systematic approach is still required to restore their clarity and sparkle without introducing scratches or unsightly water spots. The goal is to achieve a finish that is not just clean, but optically clear and gleaming.
Comprehensive Cleaning Process
A successful cleaning session for these materials involves two stages: a foundational wash to remove the bulk of the grime, followed by targeted techniques to address specific issues like discoloration or intricate details.
Basic Washing Method
This is your go-to method for routine cleaning of both glass and durable plastic shades. Consistency here prevents the buildup of stubborn grime.
- Remove shade and wash in soapy water: Always begin by carefully removing the shade from the lamp base and hardware. Fill a clean sink or basin with warm (not hot) water and a few drops of a mild dish soap. Submerge the shade and allow it to soak for a few minutes to loosen dirt and grease.
- Use soft cloth or sponge for scrubbing: Using a soft, lint-free cloth or a non-abrasive sponge, gently wipe the entire surface of the shade, both inside and out. For plastic, pay special attention to the top, where heat can cause dust to bake on.
- Rinse thoroughly to prevent water spots: This step is critical for a streak-free finish. Rinse the shade completely under a stream of clean, warm water, ensuring all soap residue is washed away. Soap film is a primary cause of dullness.
- Dry completely with lint-free cloth: Immediately after rinsing, dry the shade meticulously with a soft, lint-free cloth, such as a microfiber towel. This prevents water droplets from drying on the surface and leaving mineral spots.
Advanced Cleaning Techniques
For shades that need more than a basic wash, these targeted methods can address years of neglect or specific types of soiling.
- Glass cleaner application (spray on cloth, not shade): For an extra streak-free shine on glass, use a quality glass cleaner. To avoid overspray on the lamp’s fittings, always spray the cleaner directly onto your microfiber cloth first, then wipe the shade.
- Baking soda paste for yellowed plastic: Older plastic shades can develop a yellow tint. Create a paste from baking soda and a small amount of water. Gently rub the paste onto the discolored areas with a soft cloth, then rinse and dry thoroughly.
- Lemon oil for stained glass maintenance: For genuine stained glass shades with leaded seams, a very light application of lemon oil on a soft cloth can help preserve the lead and bring out the richness of the glass colors. Buff gently to a soft sheen.
- Toothbrush for detailed areas: An old, soft-bristled toothbrush is an ideal tool for scrubbing the intricate grooves of cut-crystal shades or the textured surfaces of some plastic designs. Dip it in your soapy water and use a gentle, circular motion.
Maintenance for Crystal and Specialty Glass
Fine crystal, cut glass, and art glass shades deserve special consideration to maintain their brilliance and value. The cleaning principles are similar, but the execution requires more finesse.
Preserving Sparkle and Clarity
The enemy of crystal clarity is mineral residue and abrasive contact. A gentle touch with the right materials will keep your shades luminous.
- Distilled water to prevent mineral streaks: For the final rinse on a prized crystal shade, use distilled water. Unlike tap water, it contains no dissolved minerals, guaranteeing a spot-free, brilliant finish when it dries.
- Ammonia-free glass cleaner recommendations: While effective, ammonia-based cleaners can over time damage the special coatings or paints on some glass shades. Opt for an ammonia-free formula for safer, regular use. The Crystal Clear Ammonia-Free Cleaner is specifically designed for this purpose, cutting through fingerprints and grime without harsh chemicals.
- Immediate drying to prevent water spots: Do not let water air-dry on crystal. The moment it is rinsed, begin drying with a lint-free cloth. For complex cut-glass patterns, use the corner of the cloth to wick moisture out of the deepest crevices.
- Regular polishing with microfiber cloth: A quick, dry polishing with a clean microfiber cloth between deep cleans will keep dust from accumulating and maintain the shade’s inherent sparkle. This is a simple habit that pays significant dividends in appearance.
For all glass and plastic shades, the type of bulb you use can impact how quickly they soil. Low-heat bulbs reduce the chance of dust being baked onto the surface. The Ambient Glow LED Bulb Collection provides brilliant, warm light while emitting minimal heat, helping to keep your freshly cleaned shades looking pristine for longer: Ambient Glow LED Bulb Collection.
【Pleated and Textured Shade Care】
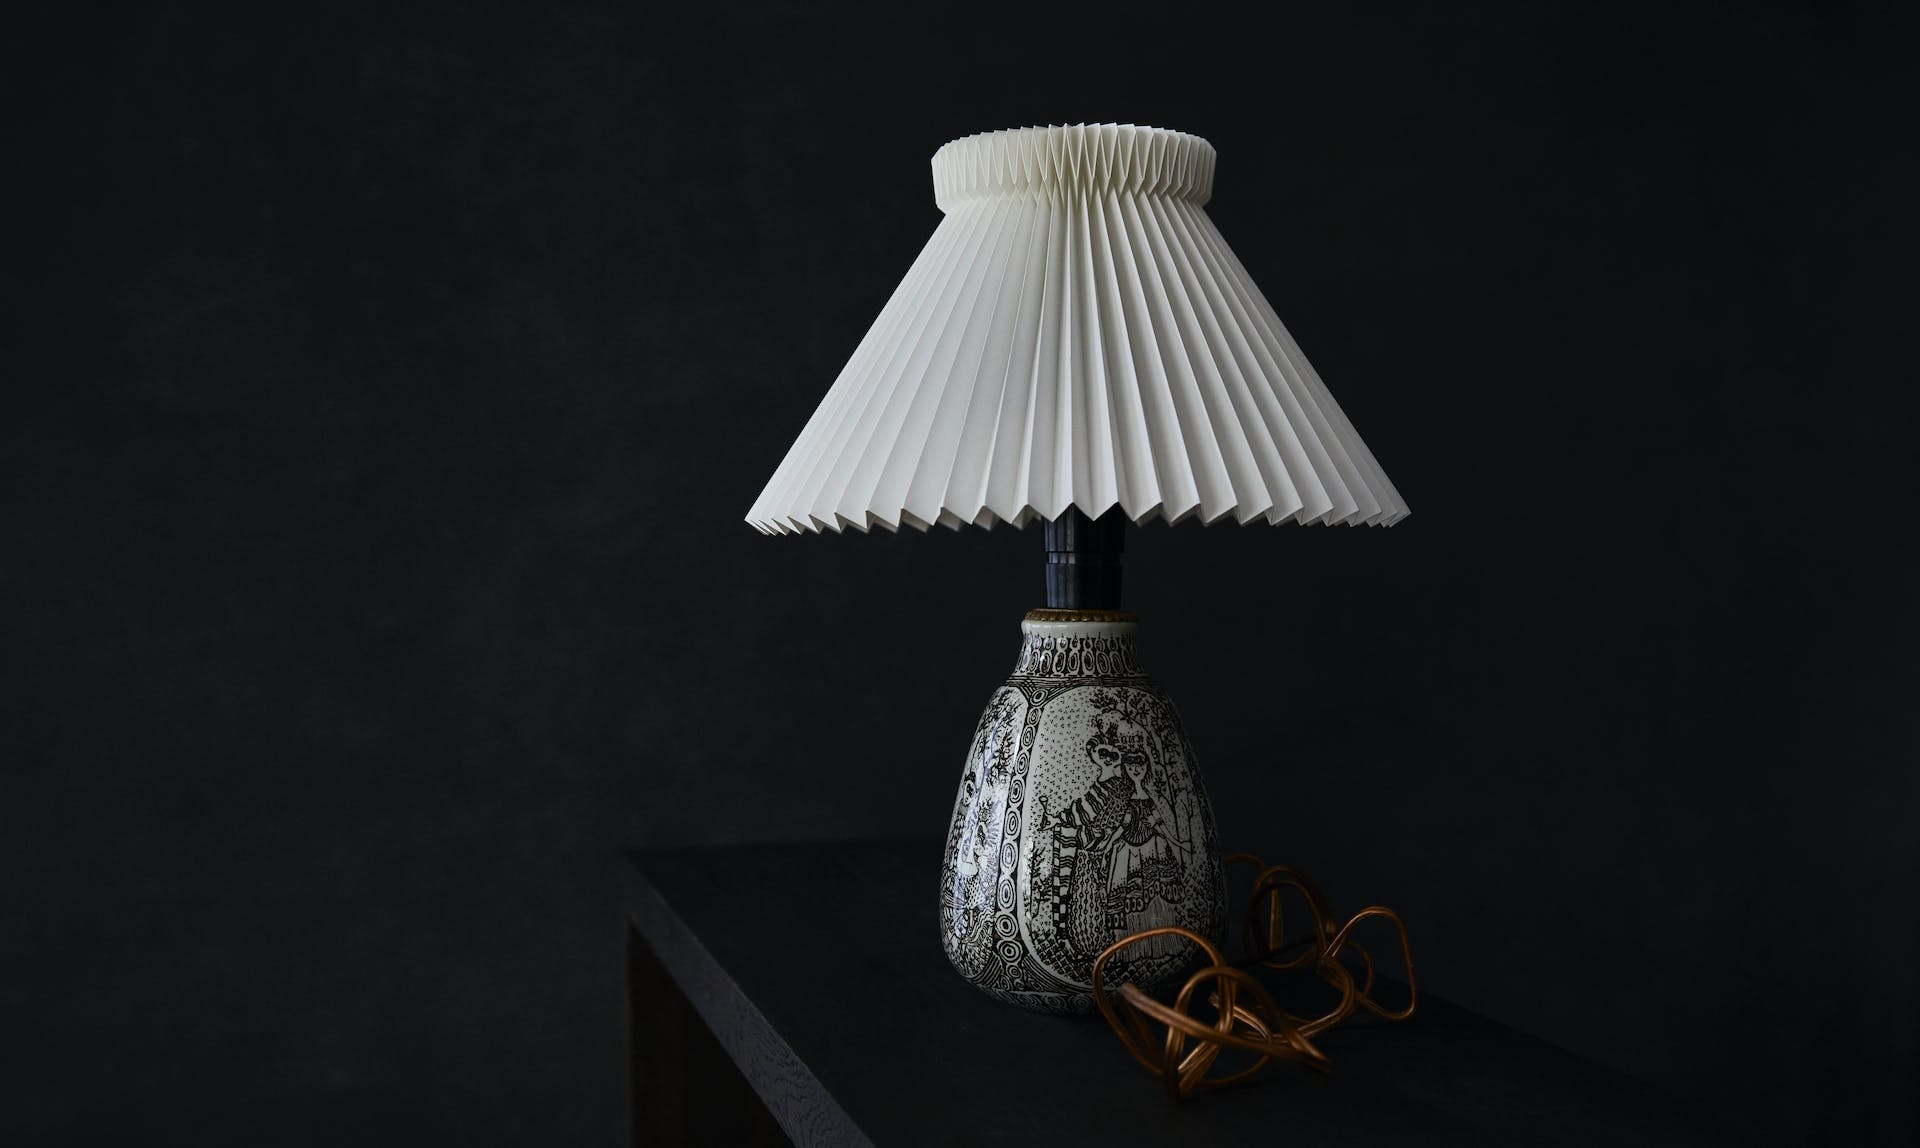
Pleated and textured lamp shades introduce a wonderful dimension of softness and visual interest to a room, but their intricate surfaces require a more nuanced cleaning philosophy than smooth glass or plastic. The goal is not to saturate or aggressively scrub, but to lift away dust and address spots with a gentle, precise touch that preserves the shade’s delicate structure and fabric integrity. A patient, methodical approach will keep these shades looking fresh and elegant for years.
Specialized Cleaning Approaches
The cleaning strategy must be tailored to the specific material and construction of the shade. A one-size-fits-all method risks damaging the delicate folds and textures that give these shades their character.
Pleated Fabric Shades
The deep folds of a pleated shade are dust magnets, and the fabric is often not designed to withstand heavy moisture. The following steps will safely refresh them.
| Step | Action | Key Consideration |
|---|---|---|
| 1. Dry Dusting | Use a soft, natural-bristle paintbrush to gently dislodge dust from between the pleats. | Natural bristles are less likely to generate static electricity that can attract more dust. Always work from the top of the pleat downward. |
| 2. Vacuuming | Use the soft brush attachment on a low-suction setting. Place your hand inside the shade to provide support and prevent the fabric from being pulled inward. | This prevents the pleats from collapsing or the delicate frame from being stressed. |
| 3. Spot Cleaning | If a stain is present, apply a minimal amount of a mild, foam-only upholstery cleaner to a clean, white cloth. Dab—do not rub—the spot. | Rubbing can fray fibers and spread the stain. Test any cleaner on an inconspicuous area first. |
| 4. Drying | Allow the shade to air dry completely, away from direct sunlight or a direct heat source like a radiator. | Rapid, uneven drying can cause water rings or distort the shape of the fabric on the frame. |
Textured Surface Maintenance
Shades with embroidered, ruffled, or deeply sculpted surfaces need a tool-based approach to clean without snagging or breaking the delicate details.
- Compressed air for intricate details: A can of compressed air is excellent for blasting dust out of the tightest crevices on heavily textured shades, such as those made of grasscloth or with complex embroidery. Hold the can upright and use short bursts.
- Makeup brushes for delicate textures: Clean, soft makeup brushes are the perfect tools for dusting. A fluffy blush brush is ideal for broad, soft textures, while a smaller, tapered eyeshadow brush can reach into tiny grooves and beading.
- Light dabbing rather than rubbing motions: When addressing a soiled area on a textured surface, the dabbing motion is your most valuable technique. It presses the cleaning agent into the soiled area without grinding the dirt deeper into the fibers or distorting the texture.
- Regular rotation to maintain even appearance: Textured and dark-colored fabric shades can fade over time. Make a habit of rotating them a quarter-turn every few months to ensure that any light-related fading occurs evenly, preserving their uniform beauty.
Preventing Damage to Pleats
The most common damage to pleated shades is not from stains, but from improper handling that flattens the pleats or strains the fabric. Prevention is the most effective form of care.
Structural Integrity Maintenance
A pleated shade’s form is its function. Protecting that structure should be the primary focus of every interaction.
- Avoid flattening pleats during cleaning: Never press down on the top of the shade or squeeze the sides during cleaning. Always handle it by the frame or the washer at the top and bottom.
- Never use harsh scrubbing motions: Abrasive scrubbing, even with a soft cloth, can wear down the nap of the fabric, create shiny spots, and weaken the fibers at the fold of each pleat.
- Support from inside during cleaning: When dusting or vacuuming the outside of the shade, always place your hand flat against the inside liner to provide a counter-pressure. This prevents the delicate frame from flexing and the fabric from being stressed.
- Store properly to maintain shape: When not in use, store pleated shades in a breathable cotton bag or a box large enough that they do not bear weight. Never stack items on top of them.
For maintaining the pristine look of delicate fabric shades, having the right tools makes all the difference. The Artisan’s Delight Natural Bristle Brush Set offers a range of sizes perfect for navigating pleats and textures without causing harm: Artisan’s Delight Natural Bristle Brush Set. Furthermore, using a low-heat bulb is crucial, as excessive heat can cause the fabric to become brittle and the pleats to set in a distorted shape. The Ambient Glow LED Bulb Collection provides a beautiful, warm light that is safe for your most delicate shades: Ambient Glow LED Bulb Collection.
【Lamp Base and Electrical Safety】
A lamp’s base provides its foundation, both structurally and aesthetically. While the shade requires a gentle touch, the base often demands a more robust, yet equally careful, approach to cleaning. More importantly, any interaction with a lamp must begin with a fundamental respect for the electrical components that bring it to life. A beautiful lamp is a functional object, and its care must always prioritize safety to ensure it remains a source of light and comfort for years to come.
Comprehensive Lamp Cleaning
A systematic cleaning process ensures that every part of the lamp, from its connection to the outlet to its decorative details, is properly maintained without risking damage or personal safety.
Base Cleaning Procedures
The material of your lamp base—be it ceramic, wood, brass, or glass—dictates the specific cleaning method, but the preliminary safety steps are universal.
- Unplug lamp before any cleaning: This is the non-negotiable first step. It eliminates any risk of electric shock and allows you to move the lamp to a stable, well-lit workspace, such as a kitchen counter protected with a towel.
- Use dry cloth for initial dusting: A soft, lint-free microfiber cloth is ideal for removing surface dust from all base types. For carved or intricate details, use a soft-bristled brush, like those used for shade care, to dislodge debris.
- Mild soap solution for stubborn grime: For non-porous bases like glass, ceramic, or glazed pottery, prepare a solution of a few drops of mild dish soap in a bowl of warm water. Dampen a cloth in the solution, wring it out thoroughly until it is only slightly damp, and wipe the base. Immediately follow with a rinse cloth dampened with clean water, and dry promptly with another soft cloth.
- Avoid moisture near electrical components: Be exceptionally careful around the socket area and the cord entry point. Never spray cleaner directly onto the base, and ensure your damp cloth does not allow moisture to seep into these electrical parts.
Metal Base Maintenance
Metal bases, from modern brushed nickel to ornate antique brass, require specific care to maintain their luster and prevent deterioration.
- Appropriate metal polish for material type: Always use a polish formulated for your specific metal. A polish for brass should not be used on pewter, for example. Apply a small amount to a soft cloth and buff according to the product’s instructions.
- Avoid harsh chemicals that damage protective coatings: Many modern metal finishes have a protective lacquer. Avoid abrasive cleaners, ammonia, or vinegar, as they can strip this coating, leaving the metal vulnerable to tarnishing.
- Regular dusting to prevent corrosion: Dust and skin oils can be acidic and accelerate tarnishing on unprotected metals. A weekly dry dusting is the most effective way to preserve the finish.
- Professional care for valuable antique bases: If you have a valuable or historically significant antique lamp with significant tarnish, corrosion, or wiring concerns, consult a professional restorer. Their expertise can preserve the value and integrity of your piece.
Electrical Safety Protocols
These practices are the cornerstone of lamp ownership and care. Adhering to them is a simple habit that ensures safety and longevity.
Safe Cleaning Practices
Integrating these protocols into your routine makes safety second nature.
- Always unplug before cleaning: We reiterate this point because its importance cannot be overstated. It is the single most critical action for your safety.
- Ensure complete cooling of bulb and shade: Before removing a shade or handling the lamp, allow the bulb and shade to cool completely after turning it off, especially with high-wattage incandescent or halogen bulbs. This prevents burns and protects delicate shade materials from thermal shock.
- Keep electrical components completely dry: The socket, plug, and cord must never come into contact with water or liquid cleaners. If you need to clean a cord, wipe it with a dry cloth only.
- Check for damage during cleaning process: As you clean, take a moment to inspect the power cord for fraying, cracks, or loose plugs. Check the socket for any signs of heat damage, such as discoloration or melting. If you find any damage, discontinue use and have the lamp repaired by a qualified professional before plugging it in again.
The right tools simplify safe and effective lamp care. For a streak-free clean on glass bases and shades, the Lumina-View Glass Cleaning Cloths are exceptionally effective: Lumina-View Glass Cleaning Cloths. To ensure your lamp’s electrical system is not generating excess heat, we recommend using the Eco-Watt LED Bulb Collection, which provides brilliant, cool-to-the-touch illumination: Eco-Watt LED Bulb Collection.
【Troubleshooting Common Problems】
Even with the most diligent care, lamps can develop issues over time. Addressing these stubborn problems promptly and correctly can restore your lamp’s beauty and function, preserving it as a cherished part of your home.
Addressing Stubborn Issues
Some lamp ailments require more than a routine dusting. For persistent problems like yellowing or smoke damage, targeted treatments are necessary.
Yellowed Shades Treatment
Fabric and parchment shades can develop a yellow tint over 2025 due to age, exposure to light, or dust accumulation. The approach to remediation depends on the severity and the shade’s value.
- Baking soda paste application for fabric: For sturdy fabric shades, create a gentle cleaning paste by mixing a small amount of baking soda with water. Using a soft, damp cloth, apply a thin layer of the paste to a small, inconspicuous area first to test for colorfastness. If there is no adverse reaction, gently work the paste onto the discolored areas, then wipe clean with a separate cloth dampened with water. Allow the shade to air dry completely before reattaching.
- Professional cleaning for valuable shades: For shades made of silk, vintage parchment, or any shade with delicate trim or hand-painted details, seeking professional cleaning is the safest course of action. They possess the expertise and solutions to clean without causing further damage or discoloration.
- Prevention through regular maintenance: The most effective treatment is prevention. Consistent dusting with a soft brush prevents the buildup of grime that can lead to yellowing. Furthermore, storing lamps in a cool, dark place when not in use for extended periods can slow the aging process.
- Replacement consideration for severe cases: If a shade is severely yellowed, brittle, or has been damaged by an improper cleaning attempt, replacement may be the most practical and aesthetically pleasing option.
Odor and Smoke Damage
Lamps can absorb odors from cooking, tobacco smoke, or a musty environment. Addressing this involves both deodorizing and cleaning.
- Baking soda deodorizing treatment: To neutralize odors, place the unplugged lamp (with the shade removed) in a large, plastic bag or a sealed container with an open box of baking soda. Seal it closed and let it sit for 24-48 hours. The baking soda will absorb the lingering odors. The shade can be treated separately in the same manner if it is the source of the smell.
- Fresh air circulation methods: Often, simply placing the lamp in a well-ventilated area for a day or two can significantly reduce mild odors. Avoid placing it in direct sunlight, which may fade certain materials.
- Professional restoration for severe cases: For heavy smoke damage or persistent, deep-set odors, a professional restoration service may be required. They can use specialized equipment like ozone generators to eliminate odors at their source.
- Replacement for permanent damage: If the odor has permanently permeated porous materials like some unsealed wood bases or certain types of fabric shades, and professional treatment is unsuccessful, replacement of the affected part may be necessary.
Emergency Stain Treatment
Accidents happen. A swift and correct response to a spill can mean the difference between a minor incident and a permanent stain.
Immediate Response Protocols
The first few minutes after a spill are critical. The goal is to contain the damage without spreading it or causing further harm to the material.
- Blotting rather than rubbing liquid spills: For a spill on a fabric shade, immediately use a clean, absorbent, white cloth or paper towel to gently blot the stain. Work from the outside of the stain inward to prevent it from spreading. Never rub, as this will grind the substance deeper into the fibers.
- Dry methods for paper shades: For paper or parchment shades, liquid is the enemy. If a dry substance (like dust or crumbs) is spilled, use a soft, dry brush to gently sweep it away. For any liquid spill on these materials, blotting is still the first step, but professional consultation is almost always warranted immediately afterward.
- Quick treatment for fabric stains: After blotting a fabric shade, you may attempt to treat the remaining stain with a minimal amount of water or a fabric-safe stain remover, applied to a cloth first, not directly to the shade. Always test any cleaning solution on a hidden area.
- Professional consultation for valuable pieces: For any stain on an antique, delicate, or particularly valuable shade, the best “immediate response” is to blot up any excess liquid and then contact a professional cleaner for advice. Attempting a home remedy could drastically reduce the value of the piece.
For gentle yet effective cleaning solutions that are safe for a variety of shade materials, the Heritage-Textile Fabric & Wallpaper Cleaner is a trusted choice for many households: Heritage-Textile Fabric & Wallpaper Cleaner. To protect your new or freshly cleaned shades from future dust and grime buildup, consider using the Aero-Dust Static Dusting Brushes, which attract and hold dust without chemicals: Aero-Dust Static Dusting Brushes.
【Long-Term Preservation Strategies】
A well-maintained oil lamp is not only a source of light but also a testament to thoughtful household stewardship. The true secret to preserving its beauty lies not in frantic, last-minute cleanings, but in establishing a consistent and gentle routine. By integrating these preservation strategies into your regular home care schedule, you can ensure your lamp remains a luminous and cherished fixture for years to come.
Preventive Maintenance Schedule
An ounce of prevention is worth a pound of cure, and this is especially true for lamp care. A structured schedule prevents the accumulation of grime that leads to more serious issues like yellowing or permanent staining.
Regular Care Routine
Adhering to a simple, recurring schedule is the most effective way to preserve your lamp’s shade and glass.
| Frequency | Task | Key Actions |
|---|---|---|
| Weekly | Dusting for all shade types | Use a soft, dry microfiber cloth or a static dusting brush. Gently wipe the glass chimney and the exterior of the shade. For fabric shades, always follow the direction of the seam. |
| Monthly | Detailed inspection | Under good light, carefully examine the shade and glass for any new smudges, dust buildup in crevices, or signs of wear. Check the lamp’s hardware for tightness. |
| Semi-annual | Deep cleaning | This is the time for the thorough cleaning methods described in our previous sections. Gently clean the glass chimney with a vinegar solution and address any slight soiling on the shade with appropriate, tested methods. |
| Annual | Professional assessment for valuable pieces | For antique lamps, signed art glass, or shades made of silk or fragile parchment, an annual check-up by a professional can identify potential issues before they become significant problems. |
Storage and Protection
When a lamp is not in use, whether seasonally or long-term, proper storage is paramount to its preservation. The goal is to protect it from dust, physical damage, and environmental fluctuations.
Proper Storage Methods
A little extra effort during storage pays dividends when you bring your lamp out again, ready to shine.
- Clean before storage to prevent set stains: Never store a lamp that has not been thoroughly cleaned. Any residual oil, dust, or fingerprints can set over time and become much more difficult to remove later. Ensure both the glass and shade are completely dry.
- Individual wrapping for protection: Wrap the glass chimney and the base in acid-free tissue paper or soft, clean cotton cloth. Place the chimney in a sturdy box that fits it snugly. The shade should be stored separately, ideally in its original box or a similarly sized container, and stuffed with more tissue paper to help it retain its shape.
- Climate-controlled storage environment: Avoid attics, basements, or garages where temperature and humidity levels are extreme. Choose a cool, dark, and dry place for storage. Consistent, moderate conditions prevent materials from becoming brittle, warping, or developing mold.
- Proper positioning to maintain shape: Store shades upright. Never stack items on top of a shade, as this can easily lead to crushing or misshaping. For very large or fragile shades, consider a dedicated shade storage box.
Environmental Protection
The daily environment of your home can subtly affect your lamp. Proactive measures can mitigate these effects and ensure even, graceful aging.
- Fabric protector application after cleaning: After a deep clean and once the shade is completely dry, consider applying a fabric protector spray designed for delicate materials. Test it on a small, hidden area first. This creates an invisible barrier against future dust and minor spills.
- UV protection for fade prevention: Continuous exposure to direct sunlight will fade most shade materials and can degrade certain types of glass and finishes. Position your lamp away from windows or use UV-filtering window film on nearby glass to dramatically slow the fading process.
- Temperature and humidity control: Just as with storage, avoid placing lamps in rooms with high humidity, like bathrooms, or directly next to heat sources like radiators and fireplaces. Stable conditions prevent glue from failing, metal from corroding, and parchment or paper from buckling.
- Regular rotation for even aging: If you have multiple lamps, rotating their use every few months ensures that no single piece is consistently exposed to light and dust, promoting more uniform aging across your collection.
Integrating these protective measures is simpler with the right tools. For your semi-annual deep cleaning, the Heritage-Textile Fabric & Wallpaper Cleaner offers a gentle yet effective solution for a variety of shade materials: Heritage-Textile Fabric & Wallpaper Cleaner. To make your weekly dusting ritual both effective and effortless, the Aero-Dust Static Dusting Brushes are indispensable for attracting and holding dust without any chemicals: Aero-Dust Static Dusting Brushes.
Mastering the Art of Lampshade Care
Proper lampshade maintenance is a skill that protects your investment and enhances your home’s ambiance. The core principle is always to match your cleaning method to the material: use dry techniques for delicate paper and parchment, gentle solutions for fabric, and more robust washing for durable glass and plastic. Remember that construction is as critical as composition—always check if a shade is sewn or glued before introducing moisture. Integrating a simple weekly dusting routine and using low-heat bulbs are the most powerful preventive measures you can take.
By following this material-specific framework, you can confidently tackle dust, stains, and yellowing without fear of causing damage. Your lamps are designed to last, and with the right care, they will.
We hope this guide empowers you to keep your lighting looking brilliant. What was the most surprising tip you discovered? Share your own lampshade care experiences in the comments below!
