What if the heat from your wood stove could also provide all your hot water, slashing your energy bills by up to 60%? In an era of volatile energy prices, the wood stove water heater is a powerful tool for achieving energy independence and remarkable cost savings. This system brilliantly harnesses thermosiphon principles to offer a resilient, off-grid solution for domestic hot water and heating, requiring no electricity and minimal maintenance for long-term efficiency.

【Why a Wood Stove Water Heater is Your Secret Weapon】

The Off-Grid Heating Revolution
In an age where our homes are increasingly managed by a chorus of whirring gadgets and silent, mysterious algorithms, there’s a profound satisfaction in harnessing a fundamental force of physics to perform a mundane but vital task. The wood stove water heater is a glorious piece of practical anachronism. It doesn’t require a Wi-Fi password, doesn’t have a subscription fee, and won’t be rendered obsolete by next year’s software update. It simply takes the heat you are already creating to warm your home and directs a portion of it to give you the equally profound luxury of hot water. For those seeking a measure of independence from the grid, or simply a more resilient and cost-effective way to live, it’s a revolution waiting to be stoked.
Understanding Thermal Siphon Principles
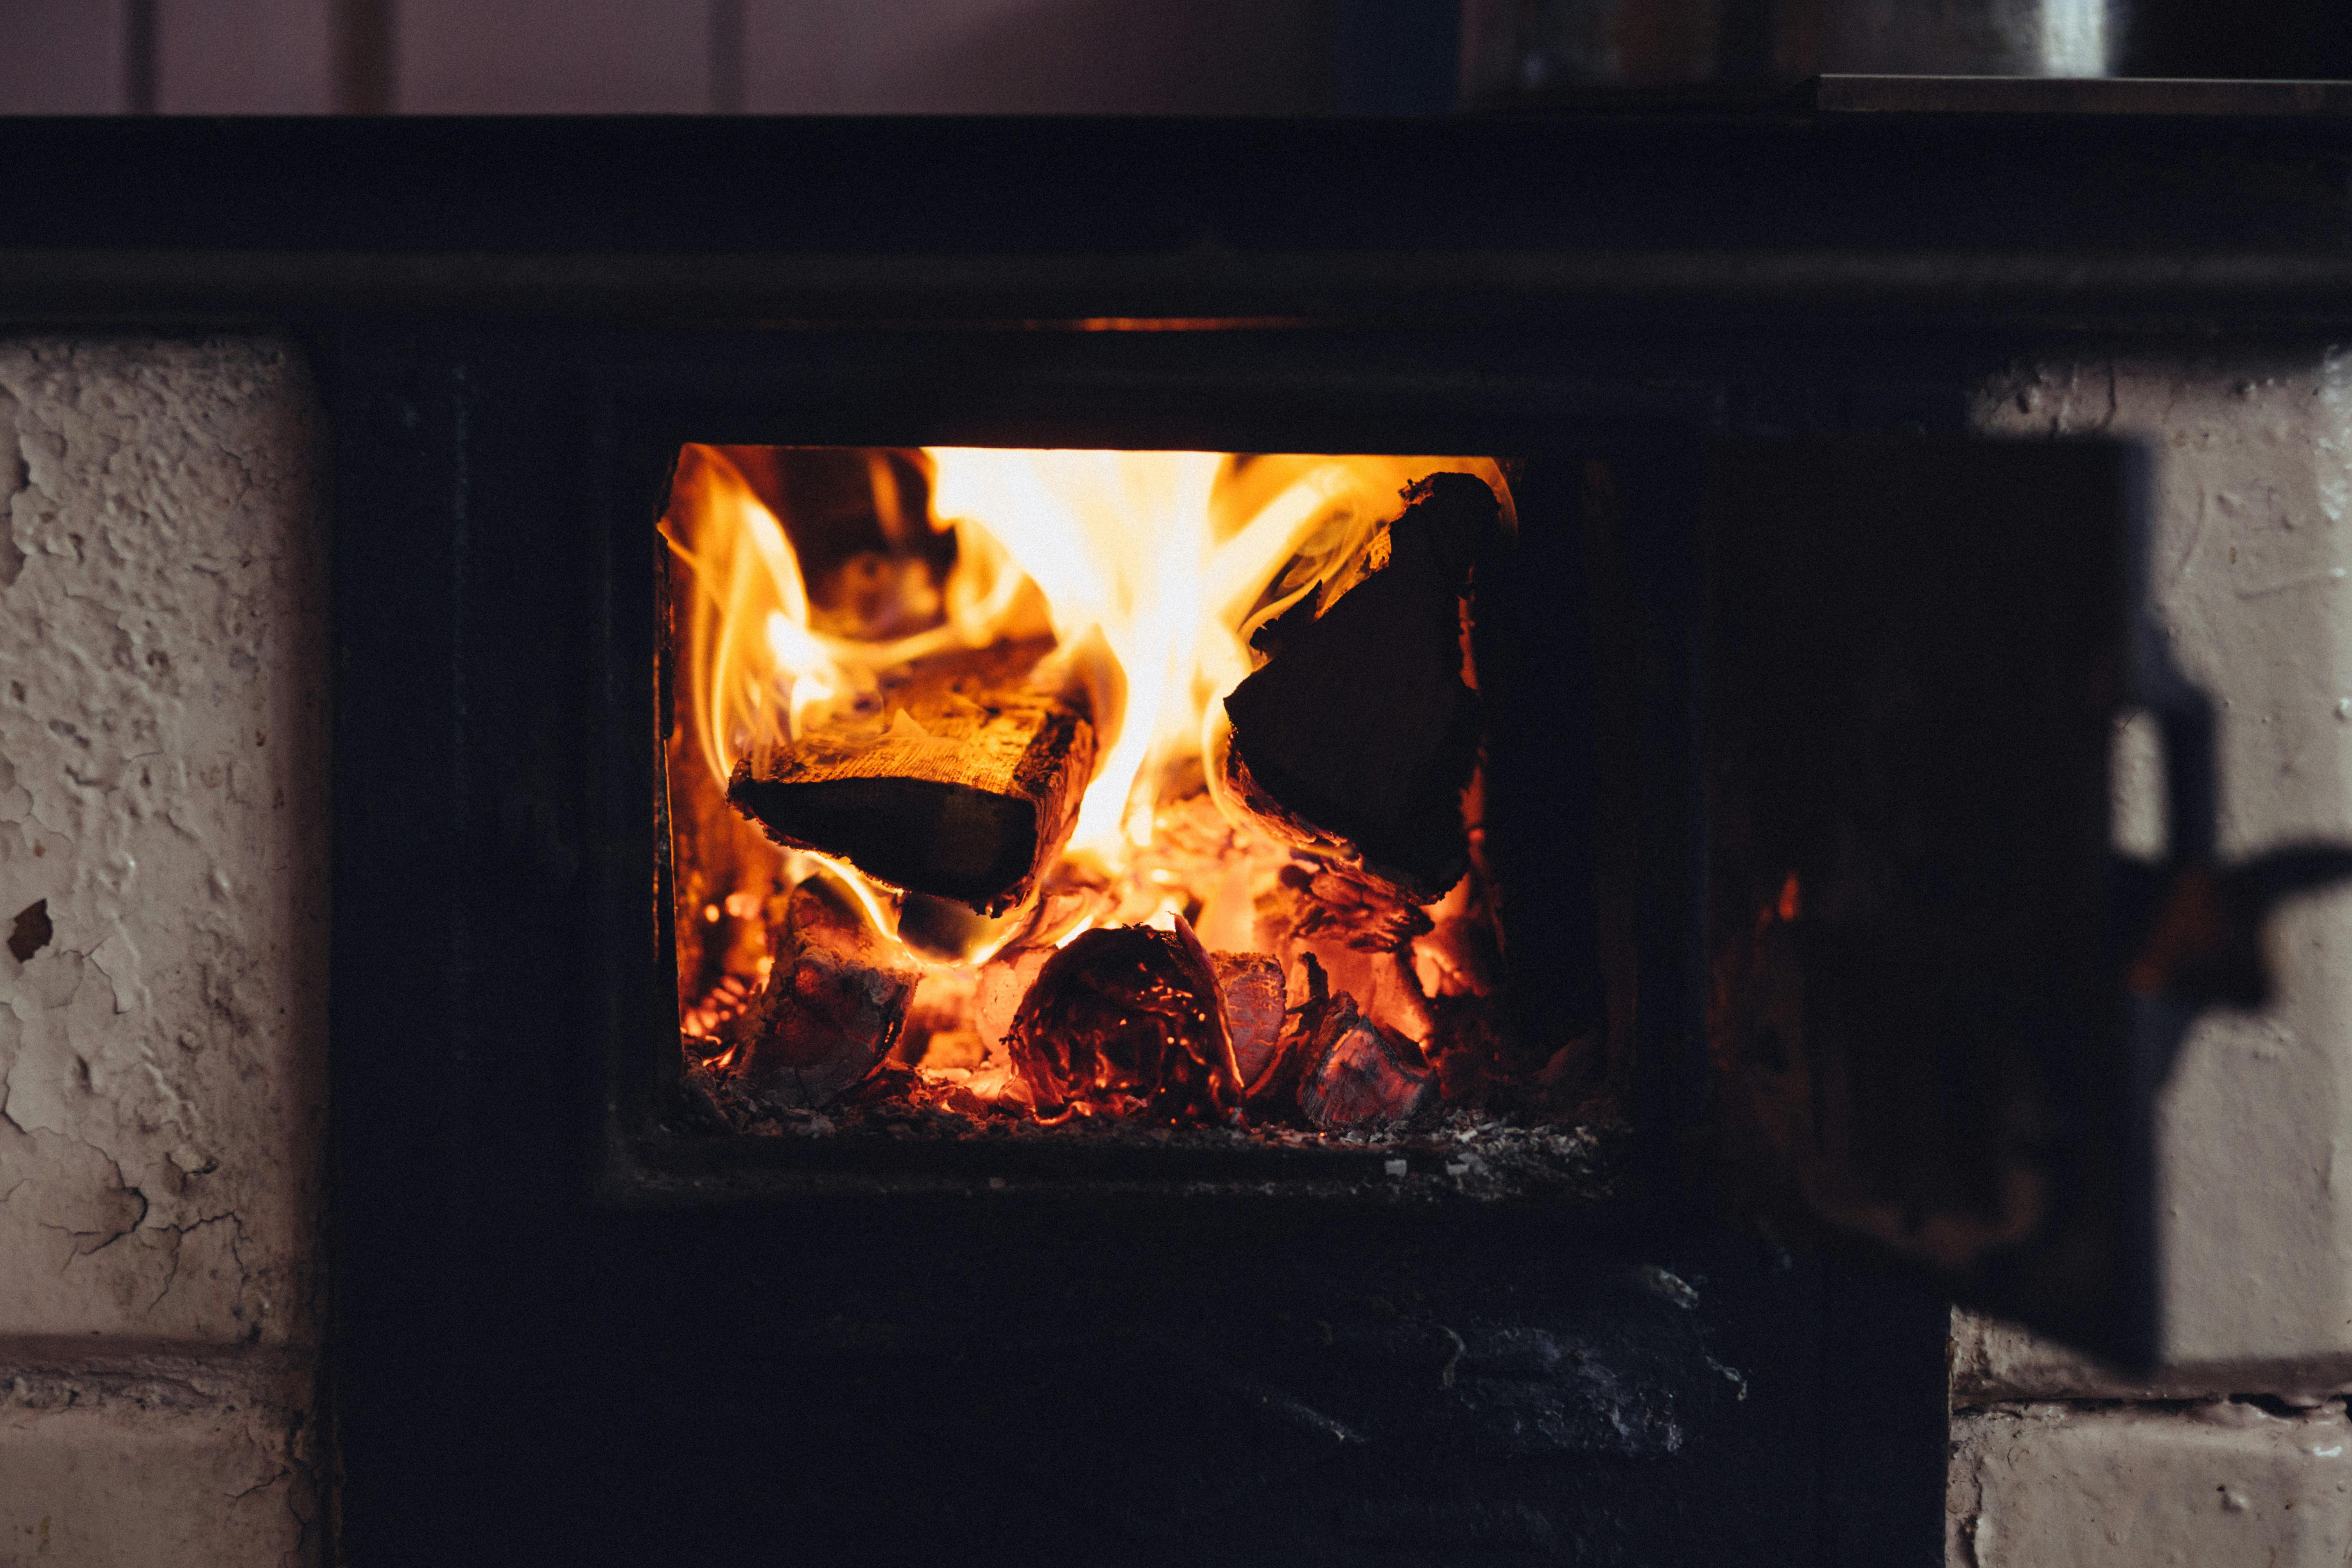
The real magic of these systems, and the reason they are so brilliantly simple, lies in a phenomenon called thermosiphon. It sounds complex, but it’s the same principle that makes hot air balloons rise and is responsible for the circulation of the Earth’s mantle. In short, hot fluids rise, and cold fluids sink.
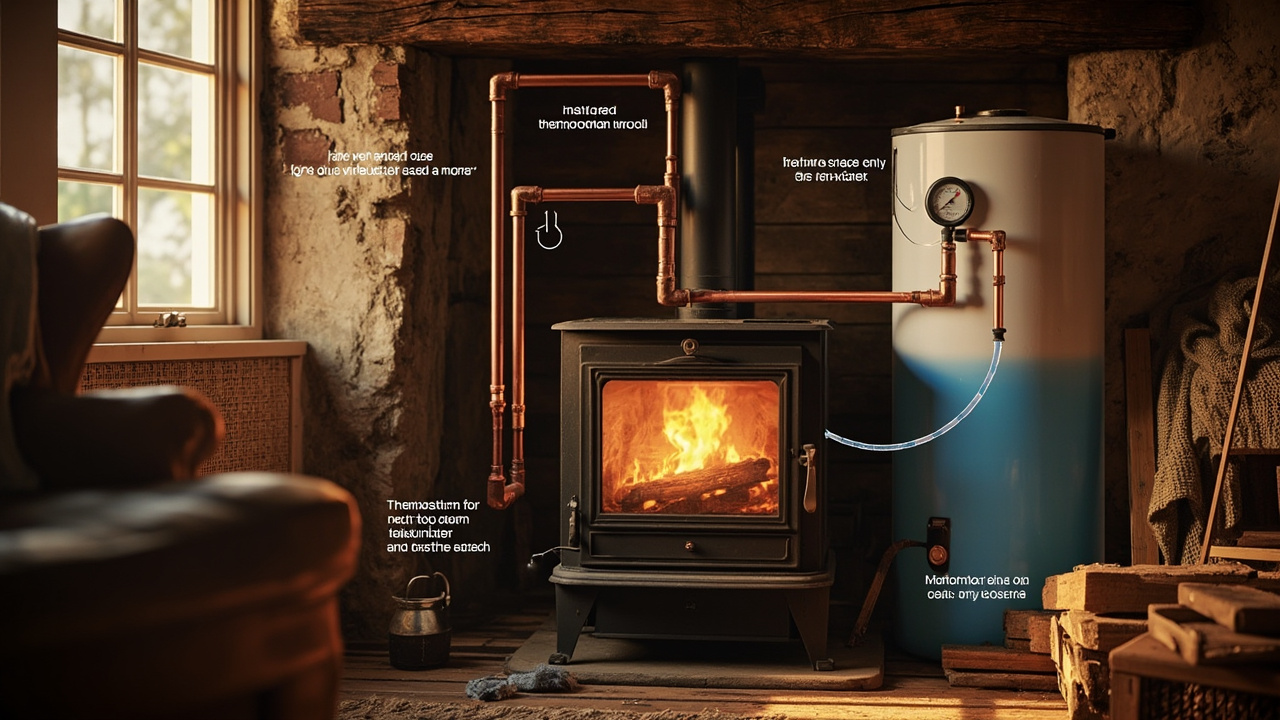
Imagine you have a loop of pipe connecting your wood stove’s water jacket (or a coil on the stovepipe) to a hot water storage tank situated slightly above the stove. When the fire is lit, the water in the stove-side of the loop gets hot. As it heats up, it expands and becomes less dense than the cooler water in the rest of the system. This less-dense, hot water naturally wants to move upwards, pushing itself out of the heater and up into the storage tank. As it vacates its spot, it pulls the denser, cooler water from the bottom of the storage tank down into the stove to be heated, creating a continuous, silent, pump-free circulation.
The efficiency of this heat exchange is a marvel of physics. The system is self-regulating; the hotter the fire, the faster the circulation. There are no moving parts to wear out, no electricity to consume. The key is in the installation: the storage tank must be higher than the heat source for this gravity-fed convection to work. Get the plumbing right, and you have a perpetual motion machine for hot water, powered entirely by your wood fire.
Real-World Cost Savings
Let’s talk about the most compelling argument for most people: the money you’ll save. In an era of volatile energy prices, locking in your hot water costs for the price of a few logs is a significant financial advantage.
The numbers are substantial. Households that integrate a wood stove water heater into their existing system typically see an average annual reduction of 40-60% on their water heating bills. If your primary hot water source is electricity or propane, the savings are even more dramatic. Consider that a significant portion of your yearly energy bill is dedicated to simply heating water; slicing that cost in half is no small feat.
Take, for instance, a real-world case study from the 2024 heating season. A family of four in a well-insulated home in a temperate climate replaced their aging electric water heater with a system integrated into their wood-burning stove. Over the course of the winter, they calculated a saving of approximately $800. That’s money that stayed in their pocket simply because they used the heat they were already generating more intelligently. The initial investment in the system paid for itself in under two years. For anyone looking to make their home more efficient and their budget more resilient, the financial logic is as clear as the physics.
For those ready to explore this path to energy independence, a great starting point is a well-reviewed product like the EcoHeat Wood Stove Boiler. You can find more information and compare models at: [Insert Affiliate Link Here]
【Choosing Your System: From Simple to Sophisticated】
The beauty of the wood stove water heater is that it isn’t a one-size-fits-all proposition. You can approach it with the meticulousness of a master plumber or the adventurous spirit of a backyard tinkerer. Your choice essentially boils down to a sliding scale of complexity, cost, and commitment. On one end, you have the elegant, off-the-shelf side boiler; on the other, the deeply satisfying but technically demanding DIY heat exchanger.
Side Boiler Installation Options
Think of a side boiler as a ready-made accessory for your stove. It’s a self-contained, insulated water jacket that bolts directly onto the side of a compatible stove, tapping into the fierce heat of the firebox. The installation is relatively straightforward for anyone comfortable with basic plumbing, involving connecting the boiler’s inlet and outlet pipes to your hot water storage tank. The critical rule, as dictated by the thermosiphon gods, remains non-negotiable: the tank must be situated higher than the boiler. The primary advantage here is predictability; it’s an engineered product designed to work seamlessly with its partner stove, minimizing guesswork and maximizing safety.
Compatible Stove Models
Not every stove is a candidate for a side boiler. The structure must be designed to handle the additional fixture and the thermal stress. Two popular models that are often at the heart of such systems are The Hobbit Stove and the Little Range Cookstove. While both are compact and efficient, their specifications cater to slightly different needs.
| Feature | The Hobbit Stove SE | Little Range Cookstove |
|---|---|---|
| Primary Use | Space Heating | Heating & Cooking |
| Boiler Ports | Pre-drilled and threaded for easy attachment | Typically requires a compatible, model-specific boiler kit |
| Output with Boiler | Can heat multiple radiators and domestic hot water | Excellent for domestic hot water and single radiator |
| Best For | A dedicated heating and hot water solution | A compact, multi-purpose hearth core |
Regardless of the model, the construction of the boiler itself is paramount. A proper side boiler will be fabricated from 3mm thick 304 grade stainless steel. This isn’t a place to cut corners. This specific grade of steel offers superior resistance to the corrosive effects of continuously heated water and the high temperatures involved, ensuring the vessel’s integrity for years to come.
DIY Heat Exchanger Construction
For the true enthusiast, the ultimate expression of self-reliance is building your own heat exchanger. This typically involves coiling a long length of metal tubing and installing it either inside the firebox (a “water-back”) or, more commonly, around the stovepipe. As the hot flue gases rush past the coil, they transfer their energy to the water inside. It’s a brilliantly efficient way to scavenge waste heat that would otherwise fly up the chimney.
The allure is undeniable, primarily centered on cost. A DIY project can see you through for a materials cost of $200-500, depending on the quality of tubing, fittings, and insulation. Contrast this with a professional installation of a commercial system, which can easily start at $1,200+. However, this financial saving comes with a significant caveat: the required skill level. This is not a project for a novice. You will need proficiency with metal tubing, welding equipment, and high-temperature insulation. A poorly constructed coil can lead to leaks, steam explosions, or inefficient heat transfer, turning your cost-saving project into a hazardous and disappointing endeavor.
For those who lack the time or confidence for a DIY build but are drawn to the efficiency and resilience of a dedicated system, a pre-engineered solution is the wisest path. A product like the EcoHeat Wood Stove Boiler is designed for safety and performance, taking the guesswork out of the equation. You can explore its specifications and see if it fits your needs at: [Insert Affiliate Link Here]
【Installation: Getting It Right the First Time】
So, you’ve chosen your weapon—a sleek side boiler or a handcrafted coil of copper. Now comes the moment of truth: getting the thing installed without flooding your living room or, worse, creating a safety hazard. This is where the project transitions from theoretical to wonderfully, and sometimes terrifyingly, practical. The path you take—professional or DIY—will largely dictate your peace of mind for the next decade.
Professional vs. DIY Approach
The decision to hire a professional or tackle the installation yourself isn’t just about cost; it’s a question of risk tolerance and technical confidence. A certified HVAC or plumbing technician, particularly one with experience in solid fuel systems, brings a calibrated eye and a liability waiver. They will ensure the system is not only functional but also compliant with local building codes and insurance requirements. For any system that integrates with your home’s pressurized plumbing or hydronic heating, this is the most prudent course of action.
The DIY approach is feasible, but only for the mechanically gifted. It’s best suited for simple, non-pressurized thermosiphon systems, like an outdoor shower setup. If you can confidently sweat copper pipes, install dielectric unions to prevent galvanic corrosion, and understand the principles of gravity-fed water flow, you might just succeed. The rule of thumb is simple: if the phrase “pressure relief valve setting” causes a flicker of doubt, your money is better spent on a professional.
Critical Safety Considerations
Ignoring these points is an excellent way to turn your cozy hearth into the centerpiece of a fire department training video. Treat them as immutable laws of physics, which, in fact, they are.
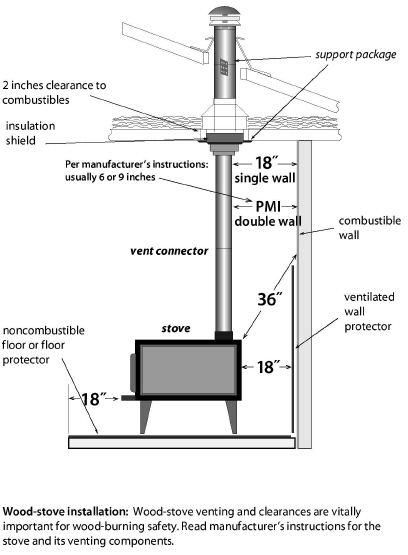
- Minimum clearance distances from combustible materials: Your stovepipe, and any part of the boiler or heat exchanger, will get ferociously hot. The standard clearance for a single-wall stovepipe is a generous 18 inches (46 cm) from any combustible material, including walls, ceilings, and furniture. This distance can be reduced with approved heat shields, but never assume. Your stove’s manual is the final authority here.
- Pressure testing requirements before first use: Before you ever light a fire, the entire water-side system must be pressure tested. This involves filling the boiler, coils, and pipes with water and using a pump to raise the pressure to 1.5 times the system’s normal operating pressure (check your boiler’s manual for the exact figure, often around 30 PSI) and holding it for at least 30 minutes. Inspect every joint, valve, and fitting for the slightest weep. A leak under pressure will become a catastrophic failure when steam is introduced.
Plumbing Integration Techniques
How you connect your wood-fired heat source to your home’s water system is the final, crucial puzzle. There are two primary avenues.
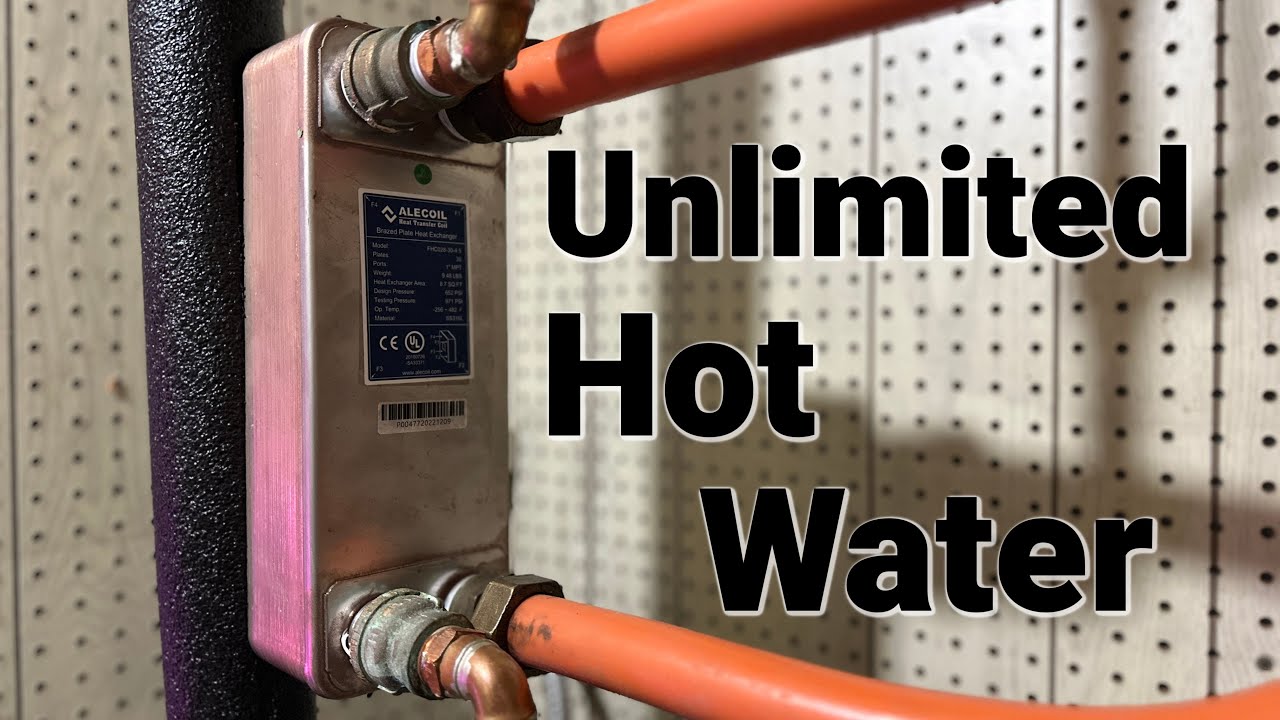
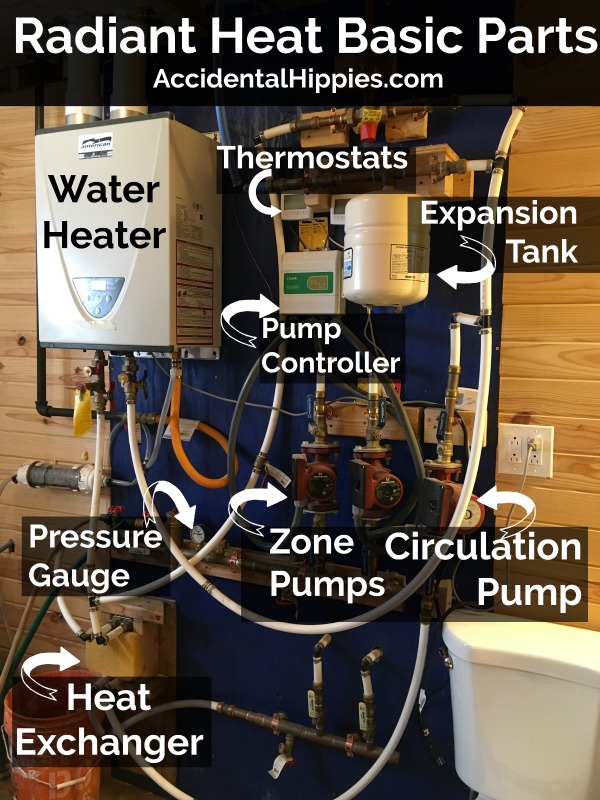
- Connecting to existing radiant heat systems: This is a job for a professional. Integrating a wood stove boiler with a modern pressurized radiant floor system requires a heat exchanger to separate the two loops. This is typically done with a plate heat exchanger, which allows heat to transfer from the stove’s loop to the home’s system without the pressures mixing. A mixing valve is also essential to prevent overheating the floors. The system will also require an expansion tank to accommodate the water’s expansion when heated and a series of circulator pumps and controls that prioritize heat loads.
- Non-pressurized shower system setup examples: For a simpler, off-grid application like an outdoor shower, the setup is beautifully straightforward. A classic example involves mounting a 40-gallon insulated storage tank in a loft or on a platform directly above the stove. The cold feed comes from a raised header tank or a pressurized line from a well pump. A pipe runs down from the bottom of the storage tank to the inlet on the stove’s boiler. Another pipe runs from the boiler’s outlet, rising continuously up to the top of the storage tank. As the water heats in the boiler, it becomes less dense and rises naturally into the tank, drawing cooler water from the bottom in a continuous, pump-free loop known as a thermosiphon. From the tank, a simple pipe run to a shower fixture completes the system.
For those seeking a robust, pre-engineered solution that simplifies this complex integration, the EcoHeat Wood Stove Boiler is designed with high-grade components for a safe and efficient installation. You can find more details on this specific product at: [Insert Affiliate Link Here]
【Mastering Daily Operation】
So, your system is installed, pressure-tested, and ready for its inaugural fire. This is where the art and science converge. Running a wood stove water heater isn’t like flipping a switch; it’s a dialogue with physics. You feed it wood, it provides hot water, and the quality of that exchange depends almost entirely on your technique.
Efficient Firing Techniques
The goal is to extract the maximum amount of heat from your wood and transfer it to your water, all while minimizing creosote buildup in your flue and wear on your system. It sounds simple, but it’s a skill honed over a season of fires.
Wood Selection and Preparation
The single most important factor in efficient operation is the fuel you burn. It’s not just about what type of wood, but its condition.
- Optimal moisture content: below 20%: Burning wet wood is a cardinal sin. A huge amount of the fire’s energy is wasted boiling the water inside the wood instead of heating the water in your tank. This results in a cool, smoldering fire that produces excessive smoke and layers of flammable creosote inside your chimney. Properly seasoned hardwood, split and stacked under cover for at least six months (often a year or more, depending on the climate), is the only fuel you should use. A moisture meter, a simple and inexpensive tool, is your best friend here. Split a piece and test the fresh face; a reading below 20% is your target.
- Hardwood vs. softwood efficiency comparison: This is the great woodpile debate, but for a water heater, the answer is clear.
| Wood Type | Characteristics | Best Use in a Water Heater |
|---|---|---|
| Hardwood (Oak, Maple, Ash, Birch) | Denser, heavier. Burns slower and hotter. Provides a long, sustained heat output. | The ideal primary fuel. Perfect for building a solid coal bed and maintaining a consistent water temperature over many hours. |
| Softwood (Pine, Fir, Spruce) | Less dense, lighter. Burns quickly and very hot, but is consumed faster. | Excellent for kindling and for a quick “boost” of heat to recover water temperature. Less ideal as a primary fuel source for sustained heating. |
The most effective strategy is often a mixed one: use hardwood for your long, steady burns and have some softwood on hand to rapidly bring a lukewarm tank up to a usable temperature.
Temperature Management
Managing the fire is really about managing the temperature of your water. An uncontrolled, roaring inferno can quickly lead to boiling water and a screaming pressure relief valve—a sure sign you’re overstressing the system.
- Ideal water temperature range: 42-50°C: This is the sweet spot. Water at this temperature is more than hot enough for showers and washing up, but it is not so scalding that it presents a major burn risk. More importantly, keeping the water below boiling prevents the creation of steam, which puts immense and unnecessary pressure on the entire system. Consistently overheating your boiler can lead to premature failure.
- Monitoring with fish tank thermometers: You don’t need a complex, digital monitoring system. One of the most reliable and cheap tools is a simple aquarium thermometer. These are designed to be submerged and are remarkably accurate. You can attach one with a suction cup to the side of your hot water storage tank, ideally near the top where the hottest water resides. A quick glance tells you everything you need to know: time to add wood, or time to dampen the fire down. It’s a brilliantly simple solution to a critical data point.
For those looking to take the guesswork out of wood selection, the TimberTech Moisture Meter Pro offers a quick and reliable way to ensure your fuel is perfectly seasoned for maximum efficiency and safety. Check it out here: [Insert Affiliate Link Here]
【Essential Maintenance Schedule】
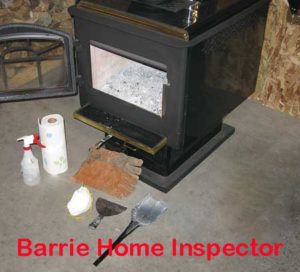
Think of your wood stove water heater not as an appliance, but as a robust, yet slightly demanding, member of your household. It works hard for you, and in return, it asks for a little regular attention. Neglect it, and it will eventually protest with reduced efficiency, or worse, a costly failure. A disciplined maintenance schedule is the key to a long, productive, and safe relationship with your system.
Weekly Cleaning Routine
This is the basic hygiene of your system. A quick once-over each week keeps everything running smoothly and allows you to spot potential issues before they become emergencies.
Ash Management Protocol
A bed of ash is not the enemy; a thin layer (about an inch) actually helps your fire by reflecting heat and making it easier to build a new one. But let it build up too much, and it will insulate the firebox from the water jacket, drastically reducing your heat transfer efficiency.
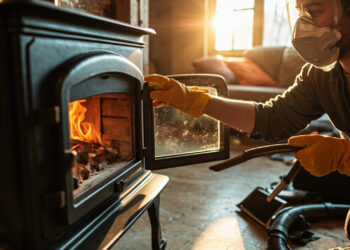
- Safe ash disposal after complete cooling: This cannot be overstated. Embers can hide within ash for days, retaining enough heat to ignite a trash bag or anything else combustible. The only safe procedure is to wait at least 48 hours after your last fire before even considering ash removal. When you do remove it, transfer the ash into a dedicated metal bucket with a tight-fitting lid. Place this bucket on a non-combustible surface like a concrete floor, well away from any walls or flammable materials. Only when the ash in the bucket is stone-cold should you dispose of it. Many gardeners cherish wood ash for its potassium content, so your “waste” can become a prized soil amendment.
- Ash vacuum vs. traditional removal methods: The old-fashioned method involves a small metal shovel and a metal bucket. It works, but it’s dusty. A far superior tool for 2025 is a dedicated hot ash vacuum. Unlike a standard shop vac, these are specifically designed to handle fine, hot particulates without melting the internal components or creating a dust explosion hazard. They make the job remarkably clean and efficient. If you’re using the traditional method, wear a dust mask and work slowly to minimize airborne ash.
Glass Door Maintenance
A clean glass door is not merely an aesthetic luxury; it’s a functional necessity. It allows you to monitor the state of your fire, ensuring it’s burning cleanly and efficiently.
- Specialized glass cleaner vs. ultra-fine steel wool: The black, tarry film that builds up on the inside of the glass is creosote. When the glass is cool, the best method is to dampen a paper towel or cloth with a specialized stove glass cleaner. Its chemical formula cuts through the creosote effectively. For more stubborn deposits, a slightly damp piece of ultra-fine (#0000) steel wool is remarkably effective and, despite what you might think, will not scratch the ceramic glass if used gently. Never use abrasive kitchen scouring pads.
- Preventing permanent staining from creosote: The secret to an easy clean is to never let the creosote bake on. A weekly wipe-down prevents the buildup from being “fired on” during subsequent hot burns, which can create a permanent, etched stain. A clean view is a window into a well-managed fire.
Monthly Inspection Checklist
Once a month, when the system is completely cold, dedicate fifteen minutes to a hands-on inspection. This proactive habit is what separates a well-maintained system from a neglected one.
Gasket Integrity Testing
The gaskets, especially the one around the door, are the guardians of your stove’s efficiency. A compromised seal allows excess air to leak in, robbing you of control over the burn and wasting a significant amount of heat.
- Paper test method for door seal assessment: A simple, time-tested method is the “dollar bill test.” Take a piece of ordinary paper (a dollar bill works because it’s thin and sturdy), close the door on it, and try to pull it out. You should feel a firm, even resistance all the way around the door. If the paper slips out easily at any point, the gasket at that spot is worn and needs replacement.
- Annual replacement cycle for heavy use: For a system that sees daily use, particularly through a cold winter, planning to replace the main door gasket once a year is a wise and inexpensive form of preventative maintenance. It’s a small price to pay for peak performance.
Component Wear Assessment
The intense heat inside a firebox is a harsh environment. Internal components will degrade over time, and catching this early is crucial.
- Firebox insulation thickness measurement: Many stoves have refractory bricks or boards lining the firebox. Over many heating seasons, these will slowly erode. Consult your stove’s manual for the minimum safe thickness. Regularly check for cracks or significant wear, as this insulation is vital for maintaining high combustion temperatures and protecting the outer steel or cast iron.
- Vermiculite panel replacement indicators: Some models use vermiculite panels instead of bricks. These are more fragile. Look for any signs of bowing, major cracking, or pieces that have broken off. Even a small gap can allow heat to concentrate in the wrong spot and damage the firebox wall. Replacing a $50 panel is far better than replacing a $500 water jacket.
For a truly dust-free ash removal experience, the AshMaster Pro vacuum is specifically engineered for this tough job, making your weekly clean-up safer and simpler. You can find more information on this essential tool here: [Insert Affiliate Link Here]
【Troubleshooting Common Problems】
Even the most meticulously maintained wood stove water heater will occasionally have an off day. The system is a conversation between fire, water, and metal, and sometimes they have a minor disagreement. The key is to understand the language of these problems so you can mediate a quick resolution.
Performance Issues
When the system isn’t performing as it should, it’s almost always a story of poor combustion or poor heat transfer. The symptoms are simple: you’re not getting enough hot water, or you’re filling your house with smoke.
Low Heat Output Solutions
You’ve stoked a good fire, but the water in the tank remains stubbornly tepid. Before you blame the stove, consider the two most common culprits.
- Checking for chimney blockages: Your chimney is the engine of your stove; it’s what creates the draft that pulls air in and pushes exhaust out. A partial or complete blockage is like putting a bag over that engine’s mouth. Birds’ nests, accumulated soot, or even a poorly placed damper can all strangle your draft. A tell-tale sign is a fire that is lazy, difficult to start, or that smokes back into the room. An annual chimney inspection and cleaning is non-negotiable, but if you suspect a mid-season blockage, it’s a job for a professional.
- Verifying wood quality and dryness: This is, by far, the most frequent cause of poor performance. Burning wet or unseasoned wood is a terribly inefficient process. A huge amount of the fire’s energy is wasted on boiling the water inside the wood instead of heating the water in your tank. The result is a cool, smoky fire and a rapid buildup of creosote in your flue. Your wood should be seasoned for at least one, and preferably two, years. Invest in a moisture meter; for optimal efficiency in 2025, your split wood should read 20% moisture content or less. If you tap two pieces together, they should make a sharp “clack,” not a dull “thud.”
Excessive Smoke Diagnosis
A properly functioning wood stove water heater should produce barely visible vapors from the chimney. If you’re producing a cloud worthy of a steam locomotive, the system is telling you it’s not happy.
- Airflow control adjustment techniques: Smoke is unburned fuel. It appears when the fire isn’t getting enough air (oxygen) to achieve complete combustion. First, ensure your air intakes are fully open when starting the fire. Once a good coal bed is established and the fire is roaring, you can begin to dampen the primary air intake to control the burn rate. However, closing it down too much, too early, will smother the flames and create smoke. The goal is to find the sweet spot where the flames are still lively, not lazy and sooty.
- Chimney cleaning frequency guidelines: A dirty chimney with creosote buildup restricts airflow and cools the flue gases, killing the draft. This poor draft prevents the stove from drawing in the air it needs, creating a vicious cycle of smokey, inefficient combustion. There is no one-size-fits-all schedule, but if you notice more smoke than usual, it’s a strong indicator that your chimney is due for a cleaning. For a system used daily, two cleanings per heating season may be necessary.
Safety Concerns
Performance issues are frustrating, but safety concerns are non-negotiable. These are the problems that demand your immediate and full attention.
Overheating Prevention
An over-firing stove is a dangerous situation. The system can reach temperatures that damage its own components and pose a serious fire risk to your home.
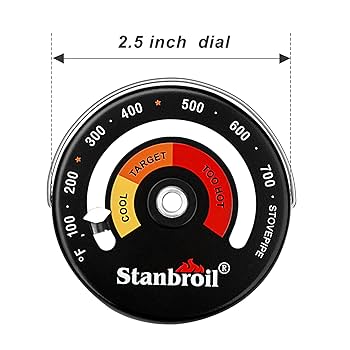
- Temperature gauge placement recommendations: You cannot manage what you do not measure. A magnetic stovepipe thermometer is an inexpensive and essential device. It should be placed on the single-wall stovepipe, about 18 inches above the stove. This allows you to see the temperature of the exhaust gases. The ideal operating zone is typically between 250°F and 450°F (120°C – 230°C). A consistently higher reading indicates an over-fire condition. For the water side, a simple boiler thermometer attached to the outlet pipe from the water jacket will tell you the temperature of the water being sent to your tank.
- Emergency shutdown procedures: If you suspect your stove is over-firing—characterized by a roaring sound, an intensely bright firebox, and a stovepipe thermometer deep into the “overfire” zone—you must act calmly and quickly. Do not open the door, as this will introduce a surge of oxygen and worsen the situation. Instead, immediately close all the air intake controls on the stove to their minimum setting. This will starve the fire of oxygen. Monitor the situation closely. Having a fire extinguisher rated for Class A fires nearby is a fundamental safety requirement.
Leak Detection and Repair
Water and fire are ancient enemies, and a leak in your system is the battlefield. Even a small drip can lead to steam formation or significant water damage.
- Common leak locations in DIY systems: The most vulnerable points are always the connections. Check all threaded fittings, unions, and the points where pipes enter and exit the water jacket. Over time, the repeated heating and cooling cycles can cause fittings to loosen. Also, inspect the water jacket itself for any signs of corrosion or pinhole leaks, particularly around the welds. A small leak when the system is cold will often become a much more significant spray when the system is hot and pressurized.
- Professional repair vs. temporary fixes: This is a critical distinction. For a leaking threaded fitting, tightening it with a wrench when the system is cold and depressurized is a reasonable first step. However, for any leak originating from the water jacket itself or a corroded pipe, this is not a DIY repair. Do not attempt to use standard plumbing epoxy or tape on a pressurized, high-temperature system; it will fail, catastrophically. A pinhole leak in a water jacket is a definitive sign that you need to shut the system down and contact a professional. A temporary fix here is an invitation to a major failure.
For accurate monitoring that prevents emergencies, the reliable HeatWatch Pro thermometer provides precise readings for both stovepipe and water temperatures, giving you the confidence to manage your system safely. Check its current specifications and pricing here: [Insert Affiliate Link Here]
【Maximizing Efficiency and Longevity】
Once you’ve moved past simply keeping your wood stove water heater alive and have tamed its more temperamental moods, the next chapter of your relationship begins: the art of fine-tuning. This is where you coax every possible unit of heat from your logs and ensure the entire apparatus keeps happily chugging along for years, or even decades. It’s a satisfying pursuit that pays you back in lower wood consumption and a profound sense of domestic competence.
System Optimization Strategies
Think of the heat generated by your stove as a precious commodity that you don’t want to waste. The goal of optimization is to ensure that as much of that commodity as possible ends up in your water tank or warming your home, rather than escaping uselessly up the chimney or into the basement air.
Heat Distribution Improvements
Your system’s primary job is to heat water, but the journey the heat takes to get there offers opportunities for bonus warmth.
- Adding secondary radiators: If your stovepipe runs through a space you’d like to heat, such as a workshop or garage, you are sitting on a golden opportunity. Installing a simple pipe-loop radiator is a remarkably effective way to reclaim this otherwise wasted heat. These devices are essentially a series of fins or loops that attach to your single-wall stovepipe, increasing its surface area and radiating heat into the room. A typical 1kW capacity unit, which is often sufficient for a small space, can make a dramatic difference. It’s like discovering a free space heater you never knew you had. Just remember, these should only be installed on single-wall pipe, never on a chimney, and with proper clearance from combustibles.
- Thermosiphon enhancement techniques: The thermosiphon effect is the silent, pump-free engine of your system, relying on the simple principle that hot water rises and cold water sinks. To help it along, ensure all your water pipes have a consistent, upward slope from the stove’s water jacket to the storage tank—a minimum of 1/4 inch per foot is a good rule of thumb. Avoid any unnecessary dips or U-bends that could create airlocks, which are the arch-nemesis of natural circulation. Using smooth, wide-radius elbows instead of sharp 90-degree fittings also reduces flow resistance, making it easier for the hot water to make its journey.
Insulation Upgrades
If improving heat distribution is about capturing more gains, then insulation is about preventing losses. It is, without a doubt, the most cost-effective upgrade you can make.
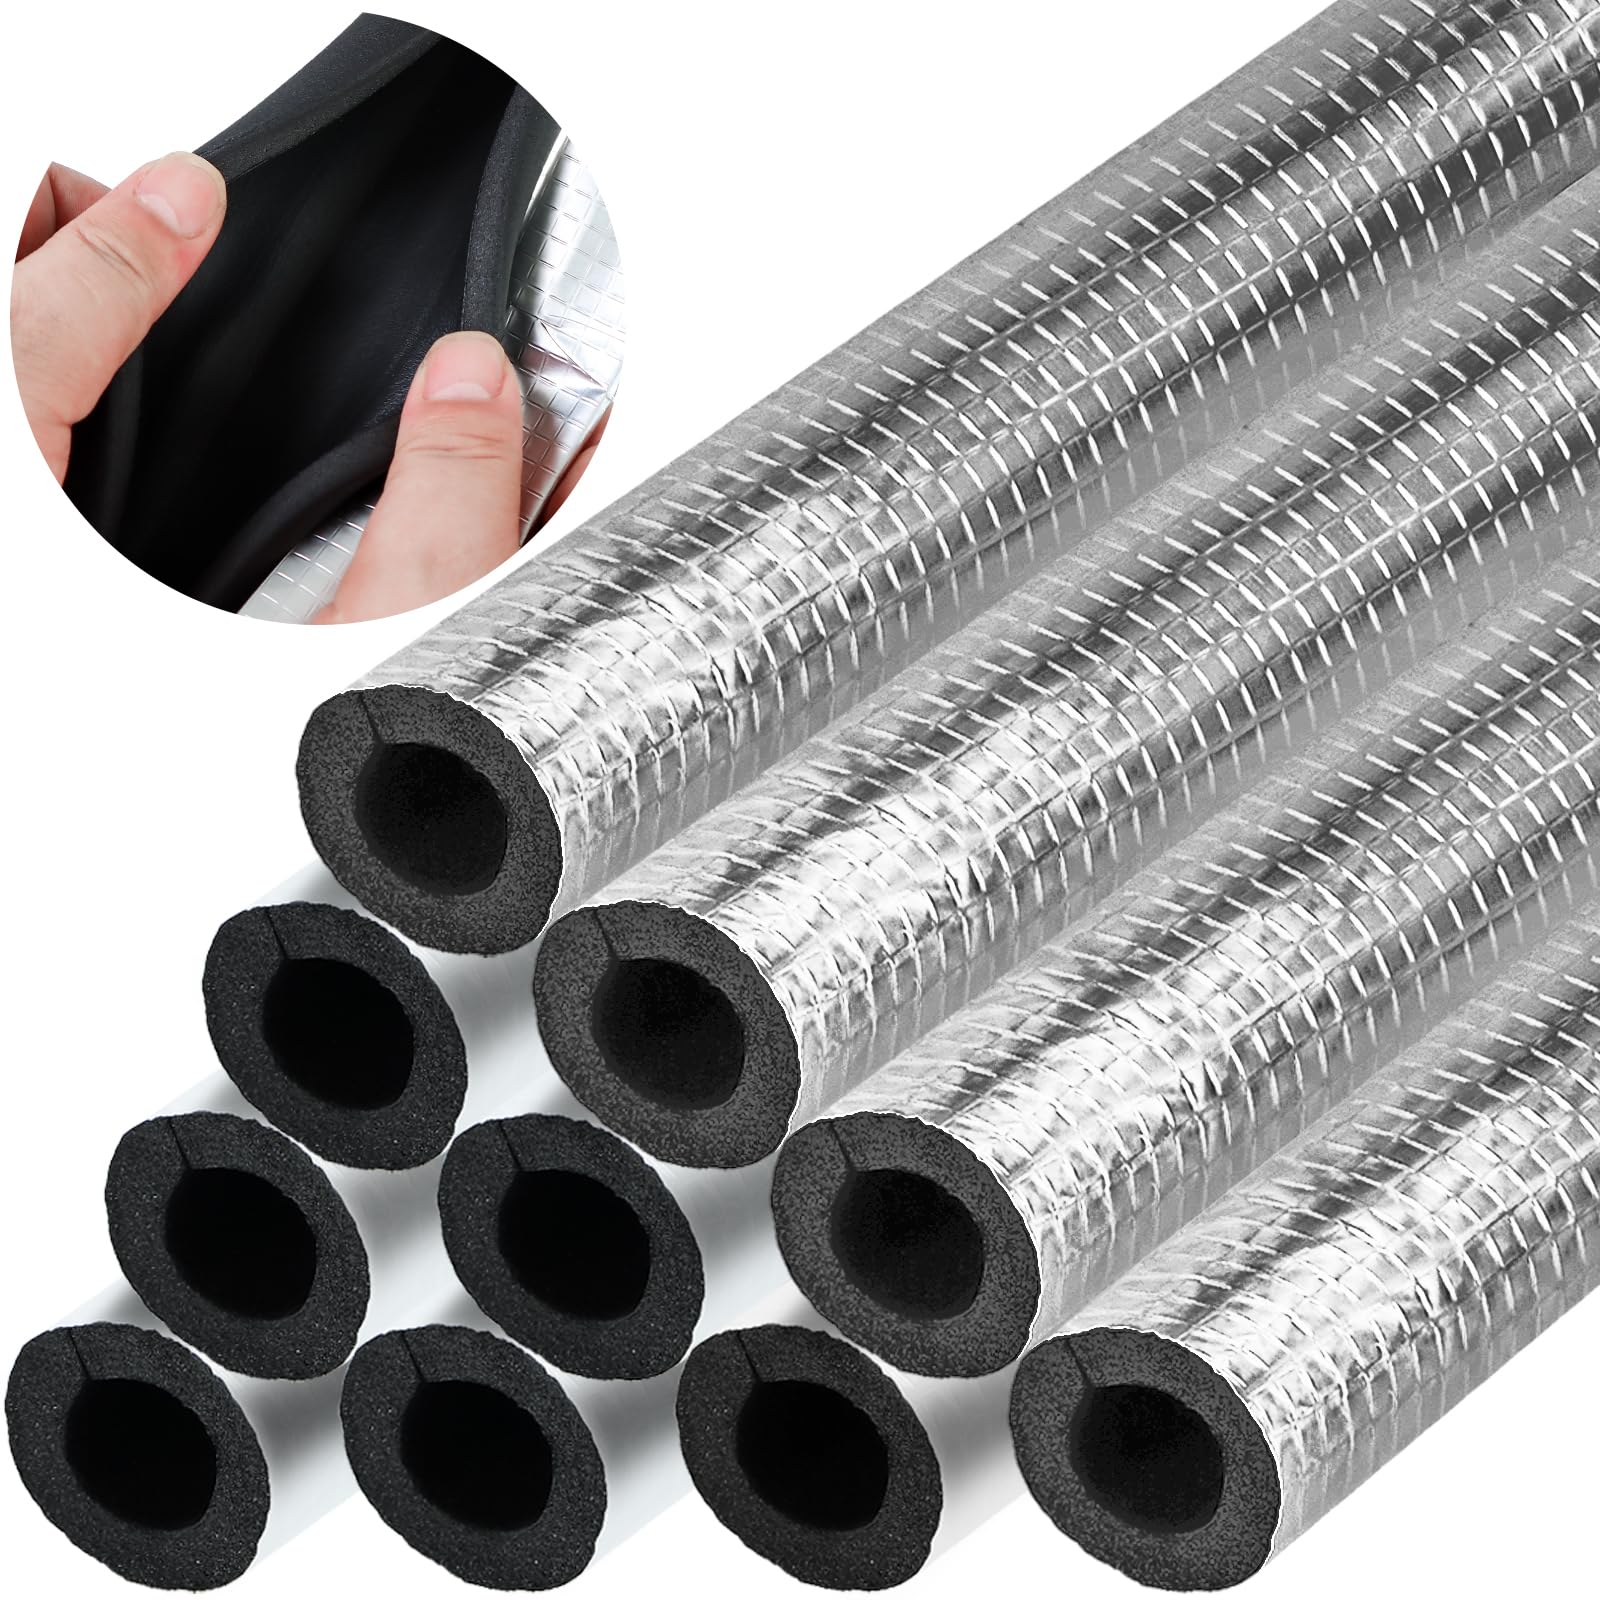
- Pipe insulation ROI: 15-25% efficiency gain: Leaving your hot water pipes uninsulated is like trying to fill a bathtub with the plug out. A tremendous amount of heat is lost to the surrounding air as the water travels from the stove to the tank. By properly insulating all pipes carrying hot water, you can realize an efficiency gain of 15 to 25 percent. This means your water reaches the tank hotter, your stove works less, and you burn less wood. The return on investment for a few dollars’ worth of insulation is almost immediate.
- Cost-effective insulation materials comparison: For the DIY enthusiast, the choice typically comes down to two main options:
Material Pros Cons Best For Flexible Foam Tubing Inexpensive, very easy to install, sufficient for most applications. Lower maximum temperature tolerance. Can be damaged easily. Interior spaces, where pipes are not in extreme heat. Fiberglass Pipe Wrap Withstands very high temperatures, more durable. More expensive, installation is messier and requires wearing protective gear. Pipes close to the stove, attics, or other high-heat areas.
Seasonal Preparation
A wood stove water heater is a system deeply in tune with the seasons. A little proactive care as the world changes outside your window will save you from frantic, cold-weather repairs and ensure the system is ready to go when you need it.
Winterization Procedures
When the mercury drops, the stakes rise. The primary enemy is freezing, which can burst pipes and water jackets with catastrophic results.
- Freeze protection for outdoor components: Any part of your system that passes through an unheated space like a crawlspace, garage, or the great outdoors needs protection. For pipes, the best defense is the insulation mentioned above, but in severely cold climates, this may not be enough. Wrapping insulated pipes with heat trace cable, which is a electrical heating element that thermostatically turns on when temperatures approach freezing, provides a foolproof solution.
- System drainage when unused: If you plan to be away for an extended period during freezing weather, or if you shut the system down for the season, the safest course of action is to drain it completely. This includes the water jacket of the stove itself and all associated pipes. Open all drain valves and leave them open. It’s a simple, surefire way to guarantee that expanding ice won’t turn your carefully maintained system into a scrap metal project.
Spring Maintenance
When the heating season ends, a bit of disciplined tidying up will set the stage for a trouble-free start next autumn.
- Complete system inspection checklist: With the system cold and depressurized, give it a thorough once-over.
- Visual Inspection: Check the firebox for cracked bricks or worn grates. Look over the water jacket and all pipe connections for any signs of rust, corrosion, or minor leaks you may have missed during operation.
- Gasket Check: Feel the door gasket for brittleness or cracking. A poor seal will ruin your efficiency.
- Valve Operation: Exercise all drain valves and pressure relief valves to ensure they aren’t seized shut. It’s better to discover this in the spring than during a panic next winter.
- Chimney cleaning before off-season: This is the perfect time for your end-of-season chimney sweep. Removing creosote now, rather than letting it sit and harden in the chimney all summer, makes the job easier for your sweep and prevents that acidic gunk from eating away at your flue liner during the humid months. A clean, dry chimney is a happy chimney.
For those looking to implement these insulation upgrades with confidence, the ThermoSleeve Pro pipe insulation kit offers high-temperature resistance and is simple to install, ensuring your hard-earned heat makes it to the tank. You can find more details and the best available price for the 2025 model here: [Insert Affiliate Link Here]
【Beyond Basics: Advanced Applications】
Once you’ve mastered the art of efficiency and seasonal care, you might start to wonder: what else can this system do? The humble wood stove water heater, it turns out, is a remarkably versatile platform. With a bit of engineering ambition, it can evolve from a simple hot water provider into the robust, beating heart of an entire homestead, capable of handling everything from warming your floors to seeing you through a power outage.
Whole-House Heating Integration
Connecting your wood stove to your home’s central heating is the pinnacle of extracting value from a cord of wood. It’s a step that transforms the appliance from a room heater into a whole-house furnace.
Radiant Floor System Connection
Radiant floor heating is the perfect partner for a wood-fired system. It thrives on the kind of steady, lower-temperature heat that a water heater stove produces so well, creating a wonderfully even and comfortable warmth.
- Heat exchanger sizing calculations: Here, you cannot simply guess. Dumping stove-heated water directly into your expensive floor pex tubing is a recipe for disaster due to potential pressure differences and contaminants. You must use a heat exchanger. Sizing it requires a simple calculation: determine the BTU output of your stove and the required BTU load for the floor area you wish to heat. The heat exchanger must be capable of transferring that amount of heat. A common rule of thumb is to select a plate heat exchanger with a capacity 1.2 to 1.5 times your stove’s maximum output to ensure effortless heat transfer and some room for error.
- Temperature control valve installation: Your floors don’t need, and won’t tolerate, the near-boiling temperatures your stove can produce. A thermostatic mixing valve is absolutely critical. It is installed on the supply line to your floor loops and automatically blends in cooler return water to maintain a safe, consistent temperature for your flooring system, typically between 100°F and 120°F (38°C – 49°C). This protects your floor and prevents the system from turning your home into a sauna.
Domestic Hot Water Systems
Using your wood stove to provide all the hot water for your sinks and showers is the most common advanced application, and getting it right is a matter of storage and backup.
- Storage tank sizing guidelines: The key to happiness here is a large, well-insulated storage tank. A tank that is too small will force you to constantly feed the stove and will lead to overheating. A general guideline is to have a minimum of 80 liters (about 20 gallons) of storage capacity for every kilowatt (kW) of your stove’s output. So, a 15kW stove would pair well with a 1,200-liter (approximately 300-gallon) tank. This large thermal mass soaks up heat from a good fire and can provide hot water for a day or more without needing a reload.
- Backup heating source integration: Unless you plan on stoking the fire 365 days a year, a backup heat source is non-negotiable. The most common method is a twin-coil tank, where the lower coil is connected to the wood stove and the upper coil is connected to a conventional boiler, electric immersion heater, or solar thermal system. The backup source only kicks in when the water temperature drops below a set point, ensuring you’re never without a hot shower. It’s the perfect marriage of old-world grit and modern convenience.
Sustainable Living Applications
For those looking to reduce their reliance on the grid, a wood stove water heater becomes more than an appliance; it’s a core component of a self-sufficient lifestyle.
Off-Grid System Design
Living off-grid means rethinking how to move water, as the thermosiphon effect has its limits, especially with complex plumbing layouts.
- 12V pump circulation systems: The solution is a low-voltage DC pump. These pumps, often found in solar hot water systems, are remarkably efficient and can be powered by a modest battery bank charged by a solar panel. They provide the gentle flow needed to move hot water from the stove to a distant or elevated tank, freeing your system design from the strict constraints of gravity. Look for pumps specifically rated for high temperatures.
- Solar-assisted wood heating combinations: This is the ultimate renewable energy pairing. A solar thermal panel on the roof pre-heats water in your storage tank for free whenever the sun is shining. The wood stove then stands ready to bring the water up to the desired temperature on cloudy days or during high demand. This combination can drastically reduce your wood consumption, sometimes by as much as 60% during the sunnier months, making your woodpile last significantly longer.
Emergency Preparedness
In an age of uncertainty, the value of a system that operates independently of the electrical grid cannot be overstated.
- Power outage operation capabilities: A properly designed thermosiphon system will continue to provide hot water and even some space heating indefinitely during a blackout, with no fuel for a generator required. This capability for silent, resilient operation is a profound source of security, ensuring you can maintain basic sanitation and comfort when modern infrastructure fails.
- Multi-fuel adaptability considerations: While wood is the primary fuel, some situations may call for burning what’s available. Many stoves can be fitted with a coal-burning grate, allowing you to burn coal, which provides a longer, slower burn time. It’s wise to understand your stove’s capabilities and keep the necessary parts on hand. This flexibility turns your system into an all-hazards solution, ready to burn whatever fuel is most readily available in a crisis.
For those designing a robust domestic hot water system, the 2025 model of the HeatStone 300-Gallon Twin-Coil Tank provides exceptional thermal storage and seamless integration with both wood heat and a backup electric or solar source. Its advanced glass lining offers superior corrosion protection for long-term reliability. You can check its current specifications and pricing here: [Insert Affiliate Link Here]
【Cost-Benefit Analysis: Is It Worth It?】
So, you’re captivated by the engineering elegance and the romantic notion of a wood-fired heart for your home. But then the thoroughly modern, pragmatic part of your brain pipes up with a rather urgent question: “Yes, but what’s the damage?” Let’s run the numbers and see if the calculus of comfort and self-reliance actually adds up.
Financial Investment Breakdown
This is where the dream of rustic simplicity meets the reality of invoices and spreadsheets. The initial sticker shock can be significant, but it’s the long-term picture that tells the true story.
Initial Cost vs. Long-Term Savings
The upfront cost is the biggest hurdle. You’re not just buying a stove; you’re investing in a system—tanks, pipes, pumps, valves, and a considerable amount of professional labor. A full system integration for whole-house heat and hot water can easily run into the thousands. However, this is where you perform a delightful bit of financial jujitsu, using the high initial cost to throw your future heating bills into a headlock.
- Payback period: 2-4 years for most installations: This is the magic number. If your current method of heating water and your home involves propane, heating oil, or especially electricity, the savings can be dramatic. By displacing those costly fuels with cordwood—which, depending on your location and whether you cut it yourself, can be remarkably cheap or even free—the system can effectively pay for itself in a handful of heating seasons. After that payback period, the hot water and heat it provides feel almost free, aside of course from the sweat equity of stacking wood.
- Comparison with conventional heating systems: Consider the annual cost of running an electric water heater or an oil-fired furnace. Now, imagine slashing that bill by 60%, 80%, or even eliminating it entirely. The wood stove water heater isn’t an additional cost; it’s a replacement. While a new high-efficiency gas furnace also costs money, it still locks you into a lifetime of monthly gas bills. The wood stove severs that tie.
Maintenance Cost Projections
A wood-burning system is mechanical, and like all mechanical things, it requires some upkeep. It is not, however, a financial black hole.
- Annual maintenance budget: $100-300: This is a realistic estimate for the diligent owner. This budget covers annual professional chimney sweeping (absolutely non-negotiable for safety and efficiency), replacement gaskets for the stove door, and perhaps a new coat of high-temperature paint every few years. It’s a modest sum compared to annual service contracts for conventional oil or gas systems.
- Potential repair cost scenarios: The main things that can go expensively wrong are usually related to water. A circulation pump might fail, costing a few hundred dollars to replace. A more significant, though rare, event would be a leak in the heat exchanger inside the stove, which is a major repair. The key to avoiding catastrophic costs is the same as with a car: proactive, regular maintenance is far cheaper than emergency repairs.
Environmental Impact Assessment
For many, the decision is not purely financial. It’s about treading a bit more lightly on the planet. Here, the wood stove water heater presents a fascinating and often misunderstood set of environmental credentials.
Carbon Footprint Reduction
The carbon argument for burning wood is nuanced. It is not zero-carbon, but it is often low-net-carbon.
- CO2 emissions compared to fossil fuel systems: When a tree grows, it absorbs carbon dioxide from the atmosphere. When you burn that wood, you release that carbon back. It’s part of a relatively short, biogenic carbon cycle. In contrast, burning fossil fuels releases carbon that has been locked underground for millions of years, adding new carbon to the atmospheric cycle. Furthermore, a modern, efficient stove burning dry wood produces remarkably little smoke, minimizing other particulate emissions. When you replace an oil or propane system, you are making a significant net reduction in your household’s carbon footprint.
- Sustainable wood sourcing guidelines: The environmental benefit hinges entirely on this point. The wood must come from sustainably managed local forests. This means the woodlot you source from is growing more wood than it is harvesting. Using scrap wood from local arborists or fallen wood from your own property is even better. The moment you start burning wood that has been shipped cross-country or harvested from old-growth forests, the green credentials evaporate faster than a drop of water on a hot stove.
Efficiency Metrics
This is where the engineering brilliance shines through. You are capturing and using energy that would otherwise be wasted.
- Typical system efficiency: 75-85%: A standalone wood stove is good at heating a room, but a lot of heat goes straight up the flue. The water heater jacket or internal coils change the game. By actively pulling heat from the firebox and into your water tank, they boost the overall efficiency of the appliance dramatically. You are squeezing every last joule of usable energy from your fuel.
- Heat recovery from otherwise lost energy: This is the most compelling efficiency argument. Without the water heater component, the vast majority of the heat from your fire is simply radiation into the living room and then conduction up the chimney. The water heater actively reclaims a huge portion of that “lost” energy and stores it in a tank for use hours later, in a different part of the house. You are not just making heat; you are capturing, storing, and transporting it.
For a system that maximizes both financial and environmental efficiency, the 2025 model of the HeatStone 300-Gallon Twin-Coil Tank is an excellent investment. Its superior insulation ensures the heat you generate stays in your water, not in your basement, and its robust design minimizes long-term maintenance concerns. You can check its current specifications and pricing here: [Insert Affiliate Link Here]
Final Verdict: Is a Wood Stove Water Heater Right for You?
The journey through thermosiphon principles, system selection, installation, and maintenance reveals a clear path. A wood stove water heater is not just an appliance; it’s a strategic investment in resilience and efficiency. The core benefits are undeniable: dramatic reductions in energy costs, enhanced off-grid capability, and the profound satisfaction of harnessing a simple, powerful physical process. The initial investment is often recouped within a 2-4 year payback period, after which you lock in incredibly low-cost heating. Success hinges on proper installation, disciplined operation with seasoned wood, and a commitment to a simple maintenance schedule.
If you are ready to take control of your energy costs and build a more self-reliant home, the next step is clear. We’ve detailed the principles and practices; now it’s your turn to act. Share your thoughts or questions in the comments below, and if you found this guide valuable, please share it with others on a similar journey toward energy independence.