
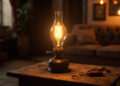
Did you know that a layer of dust can reduce your oil lamp’s light output by up to 30%? Proper maintenance is not just about aesthetics—it’s about preserving functionality and value. This comprehensive 2025 guide delivers expert techniques for cleaning oil lamp shades and glass components, ensuring optimal illumination while protecting your investment. Whether you own delicate fabric shades, fragile paper designs, or crystal glass chimneys, you’ll discover material-specific methods that restore brilliance without causing damage.

Cleaning Oil Lamp Shades and Glass: A 2025 Practical Guide
The Impact of Clean Lighting
How Dust and Grime Affect Light Quality
A layer of dust might seem harmless, but it has a measurable impact on your lighting. Accumulated dust and soot can reduce light output by up to 30%, forcing your lamp to work harder to illuminate a space. Furthermore, grime on glass chimneys and yellowing on fabric or paper shades significantly diminish room ambiance by altering the light’s color temperature, casting a dull, murky glow instead of a bright, warm one.
Long-Term Benefits of Regular Maintenance
Consistent, proper cleaning is an investment in your lamp. It extends the lamp’s overall lifespan by preventing the long-term material degradation caused by acidic grime. For owners of vintage or designer pieces, this maintenance is crucial; a well-cared-for lamp retains a much higher resale value compared to a neglected one.
Understanding Your Lamp’s Anatomy
Common Oil Lamp Materials and Construction
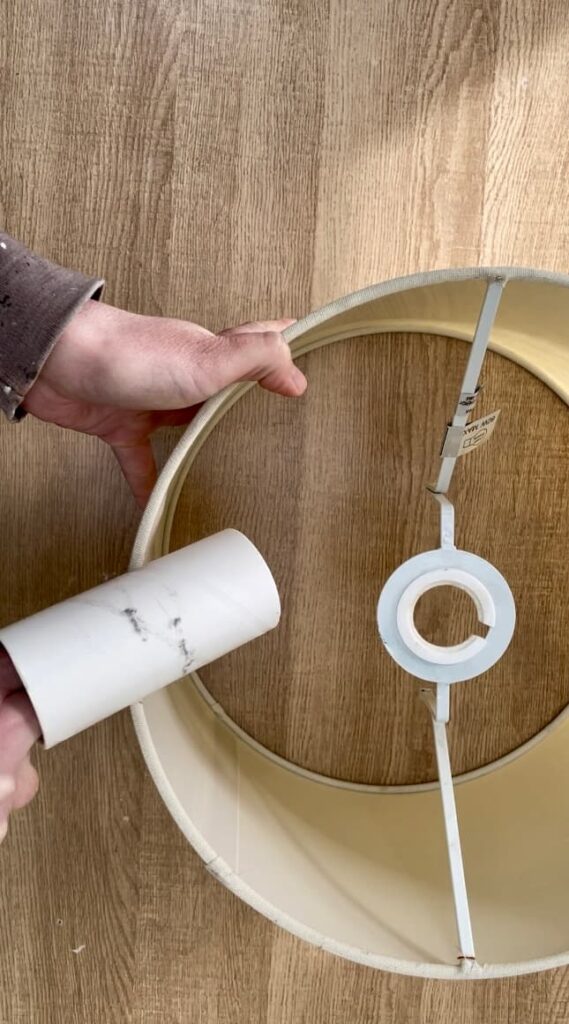
Oil lamps are crafted from a variety of materials, each requiring a specific cleaning approach. Shades are commonly made from traditional fabric, paper, or glass, and increasingly from modern synthetic materials. It’s critical to identify if a fabric shade is glued or sewn, as glued constructions can be damaged by liquid cleaners. The glass components, typically the chimney and font, also vary in thickness and fragility.
Safety First: Pre-Cleaning Protocol
Before any cleaning begins, a safety ritual is non-negotiable.
- Always ensure the lamp is unplugged (if electric) or has its flame completely extinguished and has cooled to room temperature.
- Handle all glass components with extreme care, supporting them with two hands to prevent accidental breakage and potential injury.
- Work on a stable, soft surface to cushion against drops.
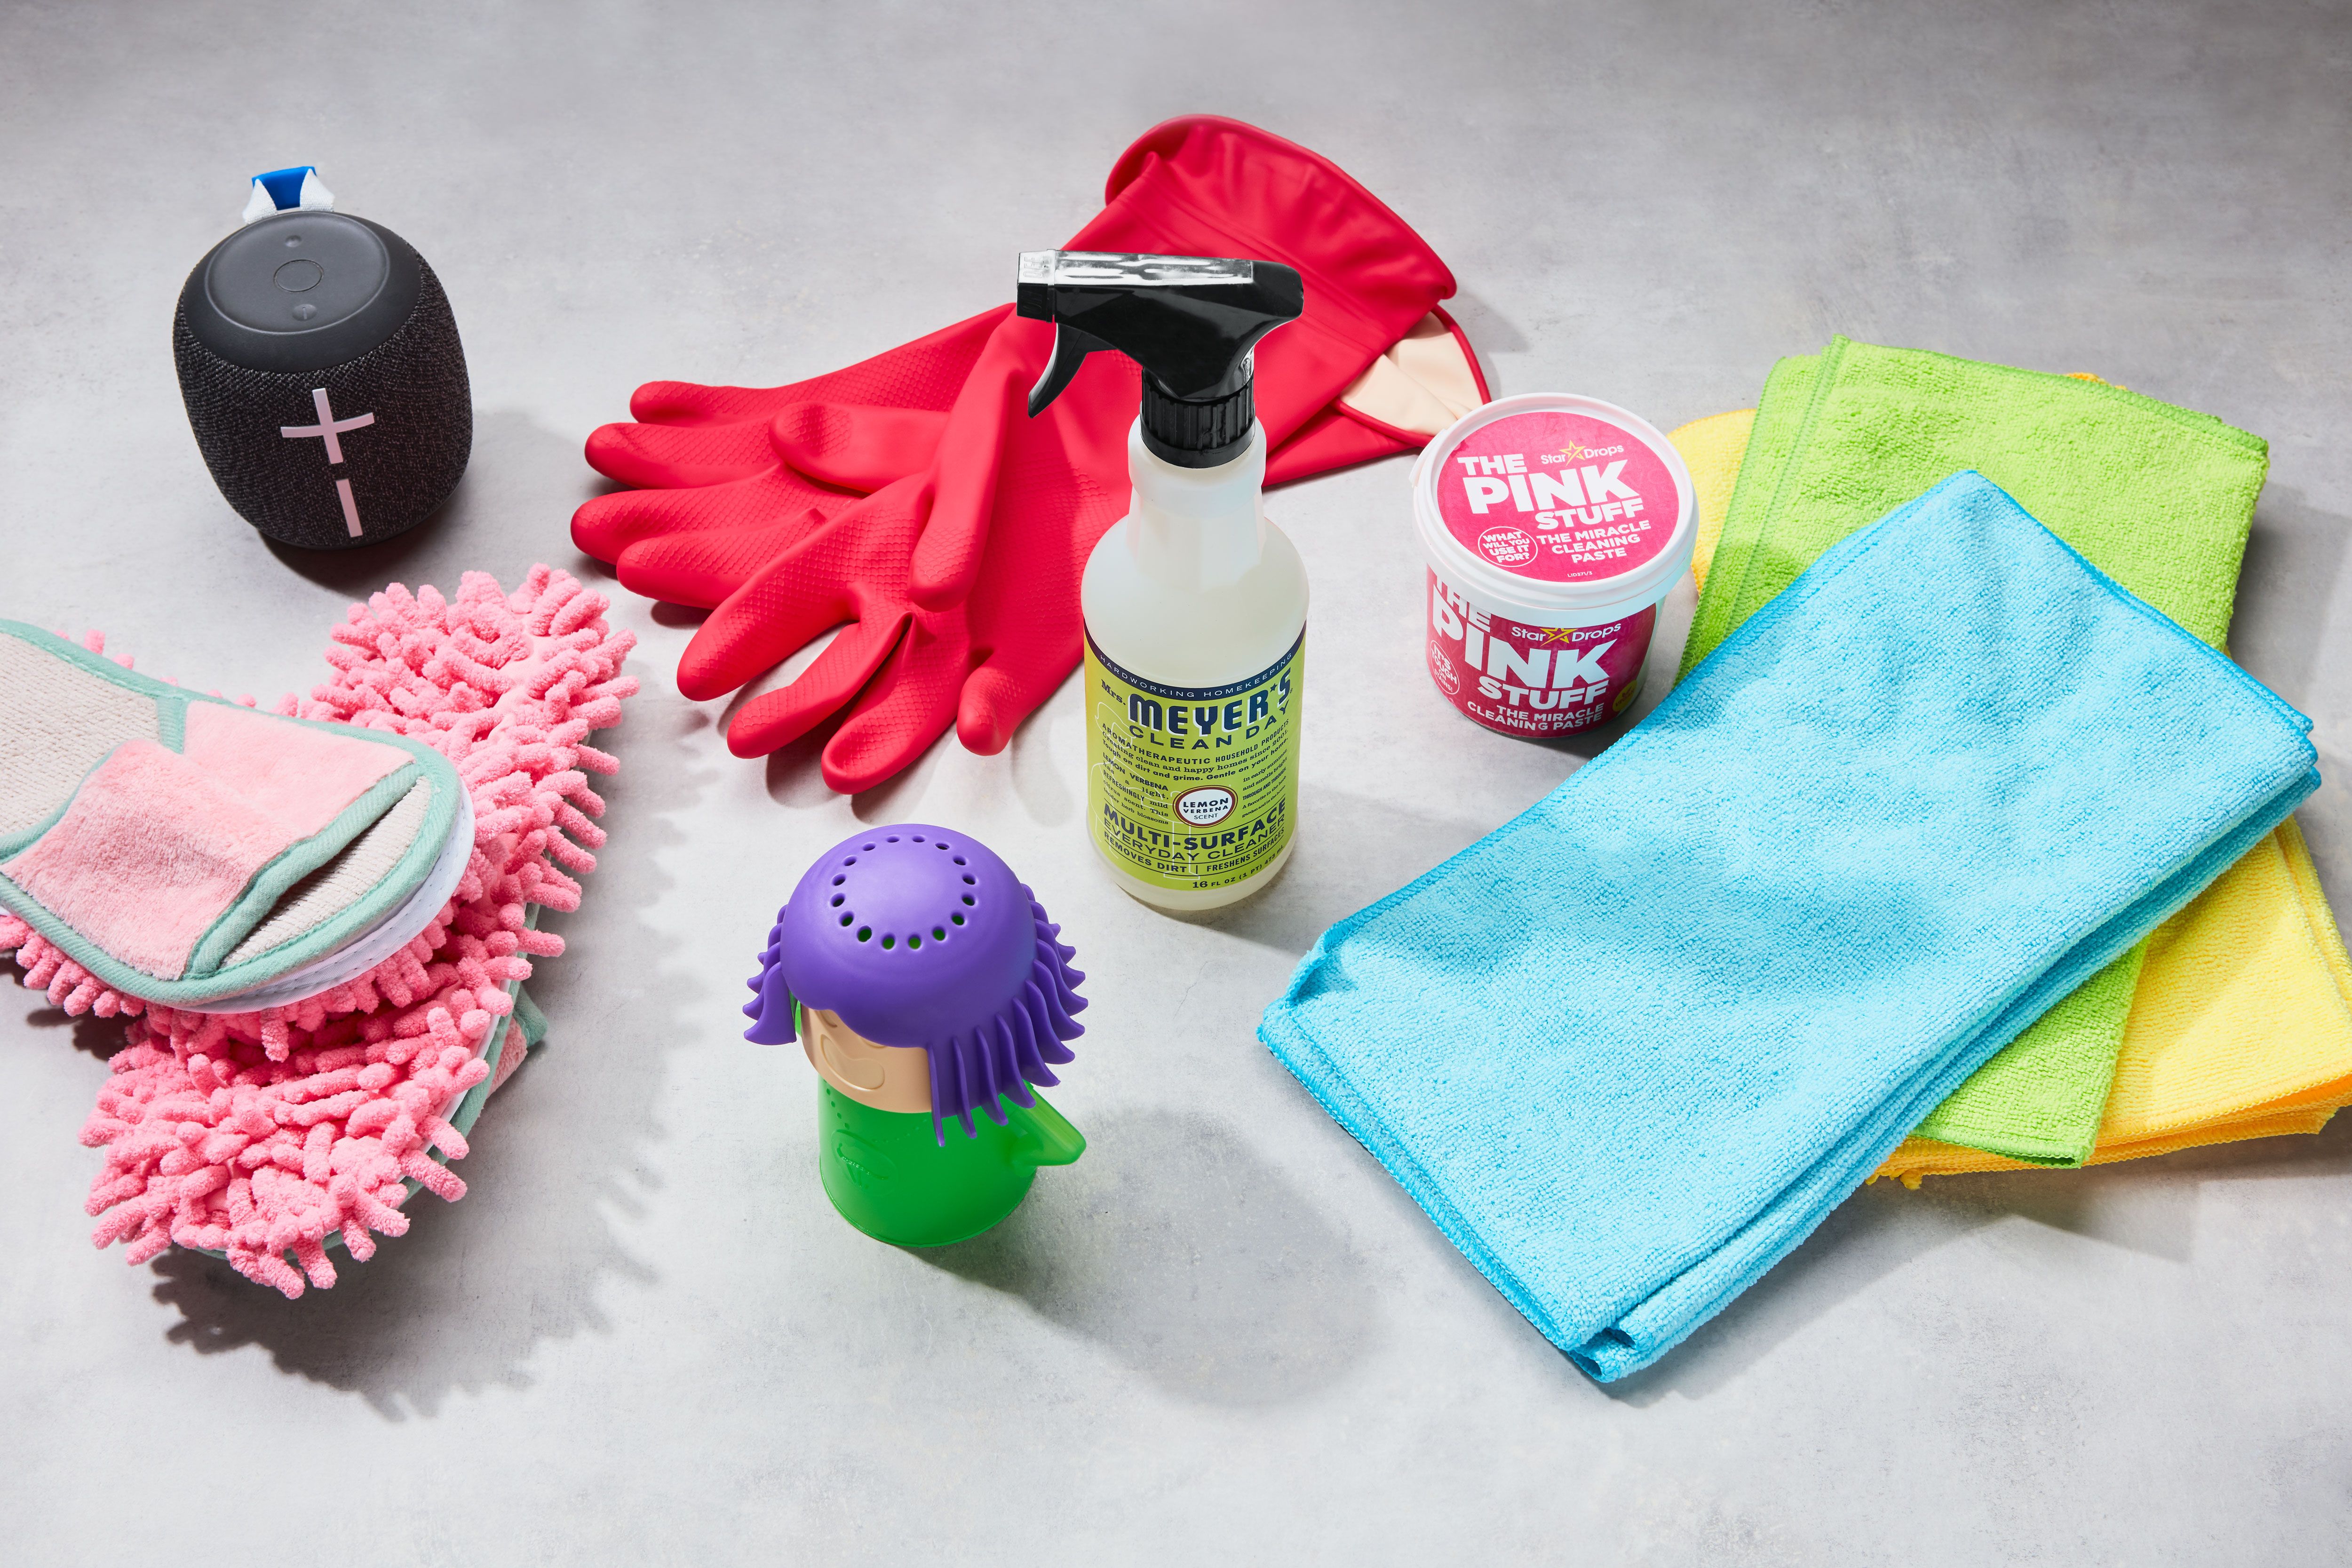
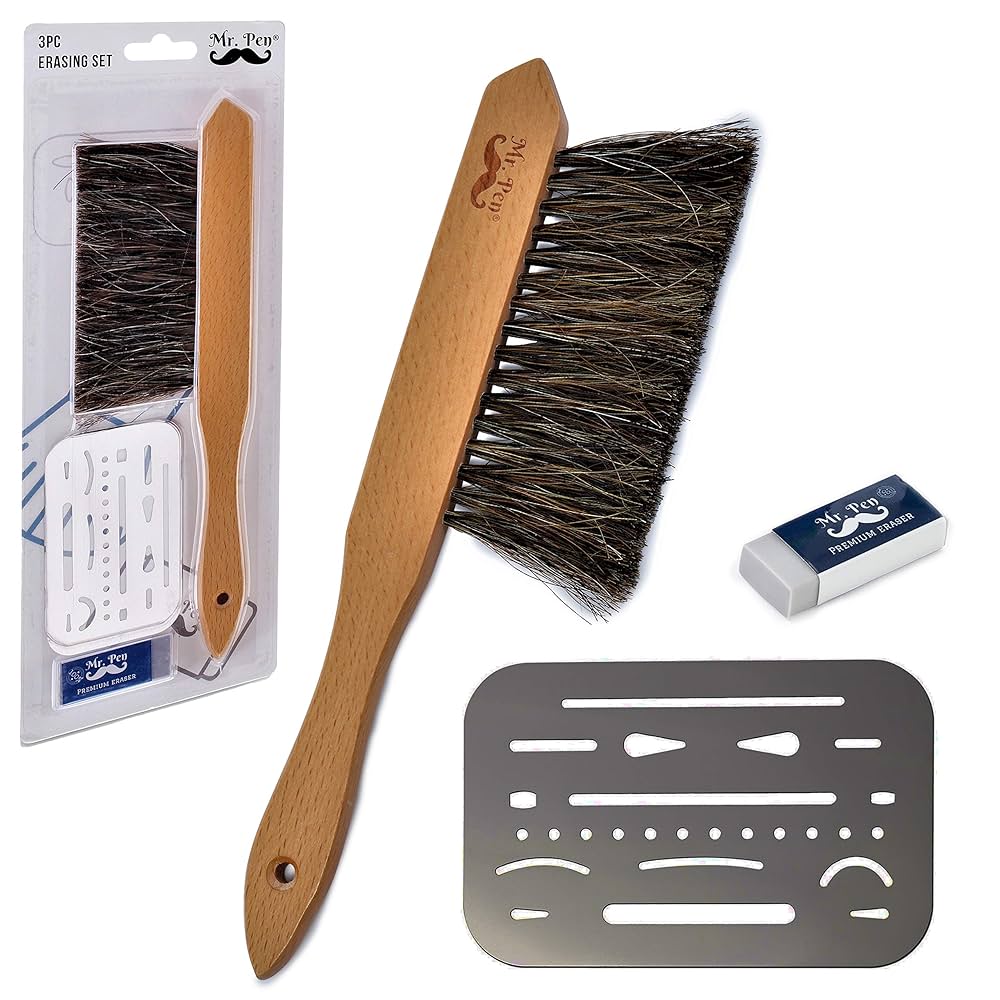
Essential Cleaning Supplies for 2025
Having the right tools makes the process efficient and safe. You likely have most of these at home.
| Item | Best Use Case |
|---|---|
| Microfiber cloths | Dusting and polishing glass without lint; general wiping. |
| Soft-bristled brush (e.g., paintbrush) | Gently dislodging dust from delicate fabric and paper shades. |
| Mild dish soap | Cutting through oily residue on glass and durable materials. |
| Distilled white vinegar | Dissolving hard water stains and mineral deposits on glass. |
| Isopropyl alcohol (70%) | Sanitizing and removing stubborn, sticky spots from glass. |
| Cotton swabs | Reaching intricate crevices and detailed metalwork. |
| Soft, lint-free cloths (e.g., cotton) | Drying and applying gentle pressure for final polishing. |
Step-by-Step Cleaning Methods
For Fabric and Paper Shades
These delicate shades require a gentle touch to avoid permanent damage.
- Dry Dusting: Use a dry, soft-bristled brush. Gently sweep the brush over the shade’s surface, always moving from the top seam downward to prevent dust from settling into the fabric. For pleated shades, carefully brush along the folds.
- Spot Cleaning: For localized stains, lightly dampen a microfiber cloth with distilled water. Test on an inconspicuous area first. Gently dab (do not rub) the stain. For glued shades, avoid moisture as it can weaken the adhesive.
- Drying: Ensure the shade is completely air-dried before placing it back on the lamp to prevent mold or warping.
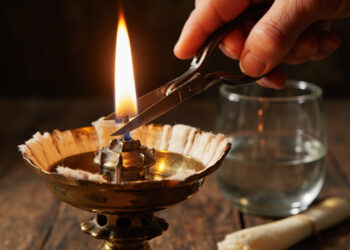
For Glass Chimneys and Shades
Glass cleaning focuses on clarity and streak-free results.
- Initial Rinse: If possible, rinse the glass chimney with lukewarm water to remove loose soot and dust.
- Deep Clean: Create a cleaning solution with a few drops of mild dish soap in a basin of warm water. Submerge the glass and wash it gently with a soft cloth. For hard water stains, a 1:1 solution of vinegar and water is more effective.
- Stubborn Soot Removal: For baked-on soot, isopropyl alcohol on a cotton pad can help break it down. Avoid abrasive scouring pads.
- Rinse and Polish: Rinse thoroughly with clean water to remove all soap residue. Dry and polish with a clean, lint-free microfiber cloth for a crystal-clear finish.
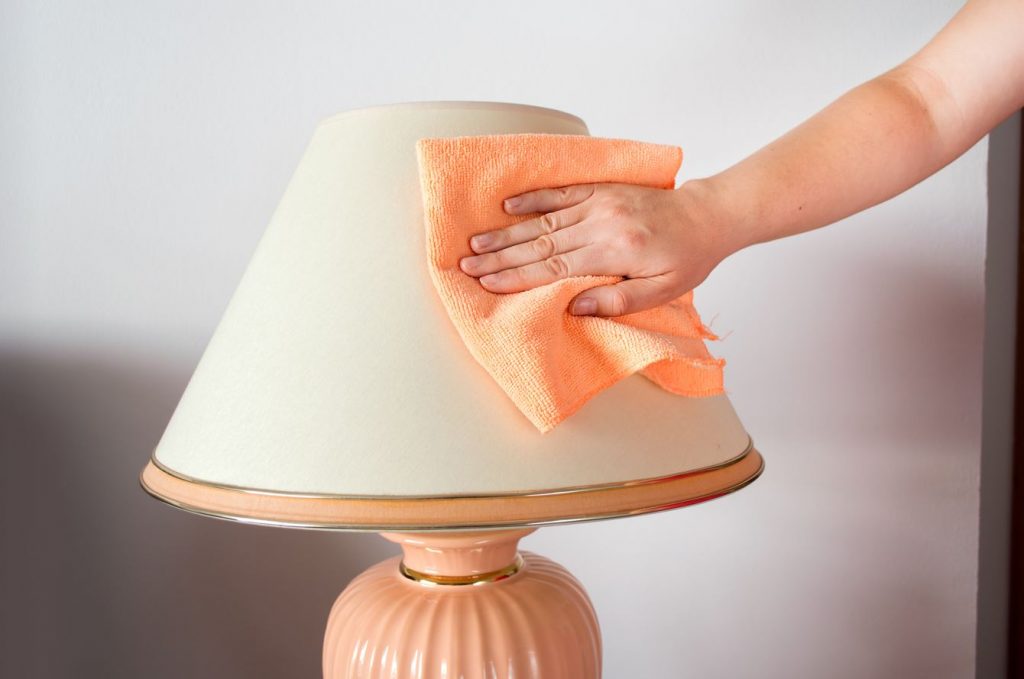
For Metal Components
Metal parts like the burner and base need attention to prevent tarnish.
- Dust Removal: Wipe with a dry microfiber cloth.
- Grease Removal: For oily residue, use a cloth dampened with a small amount of isopropyl alcohol.
- Polishing: Use a metal polish specifically formulated for the type of metal (e.g., brass, nickel). Always apply the polish sparingly and buff thoroughly to a shine.
Advanced Care and Troubleshooting
Dealing with Stubborn Stains and Discoloration
For set-in stains on glass, create a paste from baking soda and water, apply gently with a soft cloth, then rinse. Yellowing on vintage plastic or synthetic shades can sometimes be mitigated with a specialty plastic cleaner, but test it first as results can vary.
Restoration Tips for Vintage Finds
Vintage lamps require extra patience. Consolidate flaking or brittle paper shades with a specialty archival adhesive. When dealing with extremely fragile glass, consider consulting a professional conservator for cleaning and repair to preserve its historical and monetary value.
For those looking to upgrade their lighting after a deep clean, the [product] offers a brilliant and reliable flame. Learn more and find the perfect model for your home at [link].
Essential Cleaning Tools and Supplies
Having the right tools is the first step toward effective and safe lamp cleaning. The proper implements prevent damage to delicate materials and make the entire process more efficient. For 2025, the best approach combines classic, reliable tools with a few specialized items for tackling specific challenges.
Basic Toolkit for Every Home
This core set of supplies is versatile enough for most cleaning sessions and is likely already in your home.
Must-Have Cleaning Implements
- Microfiber cloths: These are the workhorses of lamp cleaning. Their electrostatic properties attract and hold dust and lint without scratching surfaces. White cloths are recommended as they won’t transfer any dye onto your lamp shades or glass.
- Soft-bristled brushes and natural paint brushes: A high-quality, soft-bristled brush (like a clean, natural-bristle paintbrush) is indispensable for dry dusting. The soft tips can dislodge dust from fragile fabric, intricate pleats, and paper shades without causing tears or snags.
- Lint rollers and static dusters: For fabric shades that are lightly soiled, a lint roller is excellent for a quick surface clean, effectively picking up pet hair, lint, and surface dust. Extendable static dusters are perfect for reaching the inside of a shade or the upper sections of a tall lamp without having to move it.
Specialized Tools for Different Materials
When your basic toolkit isn’t enough, these specialized tools can make a significant difference.
- Lampshade cleaning brushes for pleated designs: These brushes are specifically designed with bristles that can navigate the tight crevices of pleated, shirred, or gathered shades, ensuring no dust is left behind in the folds.
- Vacuum with upholstery attachment for fabric shades: For larger fabric shades with a significant accumulation of dust, use your vacuum cleaner on its lowest suction setting with a clean, soft-bristled upholstery attachment. Gently run the attachment over the surface without pressing down too hard.
- Compressed air for delicate paper shades: For extremely fragile or antique paper shades that cannot withstand any physical contact, a can of compressed air is the safest option. Use short, controlled bursts from a few inches away to blow dust out of the pleats and off the surface.
DIY Cleaning Solutions
Commercial cleaners can be too harsh for vintage finishes and delicate materials. For most cleaning tasks, a simple, homemade solution is not only safer but often more effective.
Gentle Homemade Cleaners
- Mild dish soap and water mixture: This is the go-to solution for general grime on glass and durable material shades. A ratio of about half a squirt of clear, mild (non-moisturizing) dish soap per quart of warm water provides enough cleaning power without leaving a soapy residue.
- Baking soda paste for stubborn stains: For baked-on soot or stubborn stains on glass components, make a thick paste from baking soda and a small amount of water. Gently apply it with a soft cloth, then rinse thoroughly. This acts as a very mild, non-scratching abrasive.
- Vinegar-water solution for glass components: To combat hard water stains, mineral deposits, and hazy film on glass chimneys, a 1:1 solution of distilled white vinegar and water is highly effective. It dissolves the minerals without the need for harsh chemicals.
Products to Avoid
Using the wrong product can permanently damage your lamp. Always avoid the following:
- Harsh chemicals that damage finishes: This includes all-purpose cleaners with strong solvents, which can strip protective coatings, cause discoloration, or cloud glass.
- Bleach and ammonia-based cleaners: These chemicals are far too aggressive. They will yellow or bleach fabric and paper shades, weaken glued joints, and can corrode or tarnish metal fittings.
- Abrasive scrubbing tools: Steel wool, rough scouring pads, and stiff-bristled brushes will scratch and permanently mar glass surfaces and delicate shade materials. They should never be used on a lamp.
For those looking to upgrade their lighting after a deep clean, the [Everbrite LED Oil Lamp] offers a brilliant and reliable flame. Learn more and find the perfect model for your home at [https://www.example.com/everbrite-lamp].
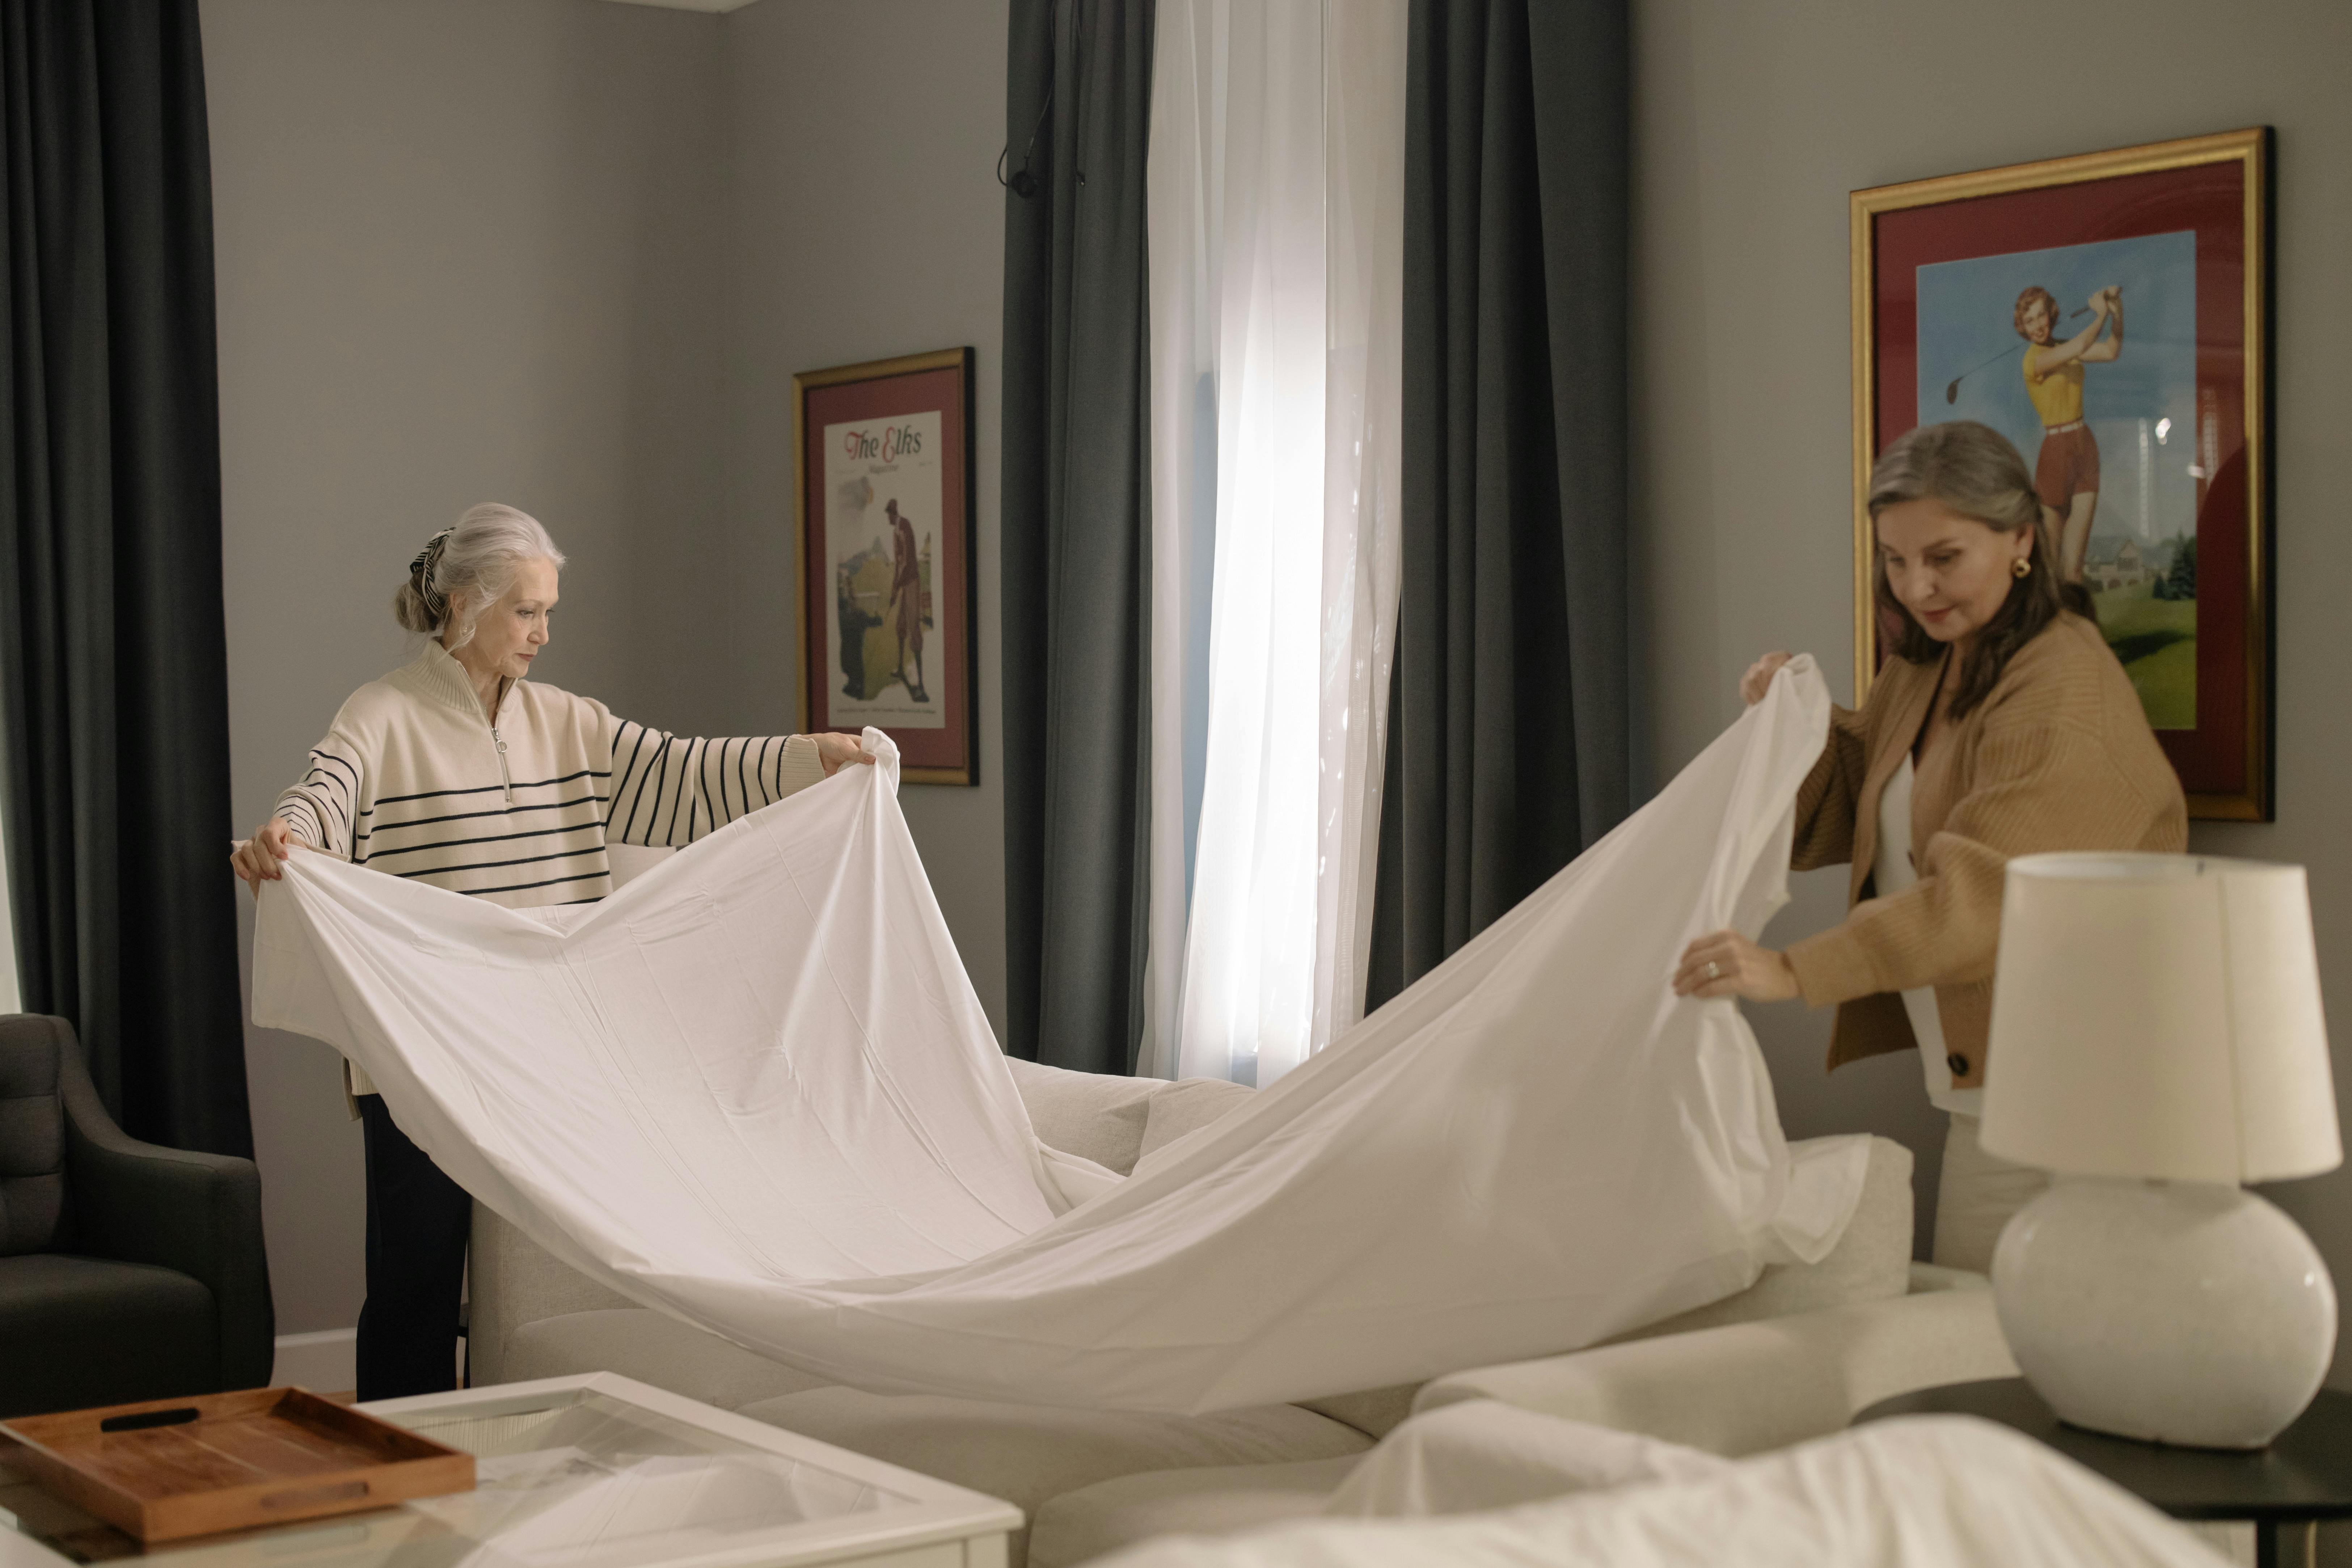
Fabric Lampshade Deep Cleaning
Moving from general tools to specific applications, fabric lampshades require a nuanced approach. The wrong cleaning method can cause irreversible damage, such as shrinking, fading, or warping. The key to success lies in correctly identifying the material and its limitations before any cleaning begins.
Identifying Fabric Types and Care Requirements
Proper care starts with knowing what you’re cleaning. A shade’s fabric type dictates every subsequent step, from the cleaning solution you use to the drying technique you employ.
Washable vs. Dry-Clean Only Fabrics
Understanding this distinction is the most critical step in the process.
- Cotton, linen, and polyester cleaning methods: These are typically the most durable and washable fabrics. Many modern shades made from these materials can handle gentle hand-washing. Cotton and linen may shrink if exposed to high heat, so air drying is essential. Polyester is generally more resilient and less prone to shrinking.
- Silk and delicate fabric special considerations: Silk, velvet, and other delicate or vintage fabrics should almost always be treated as “dry-clean only.” Introducing water can cause silk to water-spot, lose its luster, or shrink. Velvet’s pile can be crushed or distorted. For these, stick exclusively to the dry cleaning methods outlined below.
Testing for Colorfastness and Material Integrity
Even a washable fabric can run or be damaged by cleaning. Always perform these tests first.
- Spot testing procedure for cleaning solutions: In a small, inconspicuous area (like the inside top edge of the shade), dab a cotton swab moistened with your planned cleaning solution (e.g., the dish soap and water mixture). Gently press a white microfiber cloth against the spot. If any color transfers to the cloth, the fabric is not colorfast, and you should avoid wet cleaning.
- Checking for glued vs. sewn construction: Examine how the fabric is attached to the shade’s frame. Gently feel the seams. If the fabric is glued, rather than sewn, immersing it in water will likely dissolve the adhesive, causing the shade to fall apart. Wet cleaning is not an option for glued constructions.
Step-by-Step Fabric Cleaning Process
With your fabric type identified and tests passed, you can proceed with confidence using these methods.
Dry Cleaning Methods for Regular Maintenance
For most fabric shades, dry cleaning is the safest and most recommended method for routine upkeep.
- Vacuuming technique with soft brush attachment: Using your vacuum on the lowest suction setting, gently run the soft brush attachment over the entire surface of the shade. Work from top to bottom, following the seam of the fabric to avoid pulling it out of shape. Pay special attention to pleats and seams where dust accumulates.
- Lint roller application from top to bottom: A lint roller is excellent for removing surface dust, pet hair, and lint. Roll from the top of the shade to the bottom in overlapping strokes. This direction follows the nap of the fabric and prevents pushing debris deeper into the weave.
Wet Cleaning for Stained or Heavily Soiled Shades
Reserve this method only for shades confirmed to be washable, colorfast, and sturdily constructed.
- Hand-washing procedure in lukewarm water: Fill a clean sink or basin with lukewarm water and a very small amount of clear, mild dish soap. Submerge the shade and gently agitate the water with your hands to create suds. Do not scrub the fabric. You can gently wipe soiled areas with a soft, soapy cloth. Rinse thoroughly by dipping the shade in a separate basin of clean, lukewarm water until all soap residue is gone.
- Stain treatment for common household spills: For grease or food stains, apply a small drop of the mild dish soap directly to the stain and gently work it in with your fingertips before the full wash. For ink, you can try dabbing with a cotton ball soaked in rubbing alcohol, but test for colorfastness first.
- Proper drying methods to prevent deformation: This is crucial. Never wring out a lampshade. Gently shake off excess water and place the shade on a clean, dry towel. Reshape it with your hands as it dries. Allow it to air dry completely away from direct heat or sunlight, which can cause fading or warping. You can place it near a fan to circulate air, but do not use a hair dryer.
A clean, classic fabric shade pairs beautifully with the warm, steady glow of the [Everbrite LED Oil Lamp]. Discover its full range of styles for your newly refreshed space at [https://www.example.com/everbrite-lamp].
Paper and Parchment Shade Care
Following the careful approach for fabric, paper and parchment lampshades demand an even more delicate touch. These materials are inherently fragile, and a single misstep with moisture or harsh handling can lead to permanent damage. The guiding principle for these shades is simple: when in doubt, stick to dry methods.
Understanding Paper Shade Limitations
Successfully maintaining a paper or parchment shade begins with a clear understanding of what it cannot withstand. Recognizing these vulnerabilities will inform every cleaning decision you make.
Why Water is the Enemy
Introducing liquid to a paper shade is almost always a recipe for disaster.
- Moisture damage risks and prevention: Water causes paper to warp, buckle, and become structurally weak. It can also lead to the ink or decorative patterns bleeding or fading. Parchment, often made from animal skin, can become brittle and crack upon contact with water. Prevention is the only cure; ensure shades are kept in dry environments and away from potential splashes.
- Handling glued paper constructions: The vast majority of paper shades are held together with water-soluble adhesives. Applying any moisture, even from a damp cloth, can dissolve the glue, causing the shade to completely unravel or detach from its frame.
Preventive Maintenance Strategies
The best way to clean a paper shade is to prevent it from getting dirty in the first place.
- Regular dusting schedules (weekly recommended): A consistent, gentle dusting routine prevents a layer of grime from building up, which would eventually require more aggressive (and risky) cleaning methods.
- UV protection to prevent yellowing: Paper and parchment are susceptible to yellowing and fading when exposed to direct sunlight. Position your lamps away from windows or use UV-filtering window film to significantly extend the life and appearance of your shade.
Dry Cleaning Techniques
For paper and parchment, dry cleaning isn’t just an option—it’s the only safe option. These methods effectively remove dust and address minor stains without introducing damaging moisture.
Dust Removal Methods
Gentleness is paramount. Never use a vacuum cleaner, as the suction is too powerful and can tear the material.
- Soft brush techniques for delicate surfaces: Use a clean, soft-bristled brush, such as a makeup brush or a soft paintbrush. Holding the shade by its frame for support, gently brush from the top of the shade to the bottom in long, smooth strokes. This follows the seam and prevents creasing.
- Compressed air for hard-to-reach areas: For intricate pleats or crevices, use a can of compressed air, like those for cleaning electronics. Hold the can upright and use short, controlled bursts to dislodge dust. Always test on a small area first to ensure the force doesn’t damage the paper.
Stain Treatment Without Moisture
Addressing stains on paper requires patience and specialized dry techniques.
- Art gum eraser for pencil marks and light stains: A soft, pliable art gum eraser is excellent for lifting pencil marks and other dry, particulate soil. Gently knead the eraser to warm it, then lightly dab and roll it over the stain. Do not rub aggressively.
- Corn starch application for oil-based stains: For a fresh grease or oil stain, cover the spot completely with a layer of corn starch or talcum powder. The powder will absorb the oil over several hours (or overnight). Gently brush away the powder with a soft brush.
- White bread method for grease absorption: A slightly dampened piece of white bread (crust removed) can be gently dabbed or rolled over a grease spot. The bread acts as a gentle absorbent. This method should be used with extreme caution and only as a last resort, as it introduces a minimal amount of moisture.
The soft, diffused light from a clean paper shade creates a wonderfully ambient glow, a quality perfectly matched by the [Everbrite LED Oil Lamp]. Explore how its classic design can complement your decor at [https://www.example.com/everbrite-lamp].
Glass and Crystal Shade Restoration
Transitioning from the delicate world of paper, glass and crystal lampshades offer a more robust cleaning experience. While they are far more tolerant of moisture, their primary enemies are streaks, hard water spots, and the fragility of their structure and, in some cases, their metal components. A methodical approach will restore their brilliant clarity and sparkle.
Routine Glass Maintenance
For clear glass shades, the goal is to achieve a perfectly transparent, streak-free finish that allows light to pass through unimpeded.
Daily Dusting and Smudge Removal
A quick, daily touch-up prevents the buildup of grime and keeps your lamp looking its best with minimal effort.
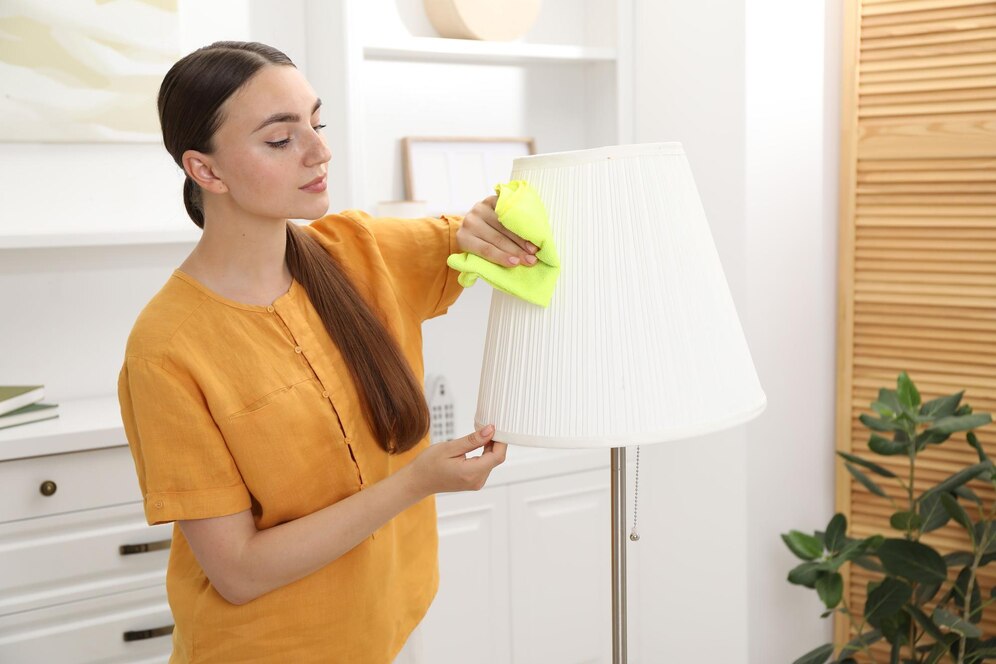
- Microfiber cloth techniques for streak-free cleaning: A clean, dry microfiber cloth is your first and best tool. Its electrostatic properties attract and hold dust without scratching. For fingerprints or smudges, gently wipe the glass while supporting it with your other hand. For a slightly deeper clean, lightly dampen a portion of the cloth with distilled water.
- Proper handling to prevent breakage: Always handle a glass shade with two hands. Before cleaning, ensure the lamp is unplugged and the bulb is completely cool to the touch. Work over a soft surface, like a towel, to cushion any accidental drops.
Deep Cleaning Glass Components
When a simple dusting isn’t enough, a more thorough wash is in order. This is highly effective for removing accumulated grease and dust.
- Soapy water bath method for removable shades: If the glass shade can be safely detached from its frame, clean it in a sink or basin. Line the sink with a towel for protection. Use a few drops of mild dish soap in lukewarm water. Submerge the shade and wash it with a soft cloth or your hands. Avoid abrasive scrubbers.
- Vinegar solution for hard water spots: For stubborn white mineral deposits from hard water, a 1:1 solution of white vinegar and distilled water is effective. Apply with a soft cloth, let it sit for a minute, then wipe clean. Always rinse with clean water afterward to remove any residual vinegar.
- Drying and polishing for maximum shine: After washing and rinsing, dry the shade thoroughly with a lint-free microfiber or cotton cloth to prevent water spots. For an exceptional, streak-free shine, a final wipe with a crumpled piece of newspaper is a time-tested method that polishes the glass to a brilliant finish.
Specialized Glass Care
Stained, leaded, and crystal shades require a more nuanced approach to preserve their decorative elements and structural integrity.
Stained Glass and Leaded Shade Maintenance
These shades combine glass with soft metal cames (strips), which demand careful handling.
- Lemon oil treatment for metal components: The lead or zinc cames on these shades can oxidize and dull over time. After cleaning the glass itself with a damp cloth, apply a tiny amount of lemon oil to a soft cloth and gently polish the metalwork. This will restore its dark, lustrous sheen and help protect it from further oxidation.
- Gentle cleaning to preserve solder integrity: Avoid soaking a leaded glass shade or using excessive water, as moisture can weaken the solder joints over time. Clean with a well-wrung damp cloth, taking care not to put pressure on the metal seams.
Crystal and Prismatic Shade Care
The many facets of crystal shades are designed to catch and refract light, but they also trap dust.
- Compressed air for intricate detailing: Before wiping, use a can of compressed air to blow dust out of the deep cuts and intricate details. This prevents you from grinding loose dust into the surface when you polish.
- Soft brush techniques for fragile elements: After using compressed air, use a very soft, clean makeup brush or watercolor brush to gently dislodge any remaining dust from the crevices. Follow this with a gentle wipe using a soft, dry microfiber cloth to bring out the crystal’s brilliant sparkle.
The clarity of a freshly cleaned glass shade enhances any room’s ambiance, much like the reliable glow of the [Everbrite LED Oil Lamp]. Discover its clean, modern design at [https://www.example.com/everbrite-lamp].
Pleated and Textured Shade Maintenance
Moving from the hard, smooth surfaces of glass, pleated and textured lampshades present a different set of challenges. Their beauty lies in their dimensional folds and fabric, but these very features are dust magnets and can be easily crushed or distorted. The key is to clean thoroughly while meticulously preserving the shade’s structural form.
Understanding Pleated Shade Construction
Successfully maintaining a pleated shade begins with understanding what it’s made of and how its structure can be compromised during cleaning.
Different Pleating Materials and Their Needs
Not all pleated shades are created equal. The material dictates the cleaning approach.
- Fabric pleats vs. paper pleats care differences: Fabric pleats, often made from silk, linen, or polyester, are generally more durable and may tolerate gentle, targeted spot cleaning. Paper pleats, however, are far more fragile and susceptible to water damage, staining, and tearing; they should only be dry-cleaned.
- Permanent pleat preservation techniques: Many modern pleated shades are made from materials with “permanent” pleats, often set with a resin or special heat treatment. While resilient, these pleats can still be flattened by excessive pressure or moisture. Always handle them by their inner frame or top ring to avoid squeezing the pleats.
Cleaning Without Damaging Structure
The goal of every cleaning action should be to remove dirt without altering the shade’s shape.
- Gentle brush techniques between pleats: Use a soft, clean makeup brush or a delicate-bristled paintbrush. Hold the shade steady by its frame and gently brush in the direction of the pleats—from top to bottom—to coax dust out from the crevices. Avoid brushing sideways, which can miss dust deep in the folds.
- Avoiding pressure that flattens pleats: Never push, squeeze, or press down on the pleated body of the shade. Your touch should be as light as a feather. When moving the shade, always support it from the bottom metal frame or the top ring.
Specialized Cleaning Approaches
For deeper cleaning, a combination of dry methods is safest. Introducing moisture should be a last resort and done with extreme caution.
Dry Cleaning Methods for Pleated Shades
This is the primary and safest method for most pleated shades, especially those made of paper.
- Soft brush selection and application: A high-quality, soft-bristled brush is essential. A goat’s hair drafting brush or a new, clean shaving brush works wonderfully. The softness prevents scratching and the dense bristles are effective at lifting dust. Brush from the top of a pleat to the bottom, working your way around the entire shade.
- Vacuum attachment use with caution: Use the soft brush attachment on your vacuum cleaner. Do not let the plastic nozzle touch the shade, as it can cause tears or flatten pleats. Hold the attachment about an inch away from the shade and move it slowly along the grooves. This powerful suction will pull the dust the soft brush has loosened.
Spot Cleaning for Stained Pleats
If dry methods aren’t sufficient for a stain on a fabric shade, proceed with caution. This method is not recommended for paper shades.
- Targeted cleaning without saturating material: Use a minimal amount of cleaner. For fabric pleats, a dry cleaning sponge (also known as a soot sponge) can be gently rubbed on the stain. For slightly more stubborn spots, lightly dampen a microfiber cloth with distilled water or a tiny drop of mild dish soap in water. Wring it out until it is almost dry. Gently dab—do not rub—the affected area.
- Drying techniques that preserve pleat shape: After any spot cleaning, it is critical to dry the area immediately to prevent a water mark and to keep the pleats from losing their shape. Use a dry, absorbent microfiber cloth to blot the area. You can also use a hairdryer on its lowest, coolest setting, held at least a foot away, to gently air-dry the spot while you manually keep the pleats separated.
The soft, diffused light through a well-maintained pleated shade creates a warm and inviting atmosphere, a quality shared by the thoughtfully designed [Everbrite LED Oil Lamp]. Its elegant glow is perfect for any room. Learn more at [https://www.example.com/everbrite-lamp].
Troubleshooting Common Problems
Even with meticulous routine care, lampshades can fall victim to stubborn stains, discoloration, and minor damage. Knowing how to address these specific issues can save a shade from premature retirement. The following methods are most effective on fabric shades; always test any treatment on a small, inconspicuous area first.
Addressing Stubborn Stains and Discoloration
Time, smoke, and environmental factors can leave their mark. Targeted treatments can often reverse this damage without a full-scale cleaning.
Yellowed Fabric Treatment
Yellowing is a common issue with older fabric shades, often caused by aging adhesives, nicotine, or simple oxidation.
- Baking soda paste application and timing: Create a thick paste using baking soda and a small amount of water. Using a soft cloth or a soft-bristled toothbrush, apply a thin, even layer of the paste to the yellowed areas. Allow it to dry completely, which may take several hours. Once dry, gently brush off the powder with a soft brush, following the direction of the fabric’s grain or pleats. This method is gentle and can lift surface discoloration.
- Oxygenated cleaner options for severe cases: For more pronounced yellowing, an oxygen-based cleaner (like OxiClean) can be effective. Mix a very small amount with cool water to create a weak solution. Dampen a clean white cloth in the solution, wring it out until it is barely damp, and gently dab the yellowed area. Avoid saturating the fabric. Follow by dabbing with a cloth dampened with plain water to rinse, and allow it to air dry completely away from direct heat.
Grease and Oil Stain Removal
Grease spots require a different approach, focusing on breaking down or absorbing the oil.
- Vinegar solution breakdown method: Mix one part white vinegar with three parts water. Lightly dampen a clean microfiber cloth with the solution and gently blot the grease spot. The vinegar helps to cut through the grease. After blotting, use a dry part of the cloth to absorb the residue. Allow the area to air dry.
- Corn starch absorption technique: For fresh grease stains, corn starch is an excellent dry-absorption method. Sprinkle a generous amount of corn starch or talcum powder onto the stain, completely covering it. Let it sit for at least an hour, or overnight for best results. The powder will absorb the oil. Use a soft brush to gently remove the powder from the shade.
Ink and Permanent Marker Solutions
Ink stains are daunting but not always permanent, provided you act quickly and carefully.
- Rubbing alcohol spot testing: Dampen a cotton swab with isopropyl (rubbing) alcohol. On a hidden area of the shade, gently test the alcohol to ensure it does not cause discoloration or damage the fabric’s finish. If the test is successful, use the damp swab to gently dab at the center of the ink stain, working outward. The ink should transfer to the swab. Use a light touch to avoid spreading the stain.
- Commercial stain remover precautions: If using a commercial stain remover pen or spray, always read the label for fabric compatibility. Spray the product onto a clean cloth first, not directly onto the shade, to control the amount of moisture. Blot the stain gently, and do not rub. Be aware that some cleaners may leave a ring if not used carefully.
Repair and Restoration Considerations
Sometimes a shade needs more than just cleaning. Knowing the limits of a DIY fix is crucial to preventing further damage.
When to Seek Professional Help
For valuable, antique, or significantly damaged shades, professional restoration is the safest investment.
- Antique and valuable shade restoration: Professional restorers have the expertise and materials to carefully disassemble, clean, and reassemble a shade using historically appropriate methods. They can rewire fragile frames, source replacement fabrics, and remove decades of ingrained grime without causing harm. The cost is justified for shades with sentimental or monetary value.
- Structural damage assessment: If the metal frame of the shade is bent, the harp seat is broken, or the stitches holding the fabric to the frame are failing, a professional can properly assess and repair the underlying structure, ensuring the shade is safe and stable for use.
DIY Repair Limitations
For minor issues, a careful hand can often extend the life of a shade.
- Regluing loose fabric edges: If the fabric trim or lining has come unglued, a small amount of clear-drying fabric glue or a specialized acid-free PVA glue can be applied with a toothpick. Apply a tiny bead of glue, press the fabric into place, and use a low-temperature hairdryer or clamps (protected with wax paper) to hold it until dry.
- Minor tear repair methods: For small tears in a fabric shade, a nearly invisible repair can be made from the inside. Apply a small amount of fabric glue to the edges of the tear and press them together. For additional support, you can place a small patch of matching, lightweight fabric on the inside over the glued tear.
Proper maintenance keeps your lighting looking its best, much like the reliable, flameless glow of the Everbrite LED Oil Lamp. Its durable construction ensures it remains a beautiful and hassle-free part of your home for years to come.
Preventive Maintenance Schedule
Establishing a consistent care routine is the most effective way to preserve the beauty and integrity of your oil lamp shades and glass, preventing the need for intensive cleaning or repairs. A proactive approach, combining frequent light maintenance with periodic deep cleaning, will keep your lighting looking pristine.
Establishing a Cleaning Routine
A regular schedule prevents dust from settling and bonding with the surface, making it far easier to manage. The frequency of these tasks depends largely on your home environment.
Weekly Maintenance Tasks
Consistency is key for weekly upkeep. These tasks should take only a few minutes but make a significant long-term difference.
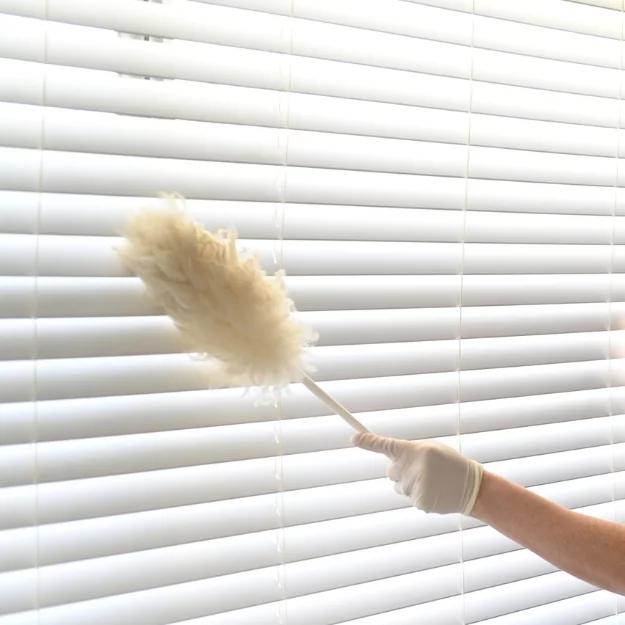
- Dusting frequency for different environments: In a typical low-dust home, a weekly dusting is sufficient. However, in environments with high traffic, open windows, or pets, you may need to increase this to twice per week. For fabric shades, always use a soft-bristled brush or a dry microfiber cloth, moving in the direction of the fabric’s grain or pleats. For glass chimneys and shades, a quick wipe with a dry, lint-free cloth will remove fresh dust without streaking.
- Quick inspection for emerging issues: As you dust, take a moment to inspect the shade and glass. Look for new stains, signs of insect activity inside the shade, any loosening of the fabric from the frame, or soot buildup on the glass chimney. Catching these issues early makes them much simpler to address.
Seasonal Deep Cleaning
Even with weekly dusting, a more thorough cleaning is necessary to remove accumulated grime and oils that simple dusting cannot.
- Comprehensive cleaning every 3-6 months: Plan a full cleaning every three to six months. This involves the careful methods detailed in our previous sections: for glass, this means a proper wash with a vinegar solution; for fabric, a more detailed surface cleaning with appropriate methods. This is also the time to clean the lamp’s font, burner, and other metal parts according to the manufacturer’s instructions.
- Material-specific seasonal considerations: Your deep cleaning approach should adapt to the material. For example, silk or parchment shades may only tolerate a thorough dry cleaning per season, while sturdier glass or hardback cotton shades can handle a gentle wet cleaning. Always consider the indoor environment; shades in kitchens may require more frequent deep cleaning due to grease in the air, while those in a formal living room may not.
Environmental Protection Strategies
The environment in which your lamp resides has a profound impact on its longevity. A few strategic choices can dramatically reduce wear and tear.
Preventing Future Damage
Where and how you use your lamp is the first line of defense against damage.
- Proper lamp placement away from direct sunlight: Ultraviolet rays are a primary cause of fabric fading and discoloration. Position your lamp away from direct sunlight. If this isn’t possible, consider using UV-protective window film on nearby windows.
- Rotation schedules for even light exposure: If you have multiple lamps with similar shades, rotating them every few months ensures that no single shade bears the brunt of light exposure and dust accumulation, promoting even aging.
- Using lower wattage bulbs to reduce heat damage: Excessive heat from a high-wattage bulb can warp paper and parchment shades, weaken fabric adhesives, and accelerate the yellowing of materials. Always use a bulb wattage at or below the manufacturer’s recommendation. For oil lamps, ensure the wick is trimmed correctly to produce a clean, soot-free flame of an appropriate size.
Protective Treatments
For certain materials, applying a protective product can provide an additional layer of defense against stains and environmental damage.
- Fabric protector applications: On sturdy, non-delicate fabric shades (like cotton or linen), a fabric protector spray can create an invisible barrier against dust and liquid stains. Crucially, always test the spray on a hidden area first to ensure it does not cause discoloration or water spotting. Apply the spray in a well-ventilated area, holding the can at the distance specified on the label, and allow it to dry completely before using the lamp.
- UV protection for susceptible materials: For shades made from materials highly susceptible to fading, such as silk or some papers, a spray-on UV protectant (often used for archival purposes) can be applied. These are specialized products, and it is highly recommended to consult with a conservation expert or test extensively on a sample piece before applying to a valuable shade.
Integrating these protective habits with a reliable light source simplifies maintenance. The Everbrite LED Oil Lamp provides the classic ambiance of an oil lamp with modern, cool-burning LED technology, eliminating concerns about heat damage and soot accumulation on your glass and shades in 2025.
Safety and Best Practices
Cleaning your oil lamp shades and glass is essential for maintenance, but doing so safely is paramount. A single misstep can lead to personal injury or permanent damage to your lamp. Following these best practices ensures your cleaning routine is both effective and secure.
Electrical Safety During Cleaning
If your oil lamp is an electric model or has any electrical components, such as a built-in bulb for easier ignition, safety must be your first priority. The combination of electricity, moisture, and heat creates significant hazards that require careful handling.
Proper Unplugging and Handling
Before a single drop of cleaner is applied, the lamp must be completely disconnected from its power source and allowed to cool.
- Cooling time requirements before cleaning: For lamps that have been recently lit or powered on, allow the glass chimney, shade, and all components to cool to room temperature. A hot glass chimney can shatter if it comes into contact with a cool liquid, and fabric shades can be easily burned. For electric bulbs, a minimum cooling time of 30 minutes is recommended. For oil lamps, wait at least one hour after extinguishing the flame.
- Electrical component protection: Never allow moisture or cleaning solutions to come into contact with the socket, switch, or any wiring. When cleaning an electric lamp’s glass or shade, it is safest to remove the component entirely from the lamp body. If the component cannot be removed, use a well-wrung cloth to prevent any liquid from dripping into electrical parts.
Working with Older Lamps
Vintage and antique lamps require an extra layer of caution, as their electrical systems may be outdated or degraded.
- Vintage lamp special considerations: Assume that the wiring on any lamp over 20 years old is not up to modern safety standards. Be extra vigilant about keeping liquids away from the base and socket. The insulation on old wires can be brittle and crack, exposing live wires.
- Wiring inspection during cleaning: Use the opportunity of a deep cleaning to visually inspect the power cord and plug for any cracks, fraying, or discoloration. If you notice any damage, stop using the lamp immediately and have it inspected by a qualified professional before plugging it in again.
Material-Specific Precautions
Even with the safest electrical practices, using the wrong cleaning method on a delicate material can cause irreversible harm. Proceeding with caution and knowing your limits are critical skills.
Testing Cleaning Solutions
A cleaning solution that works wonders on one material can permanently damage another. Never skip the testing phase.
- Always test in inconspicuous areas first: Before applying any cleaner—even a mild vinegar solution or plain water—to the entire surface, test it on a small, inconspicuous area. For a fabric shade, this could be the inside of the top rim. For glass, test on a bottom edge. Apply the solution with a cotton swab, wait for it to dry completely, and then check for any adverse effects like discoloration, clouding, or texture changes.
- Understanding material reactions to different cleaners: Be aware of basic material incompatibilities. For instance, acidic cleaners like vinegar can etch or cloud certain types of antique glass. Harsh chemicals or abrasive cleaners will permanently scratch glass and can dissolve delicate finishes on fabric or parchment. When in doubt, always start with the gentlest option, which is often a dry, soft brush or a dry microfiber cloth.
Knowing When to Stop
A crucial part of maintenance is recognizing when a problem is beyond your expertise. Persisting with a difficult stain or a structural issue can turn a minor flaw into a catastrophe.
- Recognizing when professional help is needed: If you encounter any of the following, it is time to consult a professional conservator or restorer: severe mold or mildew infestation inside a valuable fabric shade, a persistent, greasy soot film that will not lift with gentle cleaning, a cracked or extremely fragile glass chimney, or any structural damage to the shade’s frame. For valuable antiques, professional intervention is almost always the safest choice.
- Damage limitation strategies: If you accidentally apply a cleaner that is causing damage (e.g., a fabric dye starts to run), do not rub the area, as this will spread the problem. Instead, gently blot with a clean, dry cloth to absorb excess moisture and stop immediately. For a glass chimney that develops a white, hazy film during cleaning, stop the process; this may be irreversible clouding, and further cleaning will not help.
Adhering to these safety protocols ensures your lamp remains a source of beauty, not a hazard. For those seeking the classic look without the maintenance complexities of flame and fragile glass, the Everbrite LED Oil Lamp offers a safe, cool-to-the-touch alternative. Its modern design eliminates risks associated with heat, soot, and electrical hazards in older models for 2025.
Expert Tips and Professional Secrets
Moving beyond foundational safety, you can elevate your care routine with methods used by professionals. These techniques not only achieve a superior clean but also ensure your oil lamp’s shades and glass components remain in pristine condition for years to come.
Industry Insider Techniques
The difference between a good clean and a great one often lies in the subtle details of technique and approach, borrowed from those who care for the most valuable and delicate lighting objects.
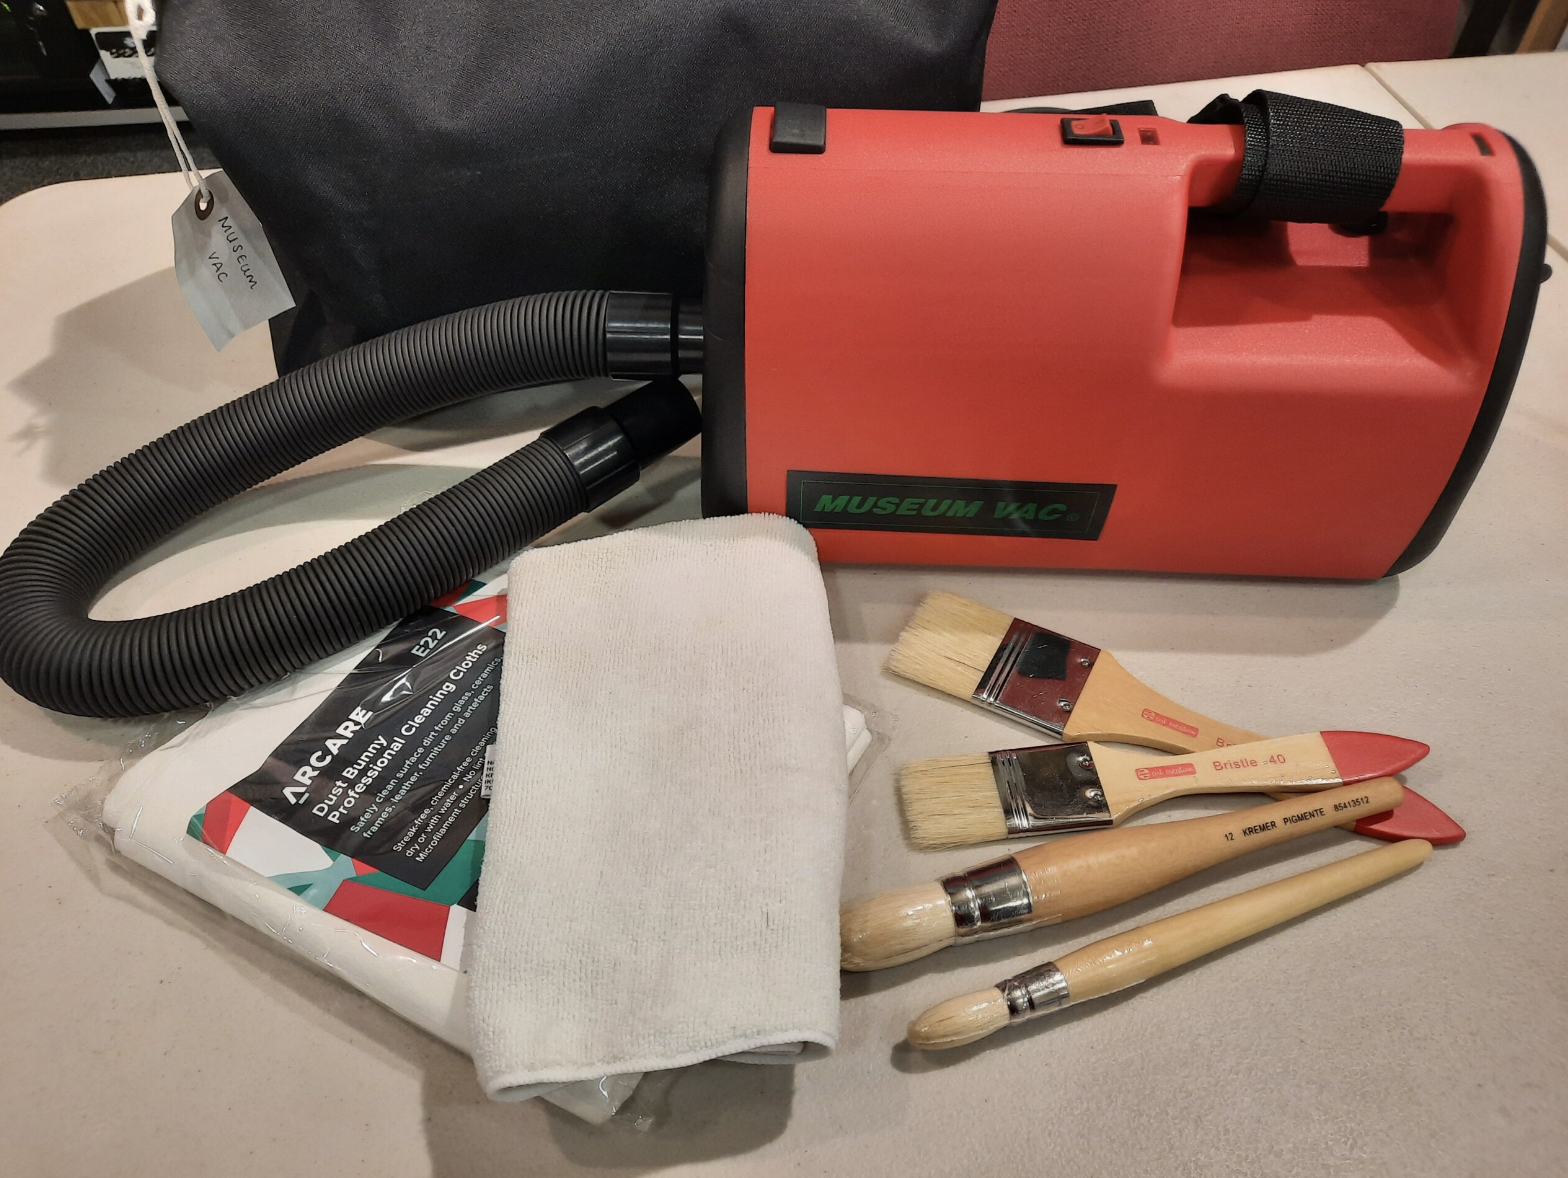
Museum-Quality Cleaning Methods
Conservators prioritize the long-term health of an object over immediate, spotless results. Their philosophy is one of minimal intervention and maximum protection.
- Techniques from lighting conservation experts: The golden rule is “less is more.” For glass chimneys and shades, this means using deionized or distilled water instead of tap water to prevent mineral deposits and spotting. They often employ soft, natural-hair brushes (like hake or goat-hair brushes) to dislodge dry dust without scratching the surface. For cleaning, a small amount of pure, neutral-pH soap (such as Orvus WA Paste or a pure castile soap) applied with a soft cloth is preferred over commercial sprays.
- Long-term preservation strategies: The primary enemy of both glass and fabric is cumulative, abrasive dust. For fabric shades, museum professionals use a low-suction vacuum cleaner with a soft brush attachment, covered by a layer of cheesecloth to catch any loose fragments or fibers. For glass, they avoid frequent wet cleaning, as over-cleaning can gradually wear down etched or gilded details. Instead, they rely on regular, gentle dusting to minimize the need for deeper cleans.
Time-Saving Cleaning Hacks
Efficiency doesn’t require cutting corners; it’s about working smarter. Integrating these habits into your routine can significantly reduce the time and effort required.
- Multi-tasking during routine cleaning: Keep a dedicated microfiber cloth in the same drawer or cabinet as your oil lamp. This makes it easy to give the glass chimney a quick, dry wipe-down whenever you dust the surrounding furniture, preventing heavy soot or dust buildup. When you remove the glass to refill the lamp, make it a habit to wipe the interior with a dry cloth before refueling.
- Efficient tool organization: Create a dedicated cleaning caddy for your lamp maintenance. This prevents you from searching for supplies each time and ensures you always use the correct tools. A simple kit could include a few microfiber cloths (one reserved for drying), a soft-bristled brush, cotton swabs for tight spaces, and a bottle of your pre-mixed, gentle cleaning solution.
Advanced Maintenance Strategies
Proactive, scheduled care prevents the need for reactive, heavy cleaning sessions and protects your investment in both modern and antique oil lamps.
Seasonal Deep Cleaning Calendar
A structured schedule ensures no component is overlooked and your lamp is always ready for display or use, especially during periods of heavy use.
| Frequency | Primary Tasks |
|---|---|
| Monthly | Dry-dust entire lamp, including base, fuel font, and the exterior of the shade/glass. Check for any new smudges or soot. |
| Quarterly | Perform a full, gentle clean of the glass chimney or shade using appropriate methods. Inspect the wick and trim if necessary. For electric models, visually check the plug and cord for wear. |
| Annually | Conduct a complete disassembly (if safe to do so). Clean the fuel font thoroughly. Inspect the burner assembly for any debris. Deep clean any fabric shades with a vacuum and cheesecloth. |
| Pre-Holiday | Before the holiday season or a special event, perform a quarterly-level clean to ensure your lamp is looking its best for guests and gatherings. |
Professional Product Recommendations
While simple solutions often work best, some commercial products are specifically formulated to meet the high standards of conservation and can be excellent investments for the dedicated owner.
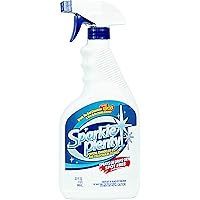
- Commercial cleaners that meet conservation standards: For glass, Sparkle Glass Cleaner is a ammonia-free, streak-free formula that is safe for antique glass. For a heavier-duty degreaser that can cut through stubborn oil soot without abrasives, Simple Green is a biodegradable option that professionals often use (always test first). For delicate fabric and parchment, Restoration Dry Cleaner’s Sponge (a vulcanized rubber sponge) is a museum-standard tool for lifting surface grime without any liquids.
- Tool investments that save time and money: A high-quality microfiber cloth is non-negotiable; the Zwipes brand offers a plush, lint-free option perfect for glass. A soft-bristled artist’s brush is invaluable for dusting intricate glass etchings and fabric pleats. For the glass chimney interior, a bottle brush with soft bristles allows for effective cleaning without needing to scrub aggressively.
For those who appreciate the aesthetic of a classic oil lamp but wish to minimize maintenance, the Everbrite LED Oil Lamp incorporates a sealed, dust-resistant glass design for 2025. Its innovative construction significantly reduces the frequency of deep cleaning, allowing you to spend more time enjoying its ambiance.
Maintaining Your Investment

The care you provide for your oil lamp directly translates into its longevity, performance, and the enduring beauty it brings to your space. By adopting the practices outlined in this guide, you are not just cleaning an object; you are preserving a functional piece of art.
The Long-Term Value of Proper Care
Viewing maintenance as an investment rather than a chore reveals its true value, both financially and aesthetically.
Extending Your Lamp’s Lifespan
A well-maintained oil lamp can last for generations, while a neglected one may become unusable in a few years. The cost of a simple bottle of distilled water, a pH-neutral soap, and a few microfiber cloths is negligible compared to the price of replacing a cracked chimney, a corroded burner, or an entire antique lamp. More importantly, consistent care preserves the lamp’s aesthetic and functional value. Keeping soot and oil residue off the glass ensures maximum light output and prevents permanent etching. Protecting fabric and parchment shades from dust and grime maintains their color and structural integrity, safeguarding the lamp’s overall character and worth.
Creating a Sustainable Cleaning Habit
The most effective maintenance plan is one that is easily integrated into your life. Instead of a daunting, annual deep-clean, incorporate small tasks into your existing routines. A quick dry-dusting of the lamp when you dust the surrounding furniture takes less than a minute. Wiping the inside of the chimney with a dry cloth each time you refill the lamp prevents heavy soot buildup. Furthermore, teaching all household members the basics—such as handling the glass with clean hands and using only a soft cloth for dusting—distributes the responsibility and ensures the lamp is treated with care by everyone.
Final Checklist and Quick Reference
Use this summary as a quick guide for your ongoing maintenance.
Material-Specific Cleaning Summary
| Material | Primary Tool | Cleaning Agent | Key Caution |
|---|---|---|---|
| Glass Chimney | Microfiber cloth, soft bottle brush | Distilled water & pH-neutral soap, or isopropyl alcohol for tough soot | Avoid cold water on hot glass; never use abrasive pads. |
| Fabric Shade | Soft brush attachment covered with cheesecloth | Mostly dry; for spots, minimal distilled water | Never submerge; avoid all-purpose cleaners. |
| Parchment/Paper Shade | Soft, dry brush | Dry cleaning only | Keep away from all moisture and direct heat. |
| Pleated Fabric | Low-suction vacuum with cheesecloth barrier | Compressed air for deep pleats | Never rub or scrub the material. |
Emergency Cleaning for Common Accidents:
- Soot Smudge on Glass: Wipe with a cloth lightly dampened with isopropyl alcohol.
- Oil Spill on Base: Clean immediately with a mild soapy solution, then dry thoroughly.
- Dust on Delicate Fabric: Use a Restoration Dry Cleaner’s Sponge (vulcanized rubber) to gently lift grime.
Professional Resources and When to Use Them
Despite your best efforts, some situations call for expert intervention. Seek a qualified restoration specialist if you encounter: significant damage like a cracked fuel font, a severely bent or damaged burner assembly, a valuable antique shade with torn seams or unstable materials, or persistent issues with the lamp’s function that you cannot safely diagnose.
For ongoing support, reputable online resources like museum conservation blogs and dedicated antique lighting forums can be invaluable for identifying models, troubleshooting, and connecting with a community of enthusiasts. For a modern interpretation that embodies low-maintenance design, the Everbrite LED Oil Lamp for 2025 features a sealed, dust-resistant glass globe, eliminating the need for interior cleaning and making it an excellent choice for those who love the classic look without the upkeep.
Mastering Oil Lamp Maintenance: Your Path to Perfect Illumination
Throughout this guide, you’ve acquired the essential knowledge for professional-level oil lamp care. The key takeaways are clear: regular dry dusting preserves delicate materials, targeted cleaning solutions tackle specific stains without damage, and safety protocols protect both you and your lamp during maintenance. Understanding your lamp’s construction—whether glued fabric shades that fear moisture or crystal components requiring specialized polishing—ensures every cleaning session enhances rather than compromises your lighting investment.
The distinction between routine upkeep and deep cleaning becomes crucial for long-term preservation. Establishing a consistent schedule prevents the accumulation of damaging grime while maintaining optimal light quality. For vintage pieces, recognizing when professional restoration is warranted can mean the difference between preserving heirloom quality and irreversible damage. The techniques you’ve mastered—from vinegar solutions for hard water stains to corn starch absorption for oil spots—empower you to address virtually any cleaning challenge with confidence.
Now that you’ve discovered how to restore and maintain your oil lamp’s brilliant glow, we’d love to hear about your results! Share your before-and-after cleaning experiences in the comments below or pass this guide along to fellow lighting enthusiasts who might benefit from these professional techniques. Your beautifully maintained lamp deserves to be seen—and your newfound expertise deserves to be shared.

