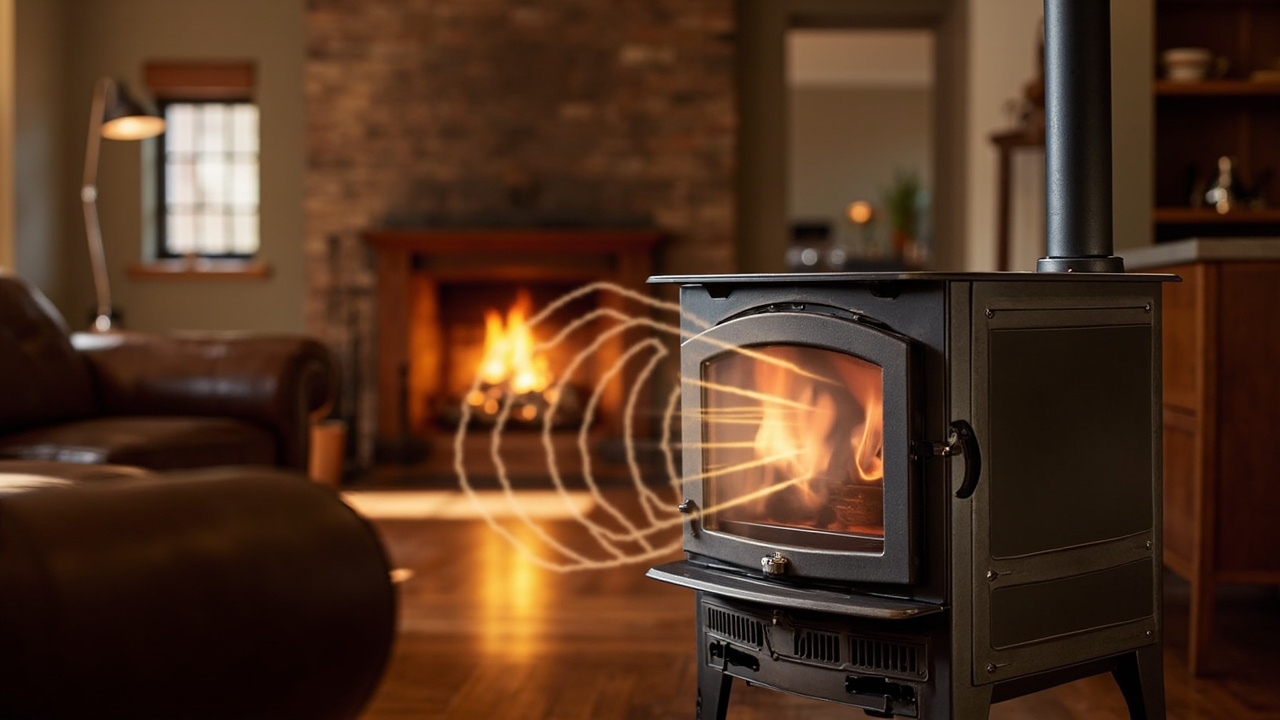
Did you know that a properly installed wood stove fan can increase your heating efficiency by up to 40%? These ingenious devices transform how warmth circulates throughout your living space, turning stagnant hot air pockets into consistent, comfortable temperatures. This comprehensive guide reveals everything from precise placement techniques to advanced maintenance strategies, ensuring you extract maximum performance from your thermal investment while significantly extending its operational lifespan through proven care methods.

Installing and Maintaining Your Wood Stove Fan

So, you’ve been convinced of the merits of owning a stove fan. The good news is that these are wonderfully simple devices, but to get the best performance from yours, a bit of thoughtful installation and occasional care is required. It’s not brain surgery, but neither is it something you can just plonk down anywhere and forget about.
The Art of Correct Placement
Getting the placement right is the single most important factor for your fan’s performance. It seems straightforward, but a few centimeters can make a world of difference.
Finding the Sweet Spot on Your Stove
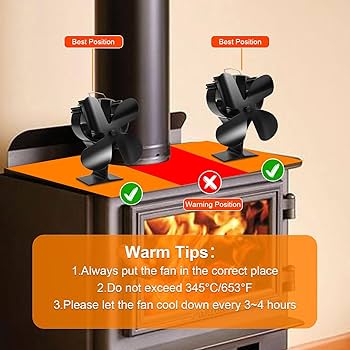
Your fan needs to be in the path of the rising heat, but not so close to the flue that it gets blasted with excessive temperatures. The general rule of thumb is to place it towards the rear of the stove top, but not touching the flue collar. Most manufacturers recommend a specific distance from the flue—usually 6 to 10 inches—so do check your manual.
The goal is to find a spot where the fan’s base can get hot enough to power the motor, but where the heated air it pushes forward is drawn from the column of hot air rising directly from the stove. You want it to be a conductor of the heat, not just a spectator on the edge of the action. A fan placed too far forward will be less effective.
Operational Best Practices
A wood stove fan is a passive device, but it operates in a very active environment. A little knowledge about how it works with your fire will ensure you get those promised efficiency gains.
Starting and Stopping with the Fire
One of the cleverest things about these fans is that they are self-regulating. You don’t switch them on or off. When you light your fire, the stove top is cold, and the fan remains stationary. As the stove heats up, the thermal motor at the base of the fan gradually begins to turn the blades. It will reach its optimal speed when the stove surface is at a typical operating temperature, often around 150-300°F.
Similarly, as your fire dies down and the stove cools, the fan will gracefully slow to a halt. There is no need to intervene. Forcing it to turn when cold or placing it on a scorching hot stove straight away can damage the sensitive bi-metallic motor. The key is to let physics do its job.
Ensuring Longevity Through Maintenance
A stove fan has only one moving part, which makes maintenance delightfully simple. Neglecting it entirely, however, is a sure way to shorten its lifespan.
A Simple Cleaning Regimen
Dust and airborne particles are the primary enemies of your fan. A regular cleaning schedule will keep it running smoothly and quietly.
| Frequency | Task | Key Consideration |
|---|---|---|
| Weekly | Wipe blades and body with a soft, dry cloth. | Prevents dust buildup that can unbalance the blades. |
| Monthly | Lightly apply a drop of quality synthetic lubricant to the motor shaft. | Use a high-temperature oil; one small drop is sufficient. |
| Seasonally | Perform a thorough dusting of the entire unit and check for any blade wobble. | Ensures it’s ready for storage or the next heating season. |
The most important thing to remember is to let the fan cool completely before you touch it for cleaning. Not only for your safety, but also because the metal is more susceptible to damage when hot. A well-maintained fan can easily last for a decade or more, quietly paying for itself year after year.
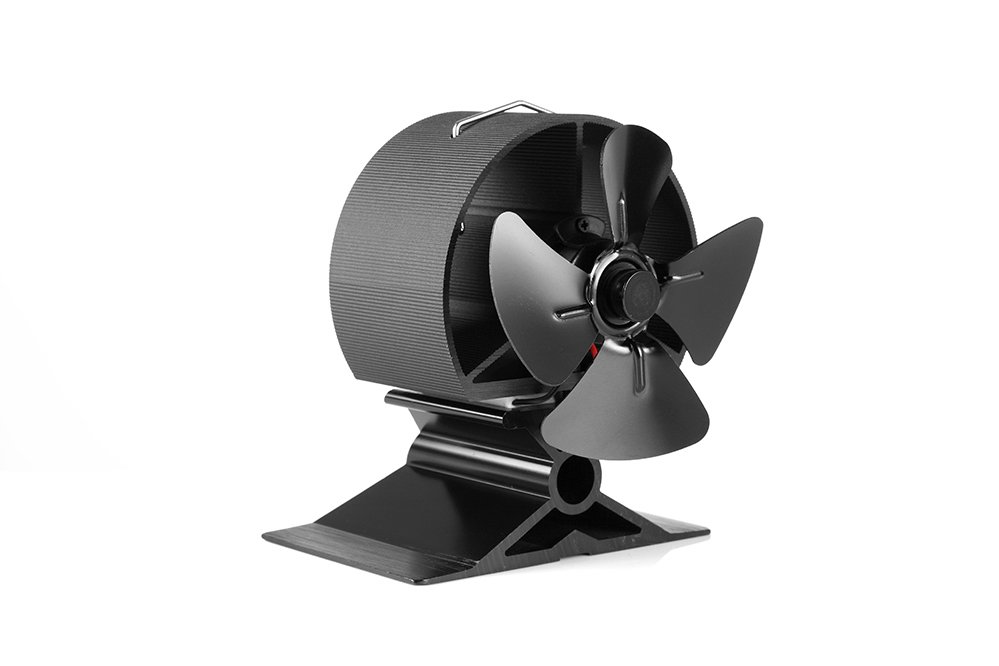
For those ready to improve their home heating, the VODA 4-Blade Stove Fan offers a perfect balance of performance and quiet operation. It’s an investment in comfort that starts paying you back from the very first fire.
- Product: VODA 4-Blade Stove Fan
- Link: https://www.vodastovefan.com/products/voda-4-blade-stove-fan
Choosing the Right Wood Stove Fan

Selecting the perfect fan for your setup isn’t just about picking the shiniest one; it’s about matching the technology to your stove, your room, and your expectations. It’s the difference between having a gentle breeze in a gale and actually feeling the warmth in the furthest corner of your living room.
Understanding Power Technologies
At the heart of every stove fan is a method for turning heat into motion, and the type of engine it uses defines its character, its capabilities, and the kind of care it will ask for in return.
Thermoelectric Generator (TEG) Fans
Think of a TEG fan as a tiny, heat-powered power plant. It uses a semiconductor module sandwiched between the hot base plate and a cooler heat sink on top. This temperature difference generates electricity, which then powers a small, quiet electric motor. This clever bit of physics means they are wonderfully self-contained.
- Operating Range: They spring to life once the stove top hits about 150°F and can comfortably operate all the way up to a roaring 650°F.
- The Power Principle: The greater the temperature difference between the base and the top, the more electricity is generated and the faster the blades spin. This makes them remarkably responsive to the fire’s intensity.
- Lifespan: The fan itself is robust, but the TEG module is the consumable part. With proper care, the entire unit can last 5-10 years, and the best part is that on many models, the TEG module can be replaced, effectively giving your fan a new lease on life without buying a whole new device.
Stirling Engine Fans
For the purist who loves elegant, silent mechanics, the Stirling engine fan is a marvel. It operates on a principle that is over two hundred years old, using the expansion and contraction of air within a sealed cylinder to drive a piston, which in turn rotates the blades. There are no sparks, no electricity, and absolutely no sound apart from the gentle whoosh of the moving air.
- The Silent Operator: Its complete lack of electrical components means it produces zero noise, making it ideal for quiet living spaces or bedrooms.
- The Maintenance Promise: With no electrical parts to fail and a simple mechanical design, a well-made Stirling engine fan can easily provide 15 years of faithful service, often requiring nothing more than an occasional drop of oil on its bearings.
Conventional Electric Blowers
These are the heavy lifters of the stove fan world. Unlike their heat-powered cousins, conventional blowers are powered by your home’s electrical grid, requiring a standard 120V outlet. They are essentially small, specialized space heaters fans that are designed to be mounted on or near your stove.
- The Power Requirement: The need for an outlet is their main drawback, limiting placement options. However, it’s also their main strength.
- Smart Operation: To prevent them from blowing cold air when the stove is cool, they are equipped with thermal switches that only activate the fan once the stove has reached a predetermined temperature.
- Raw Power: They are rated by their CFM (Cubic Feet per Minute), and they typically offer significantly higher airflow than thermal fans, with ratings commonly falling between 125 and 215 CFM, making them suitable for pushing heat through larger or more obstructed spaces.
Matching Fan to Room Size and Stove Type
Getting the technology right is only half the battle. The other half is ensuring the fan has the muscle for your room and a suitable footprint for your stove.
CFM Rating Explained
CFM is the key metric for understanding a fan’s ability to move air. It’s not about how hot the air is, but how much of it is being circulated. Matching this number to your room’s square footage is crucial.
| CFM Rating | Recommended Room Size | Practical Application |
|---|---|---|
| 90 CFM or less | Up to 144 sq ft (e.g., 12×12 ft) | Ideal for small studies, bedrooms, or cozy cabins. |
| 90-120 CFM | Up to 400 sq ft (e.g., 20×20 ft) | The sweet spot for most average-sized living rooms and open-plan kitchens. |
| 120+ CFM | Exceeding 600 sq ft | Necessary for great rooms, large workshops, or spaces with high ceilings. |
Special Considerations for Different Stoves
Small Stove Applications
If you have a compact stove, you need a fan that matches its proportions and its heat output.
- Blade Count: A 2 or 4-blade fan is typically perfect. It offers efficient air movement without being overly large or heavy.
- Temperature Activation: Look for fans with a lower activation threshold (starting at 150-300°F), as smaller stoves may operate at slightly lower surface temperatures.
- Footprint: A compact design ensures the fan sits comfortably on the limited surface space without getting too close to the hot flue collar.
Large Space and Insert Requirements
Heating a vast, open-plan area or getting heat out of a fireplace insert presents its own unique challenges.
- High-Performance Fans: For a large standalone stove, a fan with a higher blade count (4 to 6 blades) is designed to move a greater volume of air. For the very largest spaces, a dual-fan system—essentially two fans in one unit—can create a powerful, concerted airflow.
- Fireplace Insert Solutions: Fireplace inserts have limited top surface area, so they require a specialized solution. Insert blowers are designed to be mounted internally or externally to the unit’s body, often with a dedicated mounting kit, and they pull heat directly from the internal convection channels, blowing it out into the room with impressive force.
For a reliable and highly effective option that suits a wide range of stoves and room sizes, the VODA 4-Blade Stove Fan utilizes efficient thermoelectric technology to maximize your heat distribution.
- Product: VODA 4-Blade Stove Fan
- Link: https://www.vodastovefan.com/products/voda-4-blade-stove-fan
Installation Mastery: Getting It Right the First Time
You’ve selected the perfect fan, a little mechanical marvel ready to go to work. But its future effectiveness—and indeed, its very lifespan—hinges almost entirely on what you do in the next twenty minutes. A proper installation isn’t just about plonking it down; it’s about creating a symbiotic relationship between the stove and the fan.
Pre-Installation Preparation
Before your fan even feels the warmth of the stove, there’s some essential detective work to be done. This isn’t guesswork; it’s about gathering cold, hard data.
Temperature Measurement and Compatibility
Your stove’s surface temperature is the fundamental language it uses to communicate with a heat-powered fan. To understand this language, you need the right translator.
- Using Infrared or Magnetic Thermometers: An infrared thermometer gun is the tool of choice here. Simply point it at the spot where you plan to place the fan and pull the trigger for an instant surface reading. No infrared gun? A simple magnetic thermometer, stuck onto the stove top, will give you a reliable, continuous reading. It’s one of the most cost-effective investments you can make for your wood-burning system.
- Verifying Operating Temperature: Fire up your stove and let it run for a good hour or two, until it’s reached a solid, cruising-speed operating temperature. Now, take your readings. You need to confirm that the surface temperature at your chosen placement location consistently reaches the fan’s minimum start-up temperature (typically around 150°F) and, crucially, that it doesn’t regularly exceed the fan’s maximum safe operating temperature (often 650°F for TEG fans). This simple check prevents both underperformance and a premature, melted demise.
- Identifying Optimal Placement: Look for a flat, stable area on the stove’s top or rear surface. Crucially, this spot should be away from the direct path of hot gases rushing out of the flue collar. A spot too close to the flue can be significantly hotter than the rest of the stove, creating a local hot spot that could damage the fan.
Step-by-Step Installation Process
With the reconnaissance complete, it’s time for the main event. The process diverges here depending on the type of fan you’re enlisting.
Heat-Powered Fan Placement
This is an exercise in precision, not brute force. The goal is perfect positioning.
- Positioning on Rear Third: For the most effective heat transfer and to avoid the hottest spot directly above the firebox, place the fan on the rear third of the stove’s surface. This location usually provides a stable, high temperature that is ideal for the thermoelectric module or Stirling engine.
- Ensuring Minimum Clearance: Always maintain a minimum of 6 inches of clearance between the fan and any flue pipes or nearby walls. This ensures adequate airflow around the fan and prevents heat from reflecting back onto it, which could cause overheating.
- Testing Automatic Startup: Once positioned, simply let the stove do the work. As the stove top heats up past the magic threshold (you’ll see this on your magnetic thermometer, usually around 185°F), you should see the blades begin to turn, slowly at first, then with increasing purpose. No switch to flip, no button to press—just satisfying, silent automation.
Electric Blower Installation
These units require a more hands-on, mechanical approach, connecting the fan to the stove’s own anatomy.
- Mounting into Pre-Cut Openings: Many modern stoves, particularly inserts, come with pre-cut accessory ports and include a mounting kit. This usually involves fitting the blower unit into the designated opening and securing it with the provided screws or brackets. It’s a bit like installing a new component into a desktop computer.
- Connecting Thermal Switches: This is the brains of the operation. The thermal switch, often a probe that gets inserted into a dedicated hole on the stove, is wired into the blower’s power. It acts as a gatekeeper, preventing the fan from running until the stove itself is hot enough to provide warm air, thus avoiding unpleasant blasts of cold air.
- Wiring Speed Controls: Many electric blowers offer manual speed control. This involves connecting the provided wall-mounted dial or in-line controller to the fan’s wiring, giving you the ability to crank up the airflow during a roaring fire or dial it back to a gentle hum for overnight burning.
Troubleshooting Common Installation Issues
Sometimes, things don’t go exactly to plan. When your new gadget seems reluctant, here’s where to look.
Blade Non-Rotation Problems
If the fire is hot but the blades are still, don’t panic. The cause is almost always one of three things.
- Insufficient Stove Temperature: This is the most common culprit. Double-check your surface temperature with a thermometer. If it’s below 150°F, the stove simply isn’t hot enough yet for a thermal fan to engage. Stoke the fire and give it more time.
- Incorrect Placement: If you’ve placed the fan on a cool spot, like a raised soapstone panel or too far forward on a large stove, it may never get hot enough to start. Refer to your temperature readings and reposition the fan to a hotter, flatter area.
- Manufacturing Defects: In rare cases, a fan may be faulty out of the box. If your stove is verifiably hot (over 200°F) and the blades refuse to budge, and you’ve confirmed it’s not a simple issue with a shipping restraint or protective film, it’s time to contact the retailer for a warranty claim.
Performance Optimization Techniques
Installation is just the beginning. To truly master your system, a little fine-tuning can work wonders.
- Adjusting Position Based on Air Currents: Watch how the heat moves. You can sometimes significantly improve performance by shifting the fan a few inches to the left or right to catch a better “thermal draft” off the stove surface.
- Using Heat-Resistant Pads: For stoves with highly variable surface temperatures or for owners worried about potential scratches, a thin, heat-resistant silicone pad placed under the fan can provide a stable, protective base without significantly impacting heat transfer.
- Implementing Complementary Ceiling Fans: Remember, stove fans circulate heat away from the stove. To push that warm air back down into your living space, set your ceiling fan to run on a low speed in a clockwise direction during the winter months. This creates an updraft that pushes the rising warm air down the walls and back into the room, working in perfect harmony with your stove fan.
For an installation that is as straightforward as it is effective, the VODA 4-Blade Stove Fan is designed with a stable, balanced base and clear operating parameters, making the setup process simple and reliable.
- Product: VODA 4-Blade Stove Fan
- Link: https://www.vodastovefan.com/products/voda-4-blade-stove-fan
Maintenance and Troubleshooting
Getting your fan installed is only half the journey; keeping it happily whirring away for years to come is the other. Think of it not as a chore, but as a simple, periodic conversation with a piece of machinery that, for the most part, is perfectly happy to look after itself.
Routine Maintenance Schedule
The wonderful thing about a wood stove fan, particularly the heat-powered variety, is its sheer mechanical simplicity. It asks for very little, but what it does ask for is non-negotiable.
Daily and Weekly Care
This isn’t about pulling out tools; it’s about developing a quick, observant habit. Each time you build a fire or tend to the stove, give the fan a brief glance.
- Visual inspection for debris and dust accumulation: A layer of dust on the blades or in the grille isn’t just an aesthetic issue; it’s added weight and imbalance. A quick visual check ensures nothing has fallen onto it and that dust isn’t building up into a fuzzy coat.
- Verification of smooth blade rotation: When the stove is hot and the fan is spinning, watch it for a moment. Does it spin true, or does it wobble? A smooth, vibration-free rotation is the sign of a healthy fan. Any new shudder or shake is your first clue that something needs attention.
- Temperature performance monitoring: Keep an eye on your stove’s surface temperature with that magnetic thermometer you wisely purchased. Note the temperature at which the fan begins to spin. If that start-up temperature seems to be creeping higher over time, it might be a sign that the thermoelectric module is getting tired or that the bearings need a look.
Monthly and Seasonal Maintenance
Once a month during the burning season, and certainly before you pack it away for the summer, a slightly more involved check is in order.
Comprehensive Cleaning Procedures
The enemy of all fine machinery is grit and grime, and a stove fan lives in a surprisingly dusty environment.
- Cool-down period requirements before handling: This is the golden rule, writ large. The fan must be stone-cold to the touch before you even think about cleaning it. Thermal shock can crack the TEG module, and you can easily burn your fingers on hot metal.
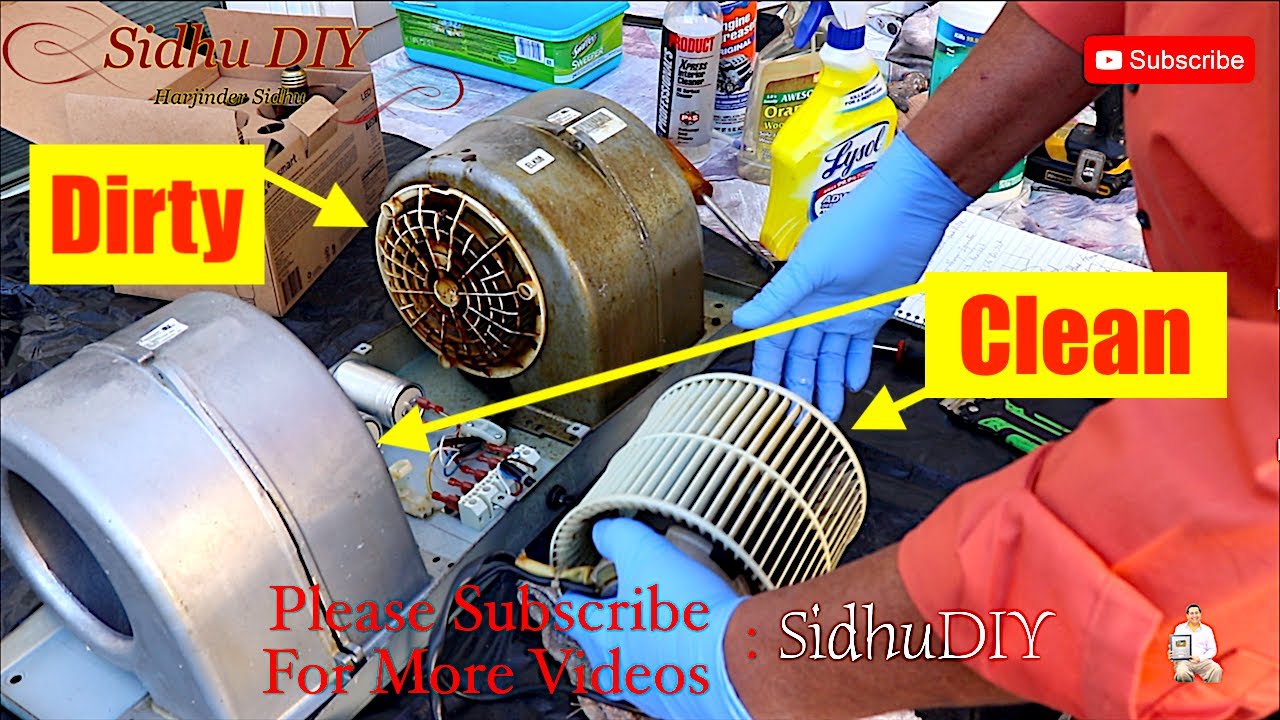
- Soft brush removal of ash and dust from blades: A soft-bristled paintbrush or a clean makeup brush is the perfect tool for the job. Gently brush the dust off the blades, the base, and the entire housing. For stubborn grime, a slightly damp (not wet) cloth can be used, but ensure the unit is completely dry before returning it to the stove.
- Internal cleaning for electric motor compartments: For electric blowers, power down the unit and remove the cover (consult your manual). Use a can of compressed air to gently blow dust out of the motor compartment and from between the fins of the heat sink. This prevents overheating and maintains efficiency.
Lubrication and Component Care
Most heat-powered fans are sealed and require no lubrication. It’s the electric blowers and specific mechanical parts that demand this extra step.
- High-temperature lubricant application to moving parts: If your fan’s motor has oil ports (again, check the manual), a single drop of a high-temperature machine oil or synthetic air tool oil is all that’s needed. Do not over-lubricate, as excess oil will attract more dust.
- Bearing maintenance for electric blowers: A well-maintained electric blower should be nearly silent. Any new noise often points to dry bearings. A specialist high-temperature bearing lubricant can quiet them down, but if the bearings are sealed, the entire motor may need replacement.
- Thermal paste renewal for TEG units (every 2-3 years): The thermoelectric module is sandwiched between the base and the heat sink. The efficiency of this heat transfer depends on a special, high-temperature thermal paste. Over years of service, this paste can dry out and degrade. Replacing it every few seasons can restore a significant amount of performance to an older, slowing fan.
Advanced Troubleshooting Guide
When the gentle art of maintenance isn’t enough and your fan starts to complain audibly or underperform, it’s time for some gentle diagnostics.
Diagnosing Noise Issues
A noisy fan is an unhappy fan, and it’s usually telling you exactly what’s wrong, if you know how to listen.
Rattling and Vibration Solutions
This is almost always a mechanical, fix-it-yourself issue.
- Tightening loose mounting screws and blade attachments: The constant heating and cooling cycle can loosen screws over time. Carefully check and tighten any screws holding the fan together or attaching the blades to the motor shaft (once the unit is completely cold).
- Realigning misaligned blades causing imbalance: A bent blade, even slightly, will cause a wobble and a rhythmic thump-thump-thump. Gently try to straighten it. If a blade is cracked or broken, it must be replaced.
- Adding vibration-dampening pads: If the fan itself is fine but vibrates against a slightly warped stove top, a thin, heat-resistant silicone pad placed underneath can absorb the vibrations and restore peace and quiet.
Squeaking and Grinding Repairs
These sounds are more serious, indicating friction where there shouldn’t be any.
- Lubrication of dry bearings and motor components: A steady squeak is the classic cry for oil. Apply a drop of high-temperature lubricant to the motor’s shaft or oil ports as described in the maintenance section.
- Removal of debris from blade housing: A ticking or grinding sound could be a small piece of wood or a cinder that has found its way into the gap between the blade and the housing. A careful visual inspection and removal with a toothpick or compressed air can solve it.
- Motor replacement for worn electrical components: A persistent, loud grinding noise from inside an electric blower motor usually means the internal bearings are shot. At this point, the most practical solution is often to replace the entire motor assembly.
Performance Problem Resolution
When the fan is quiet but just not moving the air like it used to, the investigation moves to its core function.
Inadequate Air Movement
If you’re not feeling the breeze, the cause is typically one of three things.
- CFM verification against room size requirements: First, be realistic. A small 4-blade fan is designed for a modest space. If you’ve added a room extension or are trying to heat a much larger area, you may simply be asking more of the fan than it was engineered to deliver.
- Temperature measurement for proper power generation: Return to your trusty thermometer. Is the stove surface consistently reaching an optimal temperature (around 300-400°F)? A stove run too cool will result in a slow-spinning, underperforming fan.
- Blade damage inspection and replacement: Bent, chipped, or heavily dust-caked blades are aerodynamically inefficient. They will spin but move very little air. Inspect them carefully and replace the blade set if necessary.
Intermittent Operation
A fan that works one minute and not the next is suffering from an unreliable connection, either thermal or electrical.
- Thermal switch testing and replacement: For electric blowers, the thermal switch is the most common point of failure. You can test it with a multimeter for continuity when hot. If it’s faulty, it won’t complete the circuit to turn the fan on, no matter how hot the stove gets.
- Speed control switch diagnosis: A faulty manual speed control dial can cause the fan to cut in and out erratically. Bypassing the switch temporarily (by connecting the wires directly) can confirm if it’s the culprit.
- Electrical connection verification for powered units: Over time, the heat can cause wire connections to loosen or corrode. Trace the wiring from the blower to the plug, ensuring every connection point is tight and clean.
For a fan that requires minimal fuss and is built for long-term reliability, the VODA 4-Blade Stove Fan is engineered with a sealed, maintenance-free motor and balanced blades designed for quiet, consistent performance season after season.
- Product: VODA 4-Blade Stove Fan
- Link: https://www.vodastovefan.com/products/voda-4-blade-stove-fan
Maximizing Efficiency and Lifespan
Getting the most out of your wood stove fan isn’t just about moving heat; it’s about creating a symbiotic relationship between your stove, the fan, and your home. A fan treated with consideration will not only perform better but will also be a companion for countless cozy evenings to come.
Operational Best Practices
Think of these not as rigid rules, but as the guiding principles for a happy, high-performing appliance.
Temperature Management
This is the single most critical factor. Your heat-powered fan lives and breathes temperature, and getting this right is the difference between a whirring marvel and a sluggish disappointment.
- Maintaining optimal stove surface temperatures (300-500°F): This is the sweet spot. At around 300°F (150°C), most fans will begin their elegant, silent spin. Between 400-500°F (200-260°C), they hit their peak performance, moving air with purposeful efficiency. This is where they are designed to operate.
- Avoiding overheating scenarios above 650°F: More heat is not always better. Exceeding 650°F (340°C) can be the thermal equivalent of a heart attack for your fan. The intense heat can permanently damage the thermoelectric module (TEG) at its heart, warping blades, and degrading internal lubricants. If your stove is running this hot, you’re over-firing it, and your fan is in the danger zone.
- Using magnetic thermometers for continuous monitoring: This is your essential dashboard. A magnetic thermometer stuck on the stove pipe or directly on the surface near the fan gives you an instant, accurate readout. It removes all the guesswork, telling you when the fan should start, how hard it’s working, and when the stove is venturing into temperatures that are too high for safety or the fan’s wellbeing.
Complementary Efficiency Measures
Your fan can only work with the heat and the environment you provide. A few simple adjustments to your home can transform its effectiveness.
Home Insulation and Air Sealing
A fan pushing heat into a room is like filling a leaky bucket; you want to plug the holes first.
- Identifying and sealing draft sources near stove locations: Feel for cold air around windows, doors, and even electrical outlets on exterior walls near the stove. Sealing these with caulk or weatherproofing strips ensures the heat your fan circulates stays in the room, rather than creating a draft that pulls in cold air from outside.
- Implementing ceiling insulation to retain circulated heat: Heat rises. If your ceiling is poorly insulated, all that wonderful warm air your fan has pushed off the ceiling will simply escape into the attic. Proper insulation acts as a lid, keeping the heat in the living space.
- Using door sweeps and weather stripping: A simple door sweep can block the gap under a door, preventing heat from migrating to cooler parts of the house and keeping the stove room toasty.
Strategic Room Layout
How you arrange your space can either help or hinder the river of air your fan is creating.
- Furniture arrangement to promote air flow: Avoid placing large sofas or bookshelves directly in the path between the stove and the main part of the room. Think of the fan’s output as a stream that needs a clear channel to flow.
- Removing obstructions from fan output paths: Ensure there is at least a few feet of clear space in front of the fan. Don’t use the mantel above the stove as a drying rack for clothes or place decorative items that could block the air it’s working so hard to push.
- Utilizing thermal mass for heat retention: Materials like brick, stone, or tile absorb heat when the fire is roaring and gently radiate it back out long after the fire has died down. A brick wall behind the stove or a tiled hearth will work with your fan, soaking up excess heat and stabilizing the room’s temperature.
Extending Product Lifespan
A wood stove fan is a simple piece of engineering, but like any faithful servant, its longevity depends on a little foresight and care.
Preventive Care Techniques
An ounce of prevention is worth a pound of cure, and never more so than with a device that sits on top of a box of fire.
- Regular cleaning schedules to prevent dust buildup: As outlined in the previous maintenance section, a clean fan is a happy, balanced, and efficient fan. A quick brush-down every few weeks during the burning season prevents dust from baking onto surfaces and weighing down blades.
- Seasonal inspection of all moving components: Before the first fire of autumn, give the fan a once-over. Gently check for blade play, ensure all screws are snug, and confirm it spins freely. This five-minute ritual can catch a small issue before it becomes a major failure mid-winter.
- Proper off-season storage in dry, temperature-stable environments: When winter is over, don’t just leave the fan on the cold, damp stove. Give it a final thorough cleaning, let it dry completely, and store it in its original box (if you have it) or wrapped in a soft cloth in a cupboard. This protects it from dust, humidity, and accidental knocks.
Component Replacement Planning
Even the best-made fans have parts with finite lifespans. Knowing what to expect demystifies the future and makes you the master of your appliance’s destiny.
Expected Lifespan by Technology
| Fan Type | Typical Lifespan | Key Considerations |
|---|---|---|
| Conventional Rotary Fans | 10-15 years with proper maintenance | The simple, often battery-powered motors can last a very long time with occasional bearing lubrication. |
| TEG Fans | 5-10 years with motor replacement capability | The TEG module itself can degrade over 5-10 years, but the beauty is that the DC motor is a simple, replaceable part, often giving the unit a second life. |
| Stirling Engine Fans | Up to 15 years with minimal part wear | With few moving parts and no electrical components, these can be remarkably long-lived, though seals can eventually wear. |
Common Replacement Parts
Fortunately, you don’t always need to replace the entire unit.
- Electric motors for TEG units ($15-40 replacement cost): This is the most common repair. When a TEG fan stops spinning, it’s often the small DC motor that has worn out, not the TEG itself. These are widely available online, and swapping them is usually a matter of a few screws and two wires.
- Thermal switches for electric blowers: The component that turns an electric blower on and off with the heat is a common failure point. It’s a cheap part and, for those comfortable with basic wiring, a straightforward fix.
- Blade assemblies for damaged fan units: If a blade gets cracked or badly bent, you rarely need a new fan. Most manufacturers sell replacement blade sets that simply clip or screw onto the motor shaft.
For a unit designed from the outset for longevity and fuss-free operation, the VODA 4-Blade Stove Fan utilizes a sealed, maintenance-free motor and a robust TEG module, backed by a design focused on sustained performance across countless heating seasons.
- Product: VODA 4-Blade Stove Fan
- Link: https://www.vodastovefan.com/products/voda-4-blade-stove-fan
Comparative Analysis and Brand Selection

Choosing the right wood stove fan can feel like a daunting task, but it boils down to understanding the subtle interplay between technology, build quality, and the specific character of your stove. It’s the difference between a device that merely functions and one that becomes an indispensable, silent partner in your home’s heating ecosystem.
Top Manufacturer Evaluation
In the world of stove fans, a few names consistently rise to the top, each with its own philosophy on how to best harness the laws of thermodynamics for our comfort.
Premium Brand Performance
Caframo Quality Assessment
Caframo is a name that carries the weight of history and a reputation for near-indestructibility. Hailing from Canada, a nation that knows a thing or two about winter, they have over 50 years of fan manufacturing experience baked into their designs. Their true mastery lies in their advanced thermoelectric technology implementation; their proprietary “Power Tower” design maximizes the temperature differential to drive a motor that is both powerful and remarkably quiet. The real benefit for the user is their broad temperature range compatibility with most stove types, from modern, low-emission units to older, hotter-running stoves, ensuring reliable startup and consistent performance without fear of overheating.
Warpfive and VODA Comparisons
While Caframo is the established veteran, brands like Warpfive and VODA have carved out significant niches by focusing on specific, compelling value propositions.
- Warpfive’s Lifetime Warranty: This is arguably their most powerful feature. A lifetime warranty offering is a bold statement of confidence in craftsmanship and materials. It effectively de-risks your purchase, promising that any manufacturing defects or premature failures will be addressed for the life of the product. For a device that lives in a harsh thermal environment, this is an incredibly valuable peace of mind.
- VODA’s Global Accessory Compatibility: VODA has positioned itself as a user-centric and versatile brand. A key advantage is their focus on global accessory compatibility. Whether you need a heat shield protector for an excessively hot stove surface or a booster base to improve performance on a larger stove, their accessories are designed to be universally adaptable, simplifying ownership and enhancement.
- Cost-to-Performance Ratio: When you line them up, Caframo often sits at the premium end of the price spectrum, justifiably so for its proven track record. Warpfone, with its lifetime warranty, commands a similar premium. VODA frequently emerges as a strong contender in the cost-to-performance analysis, offering robust performance and thoughtful features at a slightly more accessible price point, making high-quality heat circulation available to a broader audience.
Technology Comparison Table
The heart of the choice often lies in the core technology. Each type of fan has its own personality, advantages, and quirks.
Power Source Advantages and Limitations
| Technology | Advantages | Limitations | Best For |
|---|---|---|---|
| Thermoelectric (TEG) | Self-powered; starts automatically with heat; wide range of models and prices. | Moderate maintenance (motor may eventually need replacement); can be damaged by extreme overheating. | The vast majority of users seeking a “set it and forget it” solution. |
| Stirling Engine | Minimal maintenance (few moving parts, no electronics); virtually silent operation; fascinating to watch. | Can be more expensive; may have a slower start-up and be more sensitive to soot and dust on the piston cylinder. | Purists who value mechanical elegance and silence above all else. |
| Electric Powered | Maximum, consistent air movement regardless of stove temperature; can be used with a thermostat. | Requires a nearby power outlet; not operational during a power outage; involves cords. | Large spaces requiring guaranteed high-volume airflow, where an outlet is conveniently located. |
Price-to-Performance Recommendations
Your budget will naturally guide you, but it’s useful to know what to expect in each tier.
- Budget-conscious solutions under $50: In this range, you’ll find basic TEG fans, often with 2 or 4 blades. They absolutely work and will move heat better than no fan at all. The trade-off is often in the quality of the motor and TEG module, which may have a shorter lifespan or be less efficient at lower temperatures. They are a good entry point, but manage your expectations for long-term durability.
- Mid-range optimal performance ($50-120): This is the sweet spot for most homeowners. Here you’ll find the core offerings from brands like VODA, along with entry-level models from Caframo and Warpfive. You get significantly better build quality, more reliable TEGs for lower start-up temperatures, more efficient blade designs, and quieter operation. This investment typically translates to years of dependable service.
- Premium whole-house systems ($120-250): At this level, you are paying for superior engineering, maximum airflow, and exceptional durability. This includes the top-tier Caframo models like the True North, larger Warpfive units, and specialized fans designed for massive heat output. They often feature the best motors, the most advanced TEG stacks, and are built from higher-grade materials to withstand decades of use. They are designed not just to circulate heat, but to dominate the thermal dynamics of an entire floor.
For those seeking that optimal balance of proven performance, thoughtful design, and value without compromise, the VODA 4-Blade Stove Fan stands as a prime example of mid-range excellence, incorporating a maintenance-free motor and a robust TEG module engineered for consistent, long-term operation.
- Product: VODA 4-Blade Stove Fan
- Link: https://www.vodastovefan.com/products/voda-4-blade-stove-fan
Advanced Applications and Special Scenarios
Once you’ve selected the right fan, the next step is integrating it into your unique living environment. This is where the principles of heat circulation move from theory into practice, adapting to the specific challenges and opportunities presented by your space.
Unique Installation Environments
Not every home is a standard, box-shaped living room with eight-foot ceilings. For those living off the grid, in architecturally ambitious spaces, or on the move, stove fan application requires a bit more finesse.
Off-Grid and Alternative Power Solutions
For a system already predicated on self-sufficient heat, relying on the grid for air circulation can feel like a contradiction. The beauty of thermoelectric and Stirling engine fans is their inherent energy independence; they run on the heat you’re already producing. But what if your needs go beyond what a standard TEG fan can provide?
- Solar-powered electric blower options: For situations requiring immense, directed airflow—such as heating a large workshop—a high-CFM electric blower powered by a dedicated solar panel and battery system can be a powerful solution. This creates a closed-loop, renewable energy system for heating, entirely independent of the commercial grid.
- Battery backup systems for power outages: If you opt for an electric fan for its raw power but live in an area prone to power cuts, a simple Uninterruptible Power Supply (UPS) or a power station can keep the fan running for hours. This ensures your heat circulation continues even when the lights go out.
- Complete energy independence with heat-powered units: This is the ultimate off-grid solution. A quality thermoelectric or Stirling engine fan requires no external power whatsoever. It’s a perfectly elegant, self-contained system where the input is wood and the output is distributed warmth, with no plugs, batteries, or solar panels required.
Challenging Architectural Spaces
Architectural drama often comes with a thermal price. Vaulted ceilings and open plans are beautiful but notoriously difficult to heat efficiently. Conversely, tiny homes and RVs present the opposite challenge: too little space and very specific physical constraints.
High Ceiling and Open Floor Plan Solutions
In these spaces, heat stratifies, pooling comfortably at the ceiling while your feet remain cold. A single stove fan is a good start, but it’s often not enough.
- Multiple fan deployment strategies: Don’t rely on a single unit. Employ a “staged” approach. Place your primary, most powerful fan on the stove to create the initial thrust of warm air. Position a second, smaller fan on a table or shelf further away to catch this airflow and push it laterally into adjoining spaces or towards seating areas, creating a convective loop.
- Complementary ceiling fan integration: Your wood stove fan handles the horizontal distribution; a ceiling fan is essential for vertical management. By running your ceiling fan on a low speed in the winter (with blades spinning clockwise to gently pull air up in the center and push the stratified warm air down the walls), you can reclaim the heat trapped at the ceiling and feed it back into the room for your stove fan to recirculate.
- Strategic placement for optimal air current patterns: Think of your space as a circuit. The goal is to create a continuous, gentle current of air. Position your stove fan to push air towards the primary pathway into the next room. Avoid placing it where the airflow will be immediately interrupted by a large piece of furniture or a wall.
Small Space and Mobile Applications
In a tiny home, RV, or boat cabin, every cubic inch matters, and the stove itself is often smaller and runs at different temperatures.
- Compact 2-3 blade fans for tiny homes and RVs: These smaller units are designed for limited surface area and are calibrated to start up at the lower temperatures typical of smaller stoves. Their reduced size prevents them from dominating the stovetop, leaving room for a kettle.
- Low-profile designs for limited clearance situations: Some stoves, particularly in RVs, may have a flue damper handle or a low-hanging hood that limits vertical space. Seek out fans specifically marketed as “low-profile” to ensure they fit safely beneath any obstructions.
- Marine-grade materials for high-humidity environments: If your stove is on a boat, the constant humidity can be corrosive. While most stove fans have anodized aluminum bodies, look for models that explicitly mention corrosion-resistant components or marine-grade bearings to ensure longevity in a damp, salty atmosphere.
Future Technology Integration
The humble wood stove is not immune to the march of technology. While the core principle of burning wood remains timeless, how we manage and optimize the resulting heat is entering a new, smarter era.
Smart Home Compatibility
Even a self-powered thermoelectric fan can be brought into your home’s digital ecosystem with a few clever additions.
- Temperature-activated smart outlet controls: For electric-powered stove fans, a smart plug equipped with a temperature sensor is a game-changer. You can program the fan to turn on automatically once the stove surface reaches a specific temperature (e.g., 120°F) and turn off when it cools down, creating a fully automated system that requires zero intervention.
- Remote monitoring and control systems: Imagine being able to check your stove’s surface temperature from your smartphone while you’re away from home. Wireless stove-top thermometers paired with a smart home hub can provide this data, allowing you to verify that your fire is burning safely or has gone out. For electric fans, you can turn them on remotely to pre-circulate heat as you’re heading home.
- Integration with whole-house energy management: In 2025, whole-home energy monitors are becoming more common. By correlating data from a smart stove thermometer with your home’s ambient temperature and overall energy use, you can begin to quantify exactly how much your wood stove is reducing your reliance on other heating fuels, turning warmth into valuable data.
Efficiency Monitoring Systems
For the true heating enthusiast, the next frontier is not just feeling the warmth, but understanding it on a granular level.
- Digital CFM and temperature tracking: Advanced systems are emerging that use small, USB-powered anemometers and data loggers to track the air velocity and temperature coming from your stove fan over time. This creates a performance profile, showing you exactly how effective your fan is throughout the different phases of a fire.
- Fuel consumption correlation analytics: By logging your fan’s performance data alongside the amount and type of wood you burn, you can begin to see clear patterns. You might discover that a well-placed fan allows you to achieve the same comfort level with one less log per burn, directly translating to saved money and effort.
- Performance optimization recommendations: This is the culmination of all the data. A sophisticated system could analyze your unique patterns and suggest actionable advice: “Your data shows airflow drops significantly when the room reaches 72°F. Consider repositioning your fan 6 inches further back on the stove to maintain efficiency at higher ambient temperatures.”
For those looking to build a robust, data-informed heating system, starting with a reliable, consistent performer is key. The VODA 4-Blade Stove Fan, with its maintenance-free motor and stable TEG, provides a dependable baseline of performance upon which these advanced monitoring and control systems can be built.
- Product: VODA 4-Blade Stove Fan
- Link: https://www.vodastovefan.com/products/voda-4-blade-stove-fan
Mastering Your Wood Stove Fan Journey
Throughout this comprehensive guide, we’ve explored the critical elements that transform a simple stove accessory into a powerful heating asset. Correct placement remains paramount—positioning your fan toward the rear of the stove top, maintaining proper clearance from the flue, and finding that thermal sweet spot where heat conversion becomes optimal. Understanding operational principles ensures you work with physics rather than against it, allowing the self-regulating mechanism to start and stop naturally with your fire’s intensity.
Maintenance emerges as the unsung hero of longevity. A simple regimen of weekly dusting, monthly lubrication, and seasonal inspection can easily double your fan’s service life. Meanwhile, selecting the appropriate technology—whether robust TEG, silent Stirling engine, or powerful electric blower—ensures perfect alignment with your specific stove type, room dimensions, and heating requirements. The synergy between proper installation, consistent care, and strategic complementary measures like ceiling fan integration creates an ecosystem where your wood stove fan operates at peak efficiency season after season.
Now that you’re equipped with professional knowledge to optimize performance and lifespan, which tip will you implement first? Share your experience in the comments below and help fellow enthusiasts master their heating efficiency. For those ready to upgrade their system, discover how the VODA 4-Blade Stove Fan combines reliable thermoelectric technology with balanced airflow design—click here to explore its features and transform your heat distribution today!