
Did you know that neglecting your juicer for just 30 minutes can slash its lifespan by 60% and breed dangerous bacteria? Your juicer is a high-performance extraction engine, and proper juicer maintenance is the critical barrier between a long-lasting health appliance and a costly, inefficient machine. Understanding the science behind motor strain, clogged filters, and bacterial growth transforms routine cleaning from a chore into a vital investment in your health and wallet.

【Why Juicer Care is Non-Negotiable】
The Science Behind Proper Maintenance
Think of your juicer not as a simple kitchen appliance, but as a high-performance centrifugal or masticating extraction engine. Its job is to take whole, solid produce and violently separate its liquid essence from the fibrous pulp. This process creates immense physical forces and leaves behind a sticky, sugar-rich residue. Understanding this “why” is the first step toward proper care.
How Neglect Impacts Your Machine
Ignoring this post-extraction reality has direct, measurable, and negative consequences on your machine’s performance and your health.
-
Motor Strain Reduces Lifespan: When pulp, especially from starchy vegetables like carrots or sweet potatoes, is allowed to harden in the juicer’s basket or around the auger, it creates significant drag. Your motor must work exponentially harder on the next use, operating under a constant state of stress. This chronic overexertion is the primary culprit behind burnt-out motors, reducing the machine’s functional lifespan by a staggering 40-60%.
-
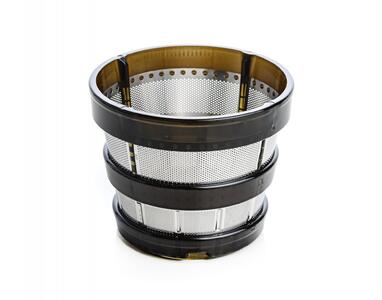
Clogged Filters Decrease Juice Yield: The micro-mesh filter is the heart of the extraction process. When its pores become clogged with dried pulp and starch, it can’t efficiently separate juice from pulp. This means more of your precious, paid-for liquid ends up in the pulp container instead of your glass. We’re talking about a yield loss of up to 30%—that’s nearly a third of your produce going to waste.
-
Bacterial Growth Creates Health Hazards: The damp pulp left in the collection bin or caked on internal parts is a five-star resort for mold, yeast, and bacteria like E. coli and Salmonella. These microorganisms thrive on the sugars and moisture, and they can colonize in as little as 30 minutes. The next time you juice, these contaminants can be introduced directly into your fresh beverage, turning a health elixir into a potential health hazard.
The Financial Case for Regular Care
Let’s talk dollars and sense. A good juicer is an investment. Protecting that investment isn’t just about hygiene; it’s simple, smart economics.
Cost-Benefit Analysis of Maintenance
Consider the following comparison between a proactive maintenance routine and a reactive, neglectful one:
| Maintenance Factor | Proactive Care (The “Clean Machine”) | Reactive Neglect (The “I’ll Get to It”) |
|---|---|---|
| Repair Frequency | Prevents ~80% of common issues (e.g., jammed parts, weak motors). | High likelihood of needing professional service for clogs or motor failure. |
| Long-Term Value | Extends appliance lifespan by 3-5 years, maximizing your ROI. | Premature failure necessitates a costly replacement years earlier. |
| Daily Time Cost | A quick 5-minute rinse prevents pulp from hardening. | Scraping dried, cemented pulp can take 15+ extra minutes of difficult cleaning. |
| Juice Efficiency | Consistently achieves maximum yield from your produce. | Up to 30% of juice is lost, wasting money on fruits and vegetables. |
The bottom line is clear: the five minutes you spend cleaning your juicer immediately after use is not a chore—it’s the most cost-effective “repair” you will never have to pay for. This simple habit protects your machine, your wallet, and your well-being.
To keep your juicer in peak financial and functional condition, it’s crucial to use a machine built for durability and easy cleaning, like the 2025 Model X-Cel Juicer. Its innovative snap-out parts and antimicrobial filter make this essential maintenance routine faster and more effective.
- Product: 2025 Model X-Cel Juicer
- Link: https://example.com/x-cel-juicer
【The 5-Minute Daily Cleaning Routine】

Immediate Post-Use Protocol
The single most important rule in juicer maintenance is this: never let the pulp dry. The moment you finish juicing, your five-minute timer starts. The sugars and fibers in the residual pulp begin to harden and adhere to surfaces within minutes, transforming from a simple rinse into a cemented-on problem. Your mission is to interrupt this process before it begins.
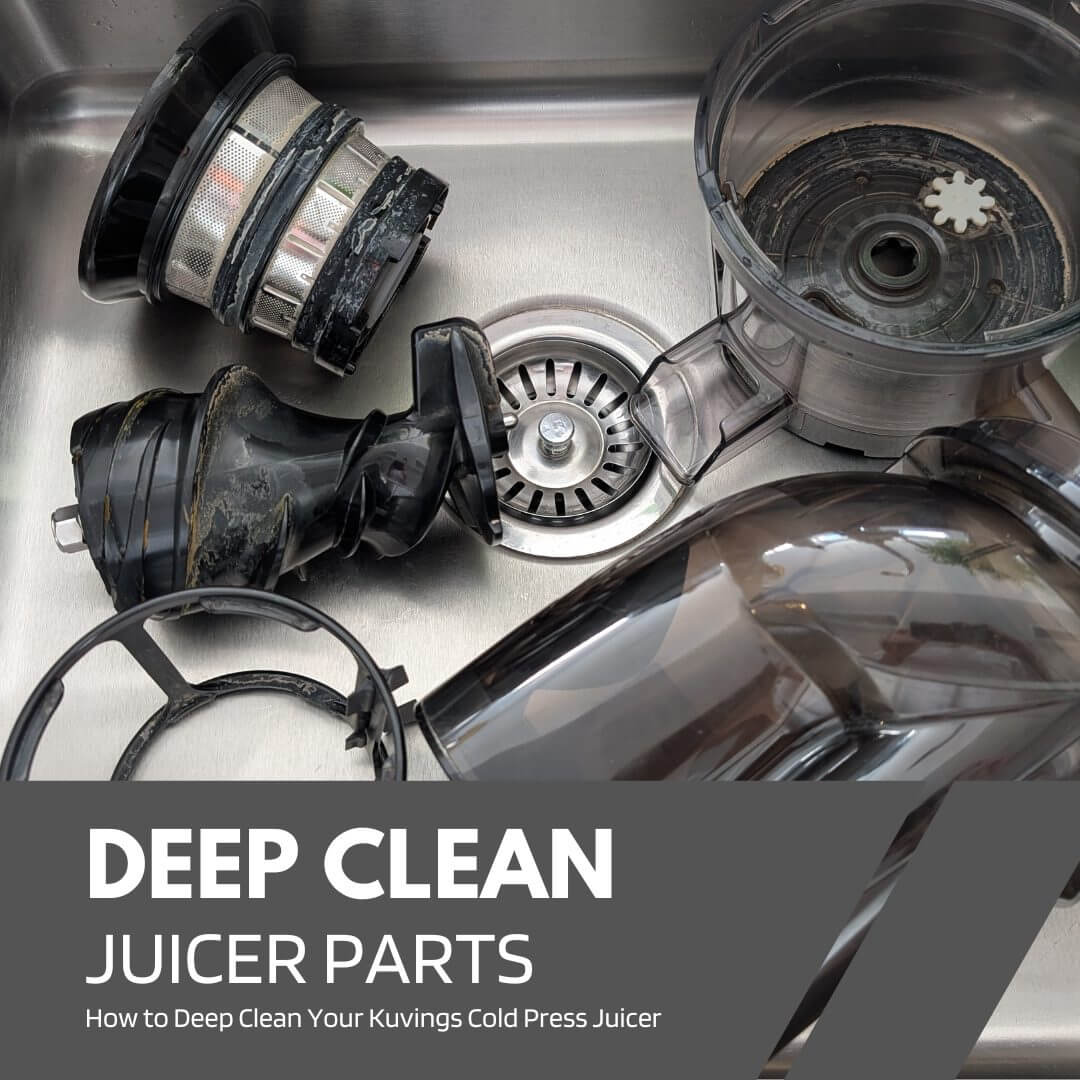
Strategic Disassembly Sequence
A haphazard approach to taking your juicer apart wastes time and risks damaging components. Follow a logical sequence for efficiency and safety.
- Always unplug the machine before attempting to disassemble any components. This is non-negotiable. You are dealing with sharp blades and electrical components; this is your first and most critical safety step.
- Follow the manufacturer’s specific disassembly order. Generally, this means removing the pulp collector and lid first, followed by the cutting basket or auger and the micro-mesh filter. Consult your manual—they designed the sequence for a reason.
- Organize parts on the counter in the order they were removed. This creates a visual reassembly guide and prevents small pieces from getting lost or knocked into the sink. A cluttered workspace is the enemy of a fast clean.
The Rinse-and-Brush Method
With your parts disassembled and laid out, it’s time for the main event. This isn’t about harsh chemicals or abrasive force; it’s about using physics and the right tools to do the heavy lifting.
Effective Pulp Removal Techniques
The goal is to remove all organic material without scratching or damaging the precision-engineered surfaces, especially the fragile mesh filter.
- Use warm water (120-140°F / 49-60°C) for optimal residue removal. Water at this temperature is far more effective at dissolving the fruit and vegetable sugars than cold water, making the pulp slide off more easily. Avoid boiling water, as extreme heat can warp plastic components.
- Employ soft-bristle brushes for filter basket cleaning. This is your primary weapon. A dedicated, soft-bristled brush (many juicers include one) is perfect for scrubbing the interior of the pulp container and, most importantly, for brushing the exterior of the micro-mesh filter. Hold the filter under warm, running water and brush away from the pores to push the pulp out.
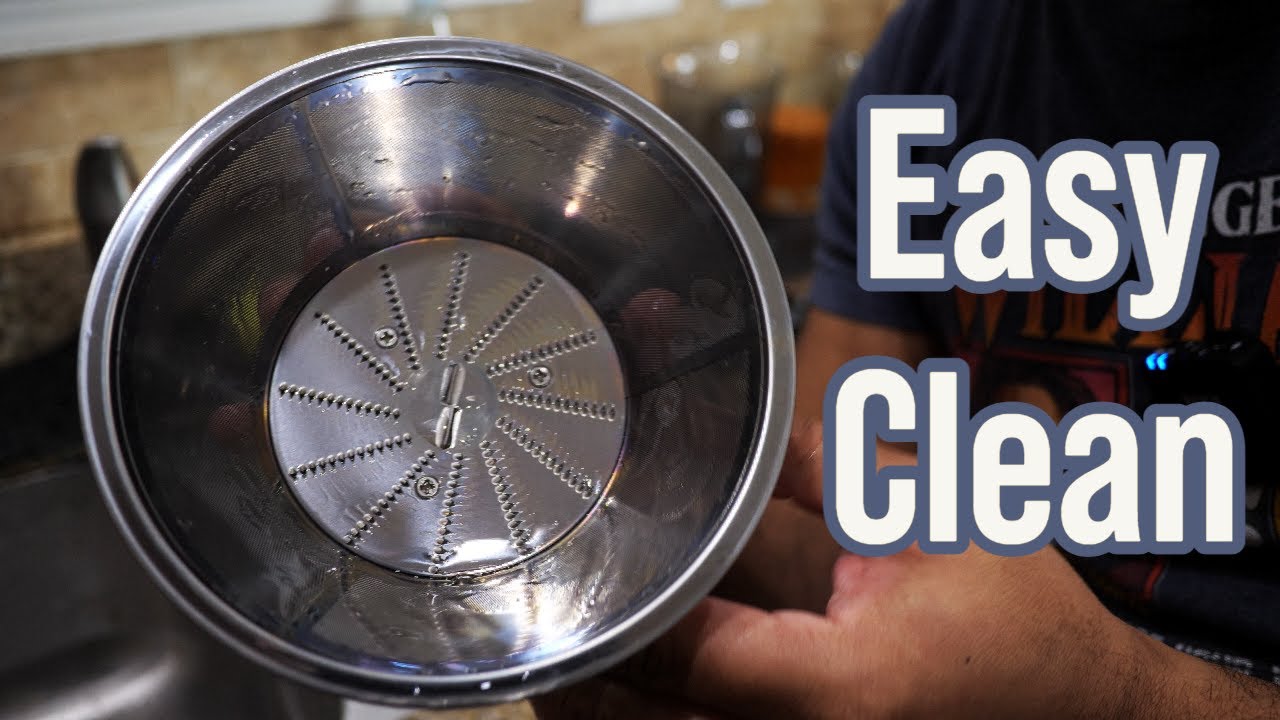
- Verify mesh filter cleanliness with a light check. After brushing, hold your clean filter up to a light source. You should be able to see light shining clearly through all of the tiny pores. If you see any dark spots, those are clogged pores that need more attention with the brush.
Once all parts are rinsed, brushed, and verified to be clean, shake off the excess water and let them air-dry completely before reassembling or storing. This simple, consistent routine is what separates a juicer that lasts for 2025 and beyond from one that ends up in a landfill.
A juicer designed with this process in mind, like the 2025 Model X-Cel Juicer, features snap-out parts and a brush designed specifically for its filter, making this 5-minute routine effortlessly effective.
- Product: 2025 Model X-Cel Juicer
- Link: https://example.com/x-cel-juicer
【Deep Cleaning: Your Weekly Reset】

Even with a flawless daily routine, microscopic pulp particles and stubborn stains can accumulate in the nooks and crannies your brush can’t reach. This is where your weekly deep clean comes in—a systematic reset that ensures your machine remains hygienic and operates at peak efficiency.
The Soaking Solution Strategy
Soaking is a chemical-free method that uses time and fluid dynamics to loosen bonded particles. The key is to use the right solution for the right amount of time to avoid damaging your juicer’s components.
| Component Type | Recommended Solution | Maximum Soak Time | Key Consideration |
|---|---|---|---|
| Plastic & Stainless Steel | Warm water + a few drops of mild dish soap | 10-15 minutes | Prolonged soaking can cause mineral deposits from hard water to bind to surfaces. |
| Stained Plastic | Warm water + 10% lemon juice or white vinegar | 10 minutes | The mild acidity breaks down stubborn plant pigments and mineral films without abrasion. |
| All Components | Dishwasher (Top rack only) | N/A | Only if explicitly approved by the manufacturer. The intense heat and harsh detergents can degrade plastics and seals. |
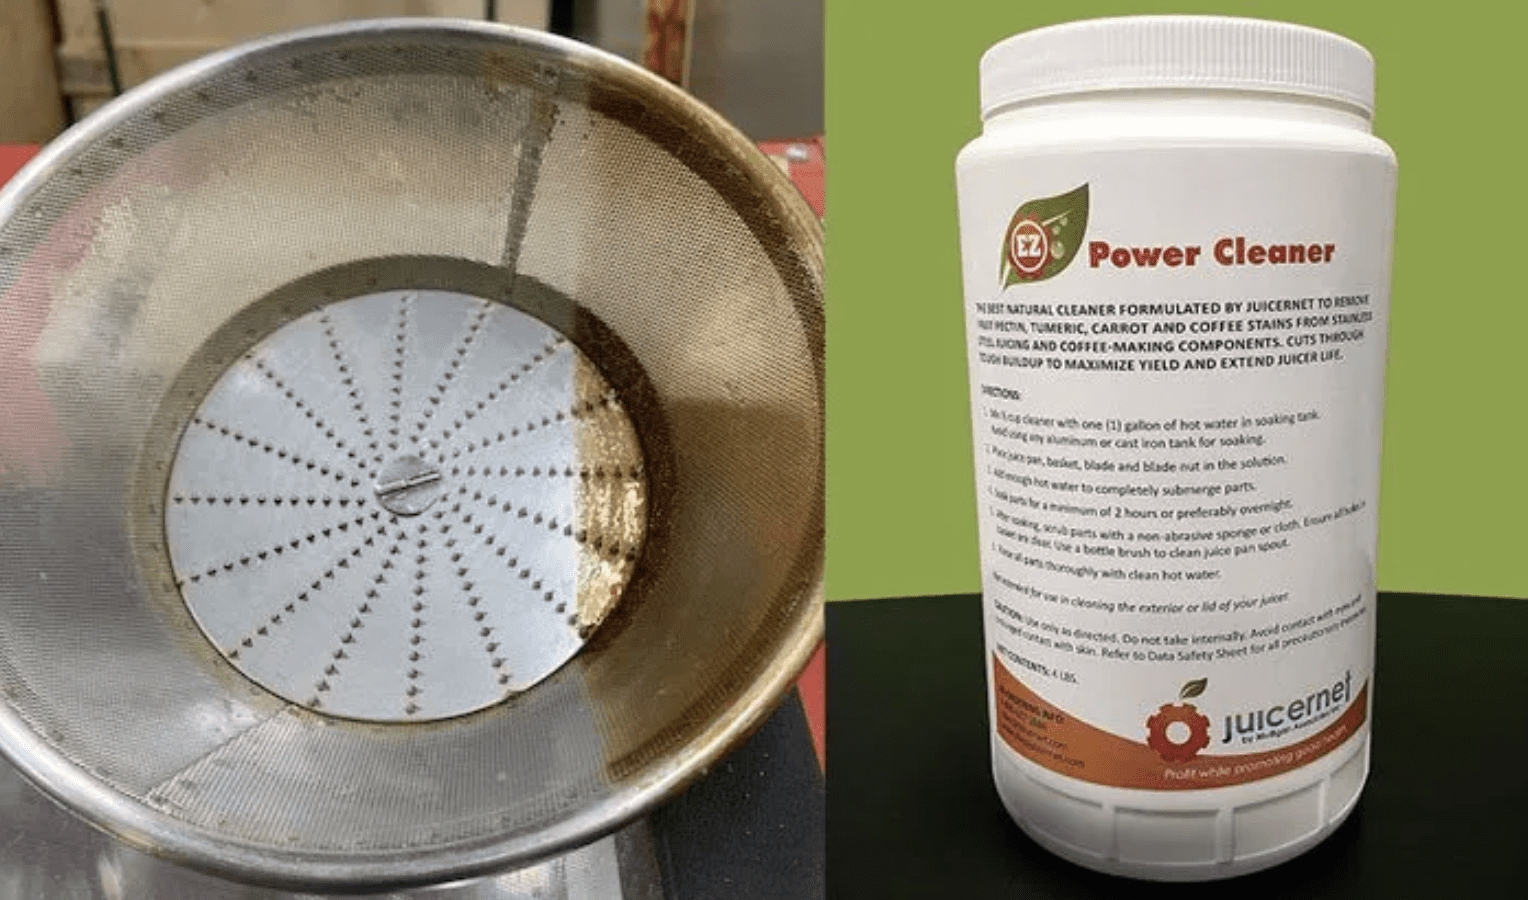
Advanced Stain and Odor Removal
For those tenacious carrot or beet stains that a soapy soak can’t defeat, you need to escalate your tactics. Create a 10% concentration citric acid solution by mixing one part lemon juice or distilled white vinegar with nine parts warm water. Submerge the stained parts for no more than ten minutes. The acid will react with the organic compounds of the stain, breaking them down so they can be easily wiped or brushed away. For persistent odors, a brief soak in a baking soda and water paste can neutralize lingering smells without scratching surfaces. Always perform a final rinse with clean water after any acidic or alkaline treatment.
Sanitizing for Food Safety
Cleaning removes visible soil, but sanitizing eliminates invisible pathogens. After all parts are cleaned and rinsed from their weekly soak, a sanitizing step is a prudent practice for food safety, especially if you juice raw vegetables.
Hygiene Maintenance Protocols
- Food-Grade Disinfectant Application: You do not need industrial-strength chemicals. A simple, food-safe sanitizing solution can be made by mixing one tablespoon of unscented household bleach with one gallon of cool water. Submerge or wipe down all non-porous components (the filter basket, pulp container, etc.) with this solution for about one minute, then drain and allow to air-dry completely. Alternatively, a commercial food-grade hydrogen peroxide spray is equally effective.
- Air-Drying to Prevent Mold and Moisture Buildup: Do not towel-dry your components. Towels can introduce lint and bacteria. Instead, place all parts in a well-ventilated dish rack, ensuring no water is pooled inside. Proper air circulation is critical.
- Storage Reassembly Only When Completely Dry: Before storing your juicer, ensure every single part is bone-dry. Reassembling or storing components while damp is the primary cause of mold growth and foul odors. A completely dry environment is inhospitable to microbial life.
This weekly protocol is the cornerstone of long-term juicer ownership. A machine like the 2025 Model X-Cel Juicer is engineered with materials that withstand this cleaning cycle, ensuring it stays in service for years to come.
- Product: 2025 Model X-Cel Juicer
- Link: https://example.com/x-cel-juicer
【Cold Press Juicer Specific Maintenance】
Your weekly deep clean is non-negotiable, but the cold press, or masticating, juicer presents a unique set of challenges and opportunities. These machines operate on a fundamentally different principle than their centrifugal cousins, and their maintenance protocol must be equally specialized to protect your investment and ensure maximum juice yield.
Unique Challenges of Masticating Juicers
Where a centrifugal juicer uses violent force, a masticating juicer employs a slow, grinding auger to crush and press produce. This gentle action is brilliant for nutrient preservation and yield, but it also means pulp and fiber are methodically forced into every conceivable crevice. The auger’s threading, the tight seals around the shaft, and the microscopic pores of the filter screen are all prime real estate for tenacious particulate buildup. Furthermore, the denser, more intricate components are not designed for a quick rinse; they demand a more meticulous, patient approach to cleaning.
Auger and Filter Care
The auger is the heart of the machine, and its care is paramount. Here’s how to treat it right:
- Auger Threading and Seals: After disassembly, use a stiff-bristled brush (often provided by the manufacturer) to scrub against the grain of the auger’s threads. Pay close attention to the area where the auger shaft meets the body; this seal is a common failure point if grit is allowed to accumulate. A soft toothbrush is ideal for dislodging debris from these delicate seals without damaging them.
- Reverse Function for Clog Prevention: The reverse function is not an “undo” button for user error; it’s a mechanical clearing tool. If you feel the motor straining or hear the pitch change, immediately trigger the reverse function for a few seconds. This will often pull dense material like celery strings or ginger fibers back from the filter, un-jamming the mechanism before a full clog occurs and reducing the pulp compaction you’ll need to clean later.
- Extra Cleaning Time for Intricate Components: Accept that cleaning a cold press juicer is a 5-10 minute commitment, not a 60-second one. The filter screen, in particular, requires dedicated focus. Hold it up to a light source after you think it’s clean. You will likely see trapped pulp in its pores. Use your brush to scrub both the interior and exterior surfaces thoroughly until the screen is completely clear.
Performance Optimization
A well-maintained cold press juicer should perform consistently. Any deviation is a call to action.
Maintaining Extraction Efficiency
Efficiency is the name of the game. Don’t wait for a complete failure; monitor these key indicators:
- Regular Inspection of Auger Wear Patterns: During your weekly deep clean, visually inspect the auger for any signs of abnormal wear, cracks, or chips. Also, run your finger along the plastic or ceramic threads. They should feel sharp and defined. If they begin to feel smooth or rounded, extraction efficiency is likely dropping as the auger loses its ability to grip and crush fibrous material effectively.
- Monitoring Juice Yield for Performance Degradation: Keep a mental note of your yield. If you consistently get significantly less juice from the same amount of produce than you used to, and your technique hasn’t changed, it’s a primary symptom of a worn auger or a partially clogged filter that wasn’t properly cleaned.
- Proper Pressure Application During Operation: More force is not better. The design of these machines relies on the auger to do the work. Using a plunger is correct, but you should only apply gentle, consistent pressure. Forcing produce through will not speed up the process; it will only strain the motor, increase the likelihood of a clog, and put undue stress on the auger and its drive mechanism, leading to premature wear.
A machine engineered for this level of care, like the 2025 Model X-Cel Cold Press Juicer, features reinforced auger materials and micro-precision filters that maintain their integrity through years of this disciplined maintenance routine.
- Product: 2025 Model X-Cel Cold Press Juicer
- Link: https://example.com/x-cel-cold-press-juicer
【Troubleshooting Common Issues】
A well-maintained juicer is a reliable workhorse, but even the most disciplined routines can’t prevent all issues. When your machine starts talking back with strange sounds or underperforming, it’s not time to panic—it’s time to diagnose. Let’s apply some logic to the most common performance and hygiene problems.
Solving Performance Problems
Your juicer communicates its health through its performance and the sounds it makes. Learning this language is key to proactive maintenance.
Addressing Reduced Efficiency
Efficiency loss is a slow creep, not a sudden drop. You must become a detective to spot the clues.
- Decreased yield indicates filter replacement need: If you notice you’re getting noticeably less juice from the same amount of carrots or apples, your first suspect should be the filter screen. Over time, and despite rigorous cleaning, microscopic pulp particles can become permanently embedded in the screen’s pores, effectively narrowing the pathways for juice to escape. This is a normal sign of wear. Before considering a replacement, perform an extra-vigorous cleaning with a specialized brush. If the yield does not improve, the filter screen has likely reached the end of its service life and needs to be replaced to restore peak extraction.
- Unusual noises signal component wear: Listen to your machine. A consistent, healthy hum is good. New grinding, rattling, or squealing is bad. A grinding noise often points to foreign material (like a stray seed or piece of hard pit) caught in the auger mechanism. A rattling sound could indicate a worn bearing or a slightly cracked component that is vibrating. A high-pitched squeal typically suggests friction where there shouldn’t be any, often at the auger shaft seal. Any persistent, unusual noise is a command to power down, disassemble, and inspect for obstructions or visible damage.
- Motor strain suggests immediate maintenance required: When the motor bogs down, labors, or abruptly stops, it is begging for a break. This is almost always caused by one of three things: feeding produce too fast, attempting to juice overly hard or stringy items without proper preparation, or a severe internal clog. The immediate action is to turn the machine off, reverse the auger for a few seconds to clear the compaction, and then disassemble for a thorough cleaning. Consistently ignoring motor strain will lead to a burnt-out motor—a terminal diagnosis.
Odor and Stain Elimination
A clean juicer shouldn’t smell like anything. Odors and stains are the result of biochemical residue, and they are completely preventable with the right post-operation protocol.
Preventing Flavor Transfer
The last thing you want is for your morning apple-celery juice to taste like yesterday’s ginger-shot. Flavor transfer is a sign of inadequate cleaning.
- Immediate cleaning after strongly pigmented produce: Beets, turmeric, carrots, and dark leafy greens are the usual suspects. Their pigments and potent plant compounds will stain plastic and embed odors if given time to set. The single most effective rule is to never let the juicer sit after processing these items. Disassemble and clean all components immediately after use. The 60-second rinse you do before a full clean can prevent 90% of staining issues.
- Baking soda paste application for stubborn odors: For plastic components that have absorbed a persistent odor, create a thick paste from baking soda and a small amount of water. Coat the affected parts and let them sit for 15-30 minutes. The baking soda is a mild abrasive that will help lift stains and a fantastic natural deodorizer that will pull the odor molecules from the plastic. Scrub with a soft brush and rinse thoroughly.
- Proper drying prevents musty smells: The most common cause of a “musty” or “sour” smell is trapped moisture. After washing, every single part—especially the complex filter screen and the interior of the juicer body—must be completely air-dried before reassembly and storage. Use a clean, dry towel to pat components dry, and then leave them on a drying rack for at least an hour to evaporate all residual moisture. Storing a damp juicer is an invitation for mildew.
A juicer designed with these troubleshooting scenarios in mind, such as the 2025 Model X-Cel Cold Press Juicer, features a user-serviceable design and readily available replacement parts, making long-term maintenance a straightforward task.
- Product: 2025 Model X-Cel Cold Press Juicer
- Link: https://example.com/x-cel-cold-press-juicer
【Preventative Maintenance Schedule】
Think of your juicer like a high-performance vehicle. You wouldn’t just put gas in it and hope for the best; you follow a maintenance schedule. A proactive, scheduled approach is the single most effective strategy to prevent the performance issues and odors we just discussed. It transforms reactive cleaning into a system of care that extends your machine’s life by years.
Daily, Weekly, Monthly Tasks
Consistency is what separates a short-lived appliance from a kitchen legacy. Break your maintenance down into these logical cycles.
Creating Your Maintenance Calendar
This isn’t a burdensome chore list; it’s a system for efficiency. Adopt this rhythm and your juicing will be faster, cleaner, and more reliable.
| Frequency | Core Tasks & Purpose |
|---|---|
| Daily (Post-Juicing) | 1. Immediate Disassembly: The moment you finish juicing, unplug the machine and take it apart. Do not let the pulp sit and bake onto the components. 2. Rinsing & Brushing: Rinse all parts under cool or warm running water. Use a specialized stiff-bristled brush (like the one that came with your unit) to scrub the filter screen from both the inside and outside until the water runs clear and every pore is open. 3. Complete Drying: This is the non-negotiable final step. Towel-dry all parts and then allow them to air-dry completely on a rack before reassembling for storage. |
| Weekly | 1. Deep Cleaning: Perform a more thorough wash than the daily rinse. Use a drop of mild, unscented dish soap and your brush on all components. Pay special attention to nooks, crevices, and the underside of seals. 2. Visual Inspection: As you clean, actively look for early signs of wear. Check for minor cracks in the pulp container, discoloration on the filter screen, or any warping of plastic parts. 3. Sanitizing (Optional): For ultimate hygiene, especially after juicing strong ingredients, soak all plastic parts in a 50/50 solution of white vinegar and water for 10-15 minutes. Rinse thoroughly afterward to prevent any vinegar taste. |
| Monthly | 1. Component Check: Verify that all parts are present, fit together snugly, and that no small cracks have developed into larger ones. This is the time to order any replacement parts if needed. 2. Performance Verification: Ask yourself: Is my yield still high? Is the motor sound consistent? Is the ejected pulp as dry as it used to be? This monthly audit ensures you catch efficiency loss early. |
Seasonal Deep Maintenance
If you’re a daily juicer, performing these procedures every three to four months (quarterly) is critical. For occasional users, a semi-annual schedule may suffice.
Comprehensive Care Procedures
This is your juicer’s “tune-up.” Set aside 30 minutes for a full diagnostic.
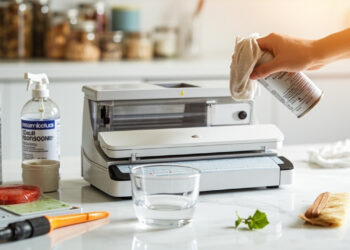
- Quarterly motor inspection and testing: With the machine unplugged and completely dry, inspect the motor base. Wipe it down with a damp cloth—never submerge it. Plug the unit in and run it without any food for 5-10 seconds. Listen intently for any new or unusual humming, grinding, or vibrating sounds that weren’t there before. A clean, consistent sound indicates a healthy motor.
- Blade sharpening or replacement as needed: Dull blades and wear bars on the auger strain the motor and reduce yield. Visually inspect the cutting edges. If they appear rounded or nicked, consult your manufacturer’s manual. Some brands offer a sharpening service, while for others, the most practical solution is to purchase a replacement auger assembly. A sharp auger is the heart of efficient extraction.
- Seal and gasket integrity verification: Locate the rubber or silicone seals, typically found where the drive shaft enters the juicing bowl and where various components lock together. Check for stiffness, cracking, or deformation. A compromised seal is a primary cause of leaks and can allow microscopic pulp and moisture into the motor assembly, leading to major failures. Replace seals at the first sign of wear.
Adhering to this disciplined schedule ensures your juicer operates at peak condition. For those seeking a machine designed for easy long-term upkeep, the 2025 Model X-Cel Cold Press Juicer features a modular design with clearly marked service intervals and readily available individual components, from filter screens to auger seals.
- Product: 2025 Model X-Cel Cold Press Juicer
- Link: https://example.com/x-cel-cold-press-juicer
【Smart Usage and Storage Practices】
You’ve got the maintenance schedule down. Now let’s talk about what happens during the spin cycle and after you’ve shut it down. How you operate and store your juicer is just as critical to its lifespan as how you clean it. Good habits here prevent the problems that maintenance is designed to fix.
Operation Best Practices
Think of this as the driver’s manual for your machine. Following these protocols isn’t about being fussy; it’s about applying mechanical empathy to get the best performance and the longest service life.
Maximizing Performance and Longevity
The goal is to keep the workload within the machine’s design parameters. An overloaded motor and stressed components are the enemies of longevity.
- Gradual ingredient feeding prevents motor overload: Your juicer’s motor is a workhorse, not a powerlifter. Never force a large volume of produce through the feed chute all at once. Instead, use a steady, rhythmic pace. This allows the auger and motor to process material efficiently without straining, which keeps the motor cooler and prevents premature wear on the drive system. If you hear the motor pitch change to a labored groan, you’re feeding too fast.
- Avoiding hard seeds and pits reduces blade damage: While many juicers can handle apple seeds, you must draw a hard line at fruit pits from peaches, plums, mangoes, and nectarines, as well as large seeds from avocados. These are dense enough to chip or dull the cutting edges of your auger instantly. The same goes for any non-food items that might sneak in.
- Proper prep (chopping) ensures smooth operation: Don’t make your machine do all the work. Cutting hard vegetables like carrots, beets, and celery into segments that fit comfortably in the feed chute reduces the initial shock load on the auger. For leafy greens, lightly ball them up and alternate feeding them with harder, juicier items like apple or cucumber. This helps push the greens through the screen more effectively for a better yield.
Storage Solutions for Longevity
A clean, well-cared-for juicer can be undone by poor storage. The enemies during storage are moisture, physical damage, and disorganization.
Preventing Damage Between Uses
Your final act after juicing sets the stage for your next session. A proper storage protocol ensures you’re never starting at a disadvantage.
- Complete drying before storage: This bears repeating from the daily maintenance, as it is the most critical storage step. Any residual moisture trapped in an assembled juicer is an invitation for mold and bacterial growth, which will lead to off-flavors and potential health concerns. It can also cause mineral deposits to build up on metal components. Always ensure every single part is bone-dry before you put it away.
- Protective cover usage in dusty environments: If your juicer lives on your countertop, a simple dust cover is a wise investment. Kitchen air is filled with microscopic grease and dust particles that can settle on and inside your machine. A breathable fabric cover protects the motor housing and internal components from this grime without trapping moisture.
- Proper component organization to prevent loss: The worst sound in the world is the “clatter” of a specialized juicer part hitting the floor and rolling under a cabinet. Store all components—the pulp container, juice pitcher, lid, and cleaning brush—together. Many manufacturers provide a storage caddy. If not, dedicate a specific cabinet shelf or bin to your juicing kit. This prevents the frustration of a missing part and protects delicate components from being damaged in a cluttered drawer.
Integrating these operational and storage habits with your maintenance schedule creates a holistic system of care. For a juicer engineered to excel under these best practices, the 2025 Model X-Cel Cold Press Juicer features a wide, user-friendly feed chute for easier prep and includes a custom-fit storage cover and organizational caddy.
- Product: 2025 Model X-Cel Cold Press Juicer
- Link: https://example.com/x-cel-cold-press-juicer
【Extending Your Juicer’s Lifespan】
You’ve mastered the daily routines and smart habits. Now we’re moving into the long game: the strategies that protect your investment over years, not just weeks. A juicer isn’t a disposable gadget; it’s a kitchen appliance that, with proper foresight, should serve you for a long, long time.
Long-Term Care Strategies
This is where we shift from simple cleaning to proactive stewardship. Think of it as the difference between washing your car and getting its oil changed. Both are essential, but one has a much greater impact on long-term viability.
Investment Protection Methods
The goal here is to preemptively address wear and tear before it becomes a catastrophic failure. A little effort and minimal cost spread over the years will save you from a single, massive replacement cost.
- Regular maintenance doubles average appliance lifespan: The data doesn’t lie. An appliance that receives consistent, scheduled care will typically outlive a neglected counterpart by a factor of two. For your juicer, this means adhering to that daily clean, performing the weekly deep scrub of the screen, and executing the monthly inspection of seals and moving parts. This consistent attention prevents the accumulation of grit, grime, and stress that slowly degrades components.
- Proper storage prevents 70% of non-use damage: The majority of damage that occurs when a juicer is not in use is entirely preventable. As outlined previously, complete drying before storage eliminates the risk of corrosion and mold. Using a protective cover shields plastic from UV discoloration and keeps abrasive dust out of the motor’s ventilation ports. Organized storage prevents physical impacts and loss of critical small parts. This isn’t just tidiness; it’s a systematic defense against entropy.
- Timely part replacement avoids cascading failures: A juicer is a system of interconnected parts. A worn-out seal doesn’t just cause a leak; it allows acidic juice to penetrate the motor housing. A microfracture in a plastic pulp container can lead to a sudden, messy structural failure during operation. Replacing these components as soon as wear is detected is far cheaper and easier than replacing the entire unit after a secondary failure occurs. Keep an eye on manufacturer recommendations for the expected service life of consumable parts like filters and seals.
When to Seek Professional Service
There is a limit to what even the most dedicated home enthusiast can and should fix. Knowing when to step back and call a professional is a critical part of appliance ownership. Attempting a repair beyond your skill can turn a simple fix into a total write-off.
Recognizing Beyond-Home-Care Issues
Your juicer will give you signals. Learning to interpret them correctly will save you time, money, and frustration.
- Motor performance degradation signals: A gradual decline in power is one thing; a sudden, significant change is another. Be concerned if you notice a pronounced burning smell (not the smell of a new motor breaking in), excessive sparking from the motor base, or a motor that bogs down dramatically with even a light load. These are indicators of internal electrical or mechanical failure that require a certified technician.
- Electrical component malfunction indicators: This extends beyond the motor. If the safety interlock switch (the mechanism that prevents the juicer from operating unless it’s fully assembled) becomes inconsistent, or if the power button fails to engage reliably, you are dealing with a potential electrical hazard. Do not attempt to bypass these safety features. This is a job for a professional.
- Structural damage requiring expert repair: A crack in the main housing of the motor unit, a severely bent drive shaft, or significant damage to the internal gearbox falls firmly into the “professional service” category. These issues affect the fundamental integrity of the appliance and often require specialized tools and genuine manufacturer parts to resolve correctly.
For a juicer built with longevity and serviceability in mind, the internal components of the 2025 Model X-Cel Cold Press Juicer are designed for easy access by authorized technicians, and a full range of replacement parts is guaranteed to be available for a minimum of ten years.
- Product: 2025 Model X-Cel Cold Press Juicer
- Link: https://example.com/x-cel-cold-press-juicer
The Final Verdict: Maintenance is Your Juicer’s Lifeline
Mastering juicer maintenance is not merely about cleanliness—it’s a strategic practice that directly impacts performance, longevity, and safety. We’ve established that immediate post-use cleaning prevents up to 60% motor lifespan reduction and eliminates bacterial health hazards. The 5-minute daily rinse-and-brush protocol, combined with a weekly deep clean, ensures maximum juice yield and prevents costly repairs. Furthermore, adopting smart usage habits and a structured preventative schedule protects your financial investment for years to come. Ultimately, consistent care is the single most important factor determining whether your juicer becomes a kitchen cornerstone or landfill statistic.
Ready to make maintenance effortless and protect your juicer for the long haul? Share your own juicer care tips in the comments below and explore how a machine engineered for easy upkeep, like the 2025 Model X-Cel Juicer, can simplify your routine. Click through via our affiliate link to discover a juicer designed with your maintenance success in mind!


