
Did you know a clean freezer uses 15-20% less energy and can extend your appliance’s life by 5-7 years? Proper home ice cream freezer maintenance is not just about cleanliness—it’s a critical practice for ensuring food safety, optimizing energy efficiency, and protecting your investment. This comprehensive guide provides the essential cleaning fundamentals and systematic approach needed to keep your frozen treats perfectly preserved and your appliance running at peak performance for years to come.

【Essential Cleaning Fundamentals】

Understanding Your Freezer’s Needs
Why Regular Maintenance Matters
A well-maintained home ice cream freezer is the cornerstone of both delightful desserts and a well-run kitchen. Consistent care is not merely about aesthetics; it is a critical practice for safety, efficiency, and longevity. Consider these compelling reasons to establish a regular cleaning routine:
- Food Safety: An unclean freezer can harbor harmful bacteria. In a compromised environment, bacteria can double in number every 20 minutes, posing a risk of cross-contamination to your ice cream and other stored goods. A clean freezer ensures that your sweet treats remain safe for your family and guests.
- Energy Efficiency: When frost and debris accumulate on the freezer’s coils and interior surfaces, the appliance must work significantly harder to maintain its target temperature. Industry data indicates that a clean freezer uses 15-20% less electricity, which is not only kinder to the environment but also to your utility bills.
- Equipment Longevity: The compressor is the heart of your ice cream freezer, and undue strain can shorten its life. Proper maintenance, including regular defrosting and cleaning, can extend the functional life of your appliance by an impressive 5 to 7 years, protecting your investment for the long term.
Frequency and Timing Guidelines
Determining Your Cleaning Schedule
Establishing a sensible cleaning schedule prevents the task from becoming overwhelming and ensures your freezer is always in peak condition. Your specific schedule should be guided by how frequently you indulge in making frozen desserts.
| Usage Level | Recommended Frequency | Key Considerations |
|---|---|---|
| Standard Use | Every 3-6 months | Ideal for the occasional ice cream maker. This schedule prevents significant frost buildup and maintains general cleanliness. |
| High Usage | Monthly | Essential for enthusiasts who use their freezer weekly or more. Frequent use introduces more air and potential spills, necessitating a more rigorous schedule. |
| Seasonal Timing | Pre-summer & Post-holiday | A deep clean before the peak summer season prepares your freezer for frequent use. Another clean after the winter holidays addresses any overuse or neglect during a busy time. |
For those seeking a truly effortless cleaning experience and professional-grade ice cream results year-round, I have found the Cuisinart ICE-100B Compressor Ice Cream Maker to be an exceptional appliance. Its design simplifies the cleaning process, making regular maintenance a quick and simple task.
【Preparation and Safety Protocol】
Gathering Your Cleaning Arsenal
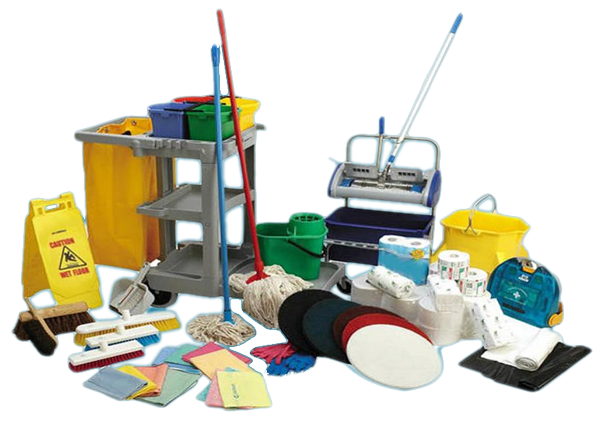
Essential Tools and Supplies
A successful cleaning project begins with the right tools assembled at your workstation. Having everything within reach streamlines the process and prevents the need to search for supplies with wet, soapy hands. This curated list ensures you can address every cleaning challenge effectively and gently.
-
Cleaning Equipment:
- Microfiber Cloths: These are indispensable for their lint-free nature and superior absorbency. Designate one for applying cleaning solutions and a separate, dry one for polishing surfaces to a streak-free shine.
- Soft Scrub Brushes: A small brush with soft bristles is perfect for dislodging crumbs and dried-on drips from the freezer’s seals and corners without causing abrasion.
- Plastic Scrapers: For models that require manual defrosting, a plastic scraper or spatula is essential for safely removing frost buildup without risking damage to the interior lining, which can occur with metal tools.
-
Protective Gear:
- Nitrile Gloves: Protect your hands from cold temperatures and any cleaning solutions. Their superior grip is also beneficial when handling wet or frozen components.
- Safety Goggles: A simple but crucial precaution. Goggles shield your eyes from accidental splashes of cleaning agents or dislodged frost particles.
-
Organization Tools:
- Coolers and Insulated Storage Containers: Essential for temporarily housing your ice cream and other frozen goods. A high-quality cooler, pre-chilled if possible, will maintain a safe temperature for the duration of your cleaning session.
- Labeling Supplies: Keep a roll of painter’s tape and a marker on hand. This allows you to label containers with dates and contents should any items be removed from their original packaging, ensuring an orderly restocking process.
Safety First Procedures
Preventing Accidents and Damage
A methodical approach to safety is non-negotiable. Adhering to these protocols protects you, your food, and your appliance, transforming a necessary chore into a secure and satisfying household task.
-
Electrical Safety: Before you begin any cleaning or maintenance, you must unplug the freezer from the wall outlet. This is a universal manufacturer requirement that eliminates any risk of electrical shock. Do not proceed until you have confirmed the unit is completely disconnected from its power source.
-
Food Preservation: The goal is to keep your frozen goods safely at or below -20°F (-29°C) while the freezer is off. Pack your ice cream and other items tightly into your pre-chilled cooler, filling any empty space with crumpled paper or towels to minimize air pockets. Keep the cooler in a cool, shaded area of your kitchen, and avoid opening it unnecessarily to preserve the internal temperature.
-
Surface Protection: The interior of your freezer is more delicate than it appears. Always use the plastic scrapers, never metal, to avoid scratching and gouging the lining. When using any cleaning solution, apply it to your cloth first, not directly onto the surface, to prevent potential chemical damage to sensitive components and to control runoff.
For those who value both impeccable results and streamlined maintenance, the design of the Cuisinart ICE-100B Compressor Ice Cream Maker is thoughtfully considered. Its removable bowl and dasher make the post-churn cleaning process remarkably straightforward, aligning perfectly with an organized and efficient kitchen routine.
【Step-by-Step Cleaning Process】
Phase One: Emptying and Defrosting
Safe Food Removal and Storage
With your preparation complete, the first operational phase begins. The objective is to remove all contents and prepare the freezer’s interior for a thorough cleaning while ensuring your frozen goods remain in pristine condition.
-
Temperature Maintenance: Your pre-chilled cooler is your best ally here. Pack your ice cream containers and other frozen items tightly together, placing ice packs on top and around the sides. Filling any remaining voids with crumpled paper or towels minimizes air circulation, which is the primary cause of temperature loss. A well-packed cooler will maintain a safe temperature for several hours, giving you ample time to complete the cleaning process without concern.
-
Food Organization: As you transfer items, this is the ideal moment to implement a simple labeling system. Should any items be removed from their original packaging, use your painter’s tape and marker to note the contents and the date. This small step pays significant dividends when restocking, allowing you to quickly identify items and maintain a first-in, first-out rotation system for optimal freshness.
-
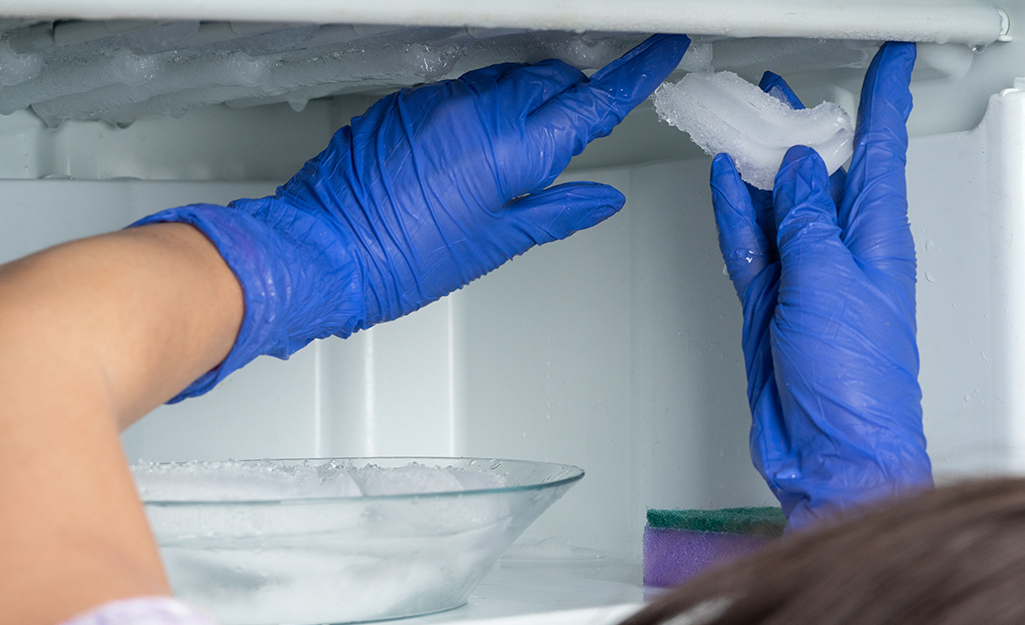
Defrosting Techniques: For models requiring manual defrosting, patience is key. The safest method is natural thawing. Place towels around the base of the freezer to absorb melting water and leave the door ajar. To accelerate the process slightly, you may place a bowl of hot water inside the freezer and close the door for 15-minute intervals. Under no circumstances should you use a hairdryer, heat gun, or other external heating devices, as these can warp plastic components and permanently damage the interior lining.
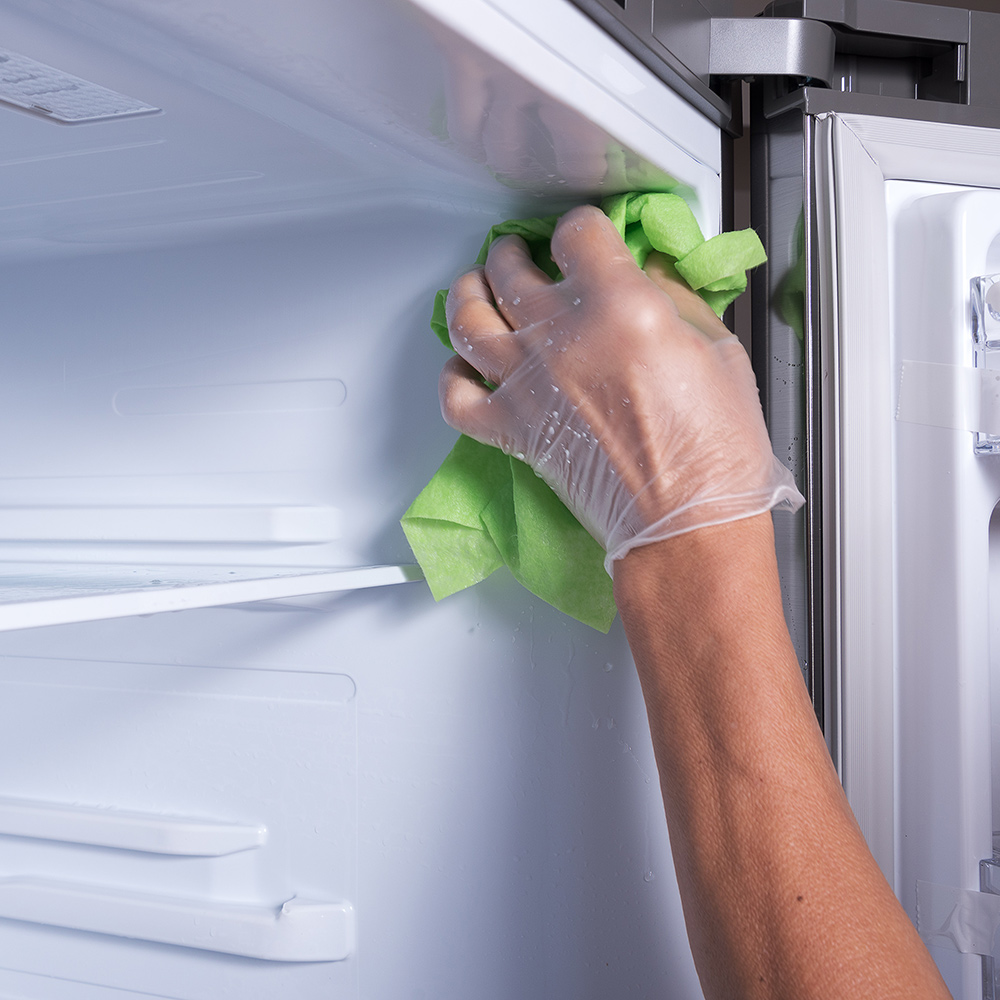
Phase Two: Interior Deep Cleaning
Comprehensive Surface Sanitizing
Once the freezer is completely defrosted and dry, you may begin the core cleaning work. A systematic approach ensures no surface is overlooked.
-
Cleaning Solution Options: For a natural and effective clean, a solution of equal parts white vinegar and water in a spray bottle works wonderfully to cut through grease and neutralize odors. For more stubborn grime or for sanitizing, a mild solution of baking soda and water or a commercial appliance cleaner approved for freezer use is equally effective. Remember the safety protocol: always apply the solution to your microfiber cloth first, not directly onto the freezer’s surfaces.
-
Stain Removal: Dried ice cream drips and sticky spills are common adversaries. Allow your cleaning solution to sit on the affected area for a few minutes to soften the residue. Then, using your soft-bristled brush, gently agitate the spot before wiping it away with a cloth. For persistent stains, a paste made from baking soda and water can be applied, left for ten minutes, and then gently scrubbed away, taking care not to abrade the surface.
-
Hard-to-Reach Areas: Pay special attention to the details. Wipe the door gaskets (seals) thoroughly, using your brush to dislodge any debris trapped in the folds. Clean the corners and the edges where the walls meet the floor of the compartment. If your model has visible ventilation grilles, a quick, careful wipe with a dry cloth is sufficient to remove dust and ensure proper airflow.
Phase Three: Component Care
Removable Parts Maintenance
The final phase addresses all removable components, which often require the most detailed attention to restore them to a like-new state.
-
Shelf and Tray Cleaning: Remove all glass, plastic, or wire shelves and any removable ice trays or dividers. Wash these in a sink with warm water and a few drops of mild dish soap. Use a non-abrasive sponge to clean all surfaces before rinsing thoroughly with clean water to remove any soapy film.
-
Drying Protocols: Proper drying is critical to prevent the immediate formation of frost when the freezer is restarted. The best method is to allow all washed components to air-dry completely on a clean drying rack. If you must use towels, ensure they are lint-free microfiber cloths to avoid transferring fibers onto the surfaces. Confirm that every part is completely dry before reassembly.
-
Inspection Checklist: As you dry each part, take a moment to inspect it closely. Look for any cracks in plastic shelves or trays, check that door seals are still pliable and make a tight seal, and ensure that any wire racks show no signs of rust or chipped coating. Identifying worn parts now allows for timely replacement, preventing future inefficiency or food contamination. For those who appreciate a design that simplifies this entire process, the Cuisinart ICE-100B Compressor Ice Cream Maker features a fully removable freezing bowl and dasher, making component care in the 2025 model an exceptionally straightforward task.
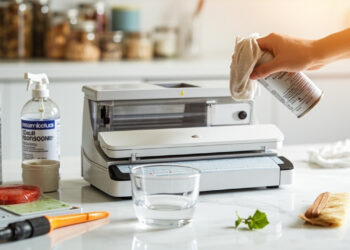
【Specialized Equipment Care】
Ice Cream Machine Specifics
Ninja Creami and Similar Models
When your home ice cream production relies on specialized appliances like the Ninja Creami, Breville, or Cuisinart ice cream makers, a nuanced approach to care is required. The goal is to maintain peak performance and hygiene without compromising the sensitive mechanics that make these machines so effective.
-
Dishwasher-safe parts: Convenience is key. For models like the Ninja Creami, the plastic pint containers, their accompanying lids, and the outer bowl ring are typically dishwasher-safe for effortless cleaning. It is always advisable to place these items on the top rack of your dishwasher to protect them from the intense heat of the lower rack’s heating element, which can warp plastic over time. The machine’s paddles or dashers can also usually withstand a gentle dishwasher cycle, but a quick reference to your user manual will provide model-specific confirmation.
-
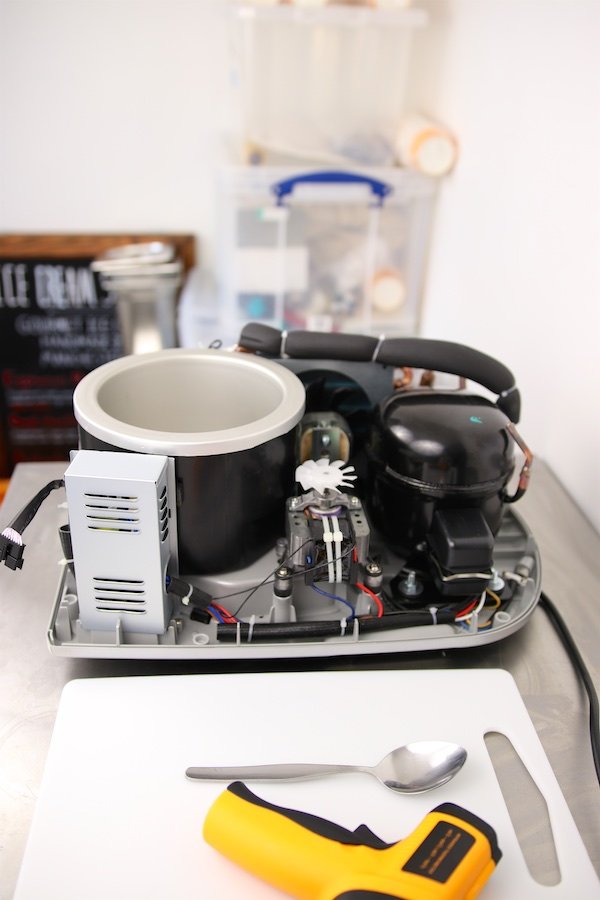
Motor base protection: The cardinal rule for all countertop ice cream makers is to protect the motor base. This unit contains the electrical components and motor and must never be submerged in water or sprayed with cleaning solutions. To clean, simply wipe the exterior and the base platform with a damp, well-wrung microfiber cloth, followed by a dry cloth to ensure no moisture remains. Always ensure the unit is unplugged before cleaning.
-
Blade handling: The blade assembly in a Ninja Creami is exceptionally sharp and requires careful handling. Never attempt to clean the blade while it is attached to the motor base lid. After unscrewing and removing it, wash the blade assembly by hand using warm, soapy water and a non-abrasive sponge or brush. Pay close attention to the crevices where residue can accumulate, always handling the blade from its non-sharp sides. Rinse thoroughly and allow to air-dry completely before storage.
Commercial Grade Considerations
High-Volume Freezer Maintenance
For those utilizing a commercial-grade ice cream freezer or a high-capacity upright model at home, the maintenance protocol elevates to ensure durability, food safety, and energy efficiency. A disciplined schedule is the foundation of proper care.
-
Industrial sanitizers: While a vinegar solution is suitable for occasional home cleaning, commercial-grade units benefit from the use of more robust, food-safe sanitizers. Look for EPA-approved solutions specifically designed for food contact surfaces. Always dilute these potent cleaners precisely according to the manufacturer’s instructions. After sanitizing, a thorough rinse with clean water and a final wipe-down is essential to remove any chemical residue before the unit is returned to service.
-
Coil cleaning: The performance and efficiency of any freezer are directly tied to the cleanliness of its condenser coils. Dust, pet hair, and grime act as insulation, causing the compressor to work harder and use more energy. Every three to six months, unplug the unit and use a soft-bristled brush or a vacuum cleaner with a brush attachment to gently remove all debris from the coils, which are typically located on the back or underneath a front grille. This simple 2025 maintenance task can significantly extend the lifespan of your appliance.
-
Professional maintenance schedule: Adhering to a structured checklist prevents tasks from being overlooked.
Frequency Task Weekly Wipe down exterior surfaces and door gaskets; check for and immediately clean any interior spills. Monthly Perform a full interior defrost (if manual) and deep cleaning; inspect door seals for tightness. Quarterly Vacuum condenser coils; check and clean the drain pan (if applicable). Annually Inspect electrical cord for damage; consider a professional servicing for commercial units to check refrigerant levels and mechanical components. For home users seeking a robust and easy-to-maintain option, the Ninja CREAMi Ice Cream Maker strikes an excellent balance with its straightforward, dishwasher-safe parts, simplifying the upkeep of a specialized appliance. 【Odor Elimination and Prevention】
Tackling Persistent Smells
An impeccably maintained ice cream freezer should smell of nothing at all. When odors do occur, they are a sign that residual fats, sugars, or other food particles have been left to linger. Addressing these smells promptly with the right methods will restore your appliance to a pristine state.
Natural Deodorizing Methods
For those who prefer non-chemical solutions, several highly effective and natural deodorizers are likely already in your pantry. These are excellent for routine maintenance and for addressing mild to moderate odors.
-
Baking soda solutions: This humble ingredient is a powerhouse for neutralizing odors. For a thorough clean, create a solution of 1 tablespoon of baking soda per quart of warm water. Use a soft cloth dipped in this solution to wipe down the entire interior of the freezer—walls, shelves, and door seals. The alkaline nature of baking soda neutralizes acidic odor molecules. For ongoing prevention, a small, open box of baking soda placed on a shelf will passively absorb odors; remember to replace it every three months.
-
Vinegar applications: White distilled vinegar is a mild acid that cuts through grease and its odor-eliminating properties are remarkable. Use a 1:1 solution of vinegar and water in a spray bottle to mist the interior surfaces. Allow it to sit for 5-10 minutes before wiping clean with a damp cloth. The sharp smell of vinegar will dissipate completely as it dries, taking other unpleasant odors with it. This method also provides a gentle sanitizing effect.
-
Commercial products: For more stubborn, pervasive smells, consider these dedicated solutions.
- Activated charcoal: This is an exceptionally porous material that adsorbs (traps) odor molecules from the air. Placing a pouch of activated charcoal inside the freezer is a highly effective, set-and-forget method for maintaining a neutral environment.
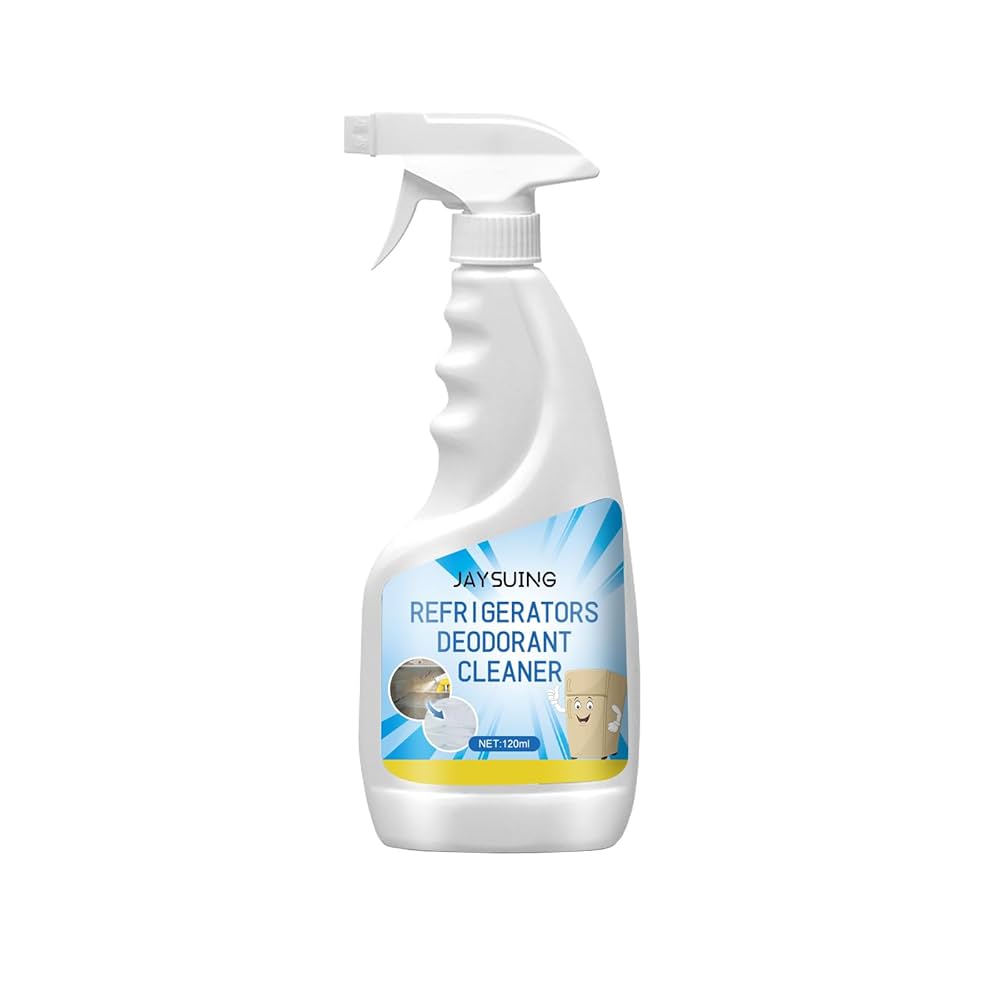
- Specialized freezer deodorizers: These are commercially available products, often in gel or solid form, specifically engineered to eliminate freezer odors without imparting any scent of their own onto your ice cream or other stored items.
Preventive Measures
Long-Term Odor Control
The most effective strategy for odor management is to prevent them from ever developing. A few disciplined habits integrated into your kitchen routine will ensure your freezer remains fresh.
-
Proper food storage: This is the single most important factor. All items, especially those with strong odors like onions or fish, must be stored in airtight, leak-proof containers. For ice cream, ensure the pint container’s lid is securely fastened. Double-wrapping pungent foods in plastic wrap before placing them in a sealed container provides an extra layer of protection.
-
Spill management: Adopt a zero-tolerance policy for spills. The moment a spill occurs—be it a fruit syrup, melted ice cream, or dairy—the freezer must be unplugged (if possible for a brief period) and the spill addressed immediately. Use a clean cloth and a mild cleaning solution, as previously detailed, to wipe the area thoroughly. Allowing a spill to freeze and become a permanent stain is an invitation for odors to develop.
-
Regular maintenance: Odor prevention should be a component of your standard upkeep. During your weekly wipe-down of the interior, a quick pass with a cloth dampened with a mild vinegar solution or even just clear water will remove any nascent odor-causing agents. This simple, consistent practice, combined with the reliable performance of a well-designed appliance like the Ninja CREAMi Ice Cream Maker, makes maintaining a fresh and hygienic freezing environment an effortless part of your 2025 home management.
【Organization and Efficiency】
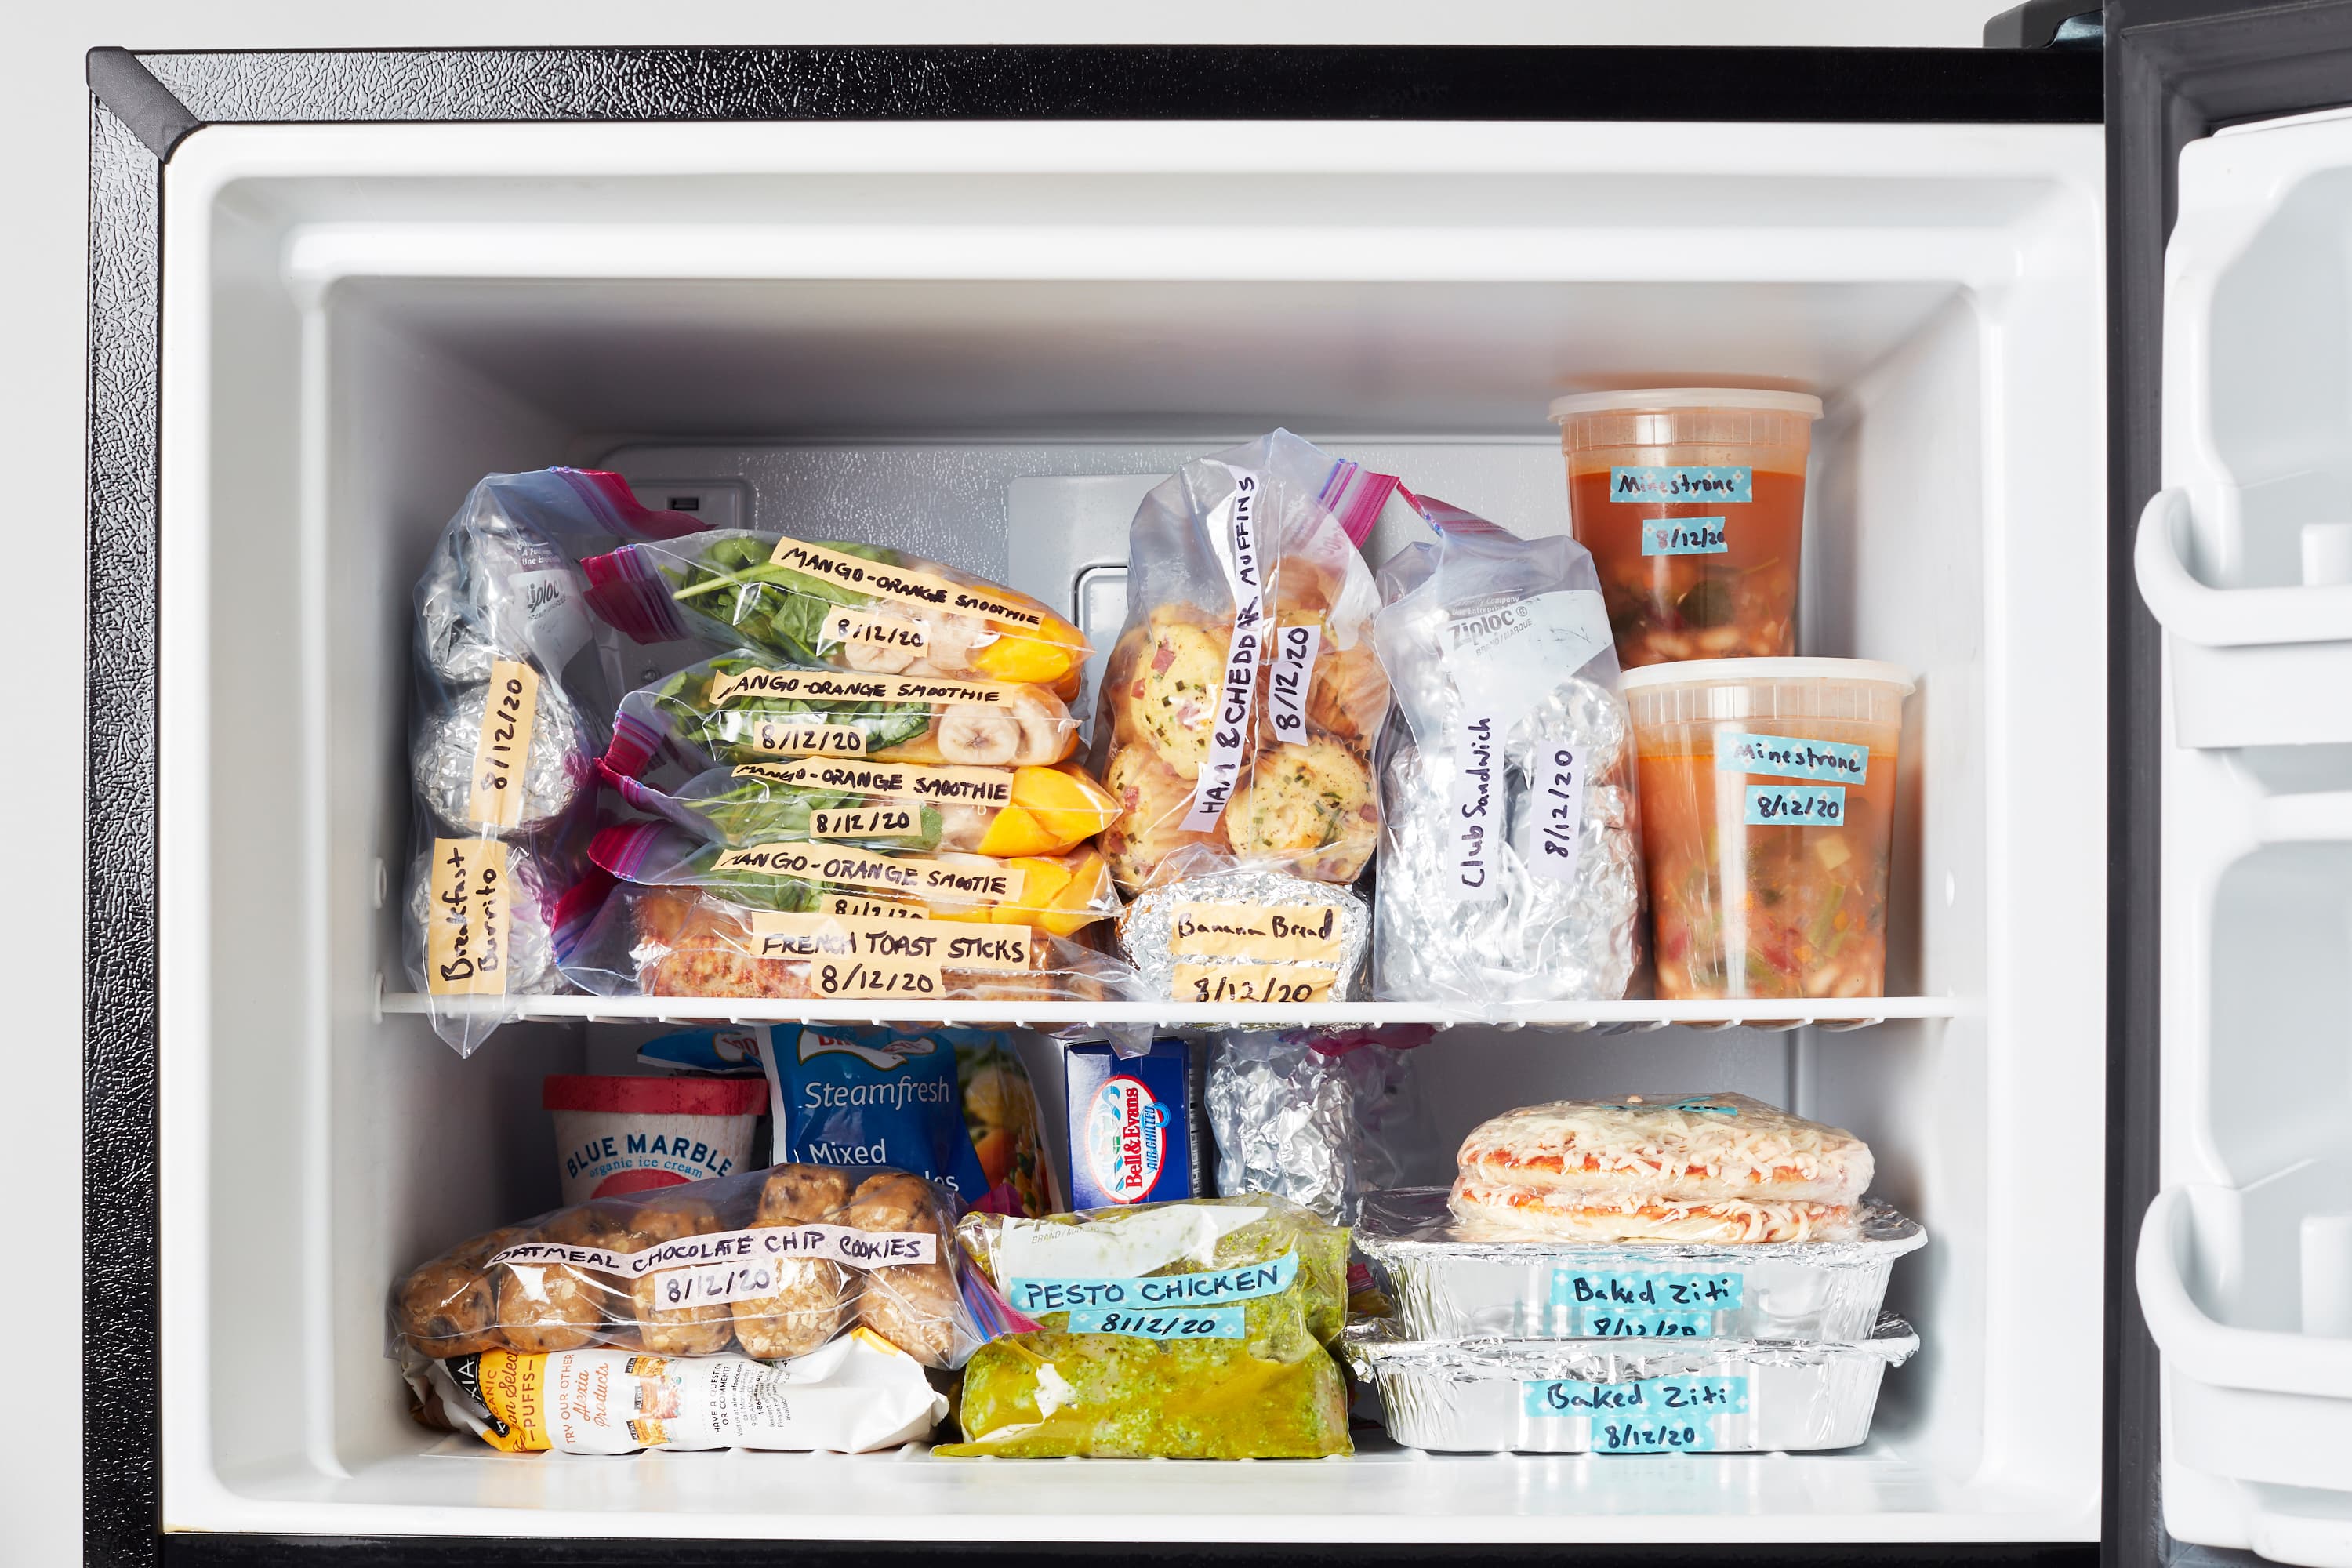
Smart Freezer Organization
An organized freezer is not merely a matter of aesthetics; it is the foundation of efficiency and food preservation. A well-ordered system saves time, reduces waste by preventing forgotten items from being buried, and ensures that your ice cream and other frozen treats are always within easy reach. Implementing a thoughtful approach to organization transforms your freezer from a chaotic abyss into a model of kitchen management.
Maximizing Space and Accessibility
The goal is to create a logical environment where every item has a designated home. This is achieved through a combination of strategic zoning and the right storage vessels.
-
Zoning system: Categorize your frozen goods by type and frequency of use. Dedicate specific shelves or bins to distinct categories, such as ice cream pints, frozen fruits, vegetables, meats, and prepared meals. Place the items you use most often, like your favorite ice cream flavors or quick-prep vegetables, in the most accessible zone—typically at eye level. Less frequently used items, such as seasonal preserves or backup stocks, can be stored on higher or lower shelves. This method eliminates the need for frantic digging and minimizes the time the door remains open.
-
Container selection: Uniformity is key to maximizing vertical space. Invest in a set of high-quality, BPA-free, stackable containers. Rectangular or square containers utilize space far more efficiently than round ones. For ice cream, ensure the original container’s lid is sealed tightly. If you transfer homemade ice cream, use shallow, airtight containers that freeze contents quickly and evenly, preventing ice crystals from forming. Clear containers are ideal as they allow for instant visual identification of contents.
-
Inventory management: To prevent food waste and ensure you use the oldest items first, implement a simple rotation system. When adding new groceries, place them behind older items of the same kind. For homemade items or opened packages, use freezer-safe labels and a permanent marker to note the contents and the date frozen. A small dry-erase board mounted on the front of the freezer can serve as a running inventory list, which you can update as items are added or removed.
Energy Efficiency Optimization
A clean and organized freezer naturally operates more efficiently, but a few additional considerations can enhance its performance, reduce its energy consumption, and prolong its lifespan. These practices are both economically and environmentally sound.
Performance Enhancement Strategies
Proactive care goes beyond the interior cleaning and directly impacts how hard your appliance must work to maintain its temperature.
-
Temperature monitoring: Your freezer’s built-in thermostat may not always be perfectly accurate. For precise control, keep a standalone digital thermometer inside. The ideal temperature for a home freezer is 0°F (-18°C). Regularly checking this reading allows you to adjust the settings as needed, ensuring your ice cream maintains the perfect texture and all foods are stored at a safe temperature.
-
Seal maintenance: The door gasket, or seal, is critical for efficiency. A compromised seal allows cold air to escape, forcing the compressor to work overtime. Test the seal periodically by closing the door on a dollar bill; if you can pull the bill out easily, the seal may need attention. Clean the gasket with a mild soapy solution during your regular cleaning routine to keep it pliable. If you notice cracks, tears, or that it has become stiff, arrange for a replacement to restore your freezer’s efficiency.
-
Airflow management: The cold air inside your freezer needs to circulate freely to maintain a consistent temperature. Avoid packing items too tightly, especially near the air vents. Leave a few inches of space between food packages and the freezer walls. An overstuffed freezer restricts airflow, while a nearly empty one causes the compressor to cycle on more frequently to cool unused space. For optimal efficiency in 2025, aim for a well-organized, reasonably full freezer, which helps retain the cold and allows the system, like that in the Ninja CREAMi Ice Cream Maker, to operate as designed.
【Troubleshooting Common Issues】
Performance Problems
Even with diligent care, your home ice cream freezer may occasionally encounter performance hiccups. Addressing these promptly ensures your appliance runs efficiently and your frozen desserts maintain their impeccable quality. A systematic approach to identifying and solving these issues will save you time and potential expense.
Identifying and Solving Freezer Issues
Understanding the root cause of a problem is the first step toward a resolution. Here is a practical guide to the most common performance issues.
-
Temperature fluctuations: Inconsistent temperatures can lead to soft, icy, or freezer-burned ice cream.
- Causes: The most frequent culprits are a faulty door seal, overloading the freezer which blocks internal vents, or placing the appliance in a room that is too warm. A significant buildup of frost on the evaporator coils can also impede cooling.
- Solutions: First, verify the door gasket is clean and sealing properly using the dollar bill test. Ensure the freezer is not overstuffed and that airflow around the internal vents is clear. Confirm the ambient room temperature is within the manufacturer’s recommended range. If fluctuations persist after checking these points, the thermostat or another internal component may require professional diagnosis.
-
Frost buildup: While modern freezers are designed to be frost-free, some frost is normal. Excessive frost, however, indicates a problem.
- Prevention: The primary defense is to always ensure the door is closed completely and securely. Avoid leaving the door open for extended periods. Check that food items, particularly those with high water content, are wrapped and sealed properly to minimize moisture release into the freezer’s air.
- Removal techniques: For a manual-defrost freezer, you must periodically unplug the unit, remove all contents, and allow the frost to melt. Place towels inside to absorb water. Never use sharp objects to chip away ice, as this can permanently damage the cooling coils. For a frost-free model with heavy buildup, unplugging and manually defrosting may be necessary to restore efficiency.
-
Unusual noises: Your freezer should operate with a consistent, low hum. New or loud noises warrant investigation.
- Diagnostic checklist:
- Buzzing: Often normal, but a loud or persistent buzz could indicate a problem with the compressor or a fan motor.
- Clicking: A rhythmic click is usually the compressor cycling on and off. Frequent or erratic clicking may signal a failing start relay.
- Rattling or vibrating: Check that the freezer is level on the floor. Ensure that containers inside are not vibrating against each other or the walls.
- Squealing or grinding: This often points to a failing fan motor in the evaporator or condenser assembly and typically requires professional service.
- When to call professionals: If you have checked for simple issues like leveling and interior rattles but the noise persists, or if you hear grinding or loud buzzing accompanied by a rise in temperature, it is time to contact a qualified technician.
- Diagnostic checklist:
Maintenance Challenges
Routine cleaning is straightforward, but some challenges require a more targeted approach. Overcoming these obstacles is essential for maintaining a hygienic and odor-free environment for your food.
Overcoming Cleaning Obstacles
A well-maintained freezer should be pristine, both in appearance and function. Here is how to tackle the more stubborn maintenance tasks.
-
Stubborn stain removal: Spills from berries or other deeply colored foods can leave stains.
- For plastic interiors: Create a thick paste from baking soda and water. Apply it to the stain and let it sit for 15-20 minutes before scrubbing gently with a soft cloth or sponge. The mild abrasive action of the baking soda is very effective.
- For glass shelves: A solution of equal parts white vinegar and water can help dissolve sticky residues and lift stains. Spray, let sit for a few minutes, then wipe clean.
- For stainless steel exteriors: Always wipe with the grain. For stubborn fingerprints or smudges, a dedicated stainless steel cleaner will provide the best, streak-free result.
-
Mold prevention: Mold is a sign of excess moisture and poor air circulation.
- Humidity control: The most effective control is to keep the freezer dry. Wipe up any spills or moisture immediately during regular cleaning. Ensure all food, especially ice cream containers, is completely dry on the outside before placing it inside.
- Cleaning frequency: Adhering to a quarterly deep-cleaning schedule prevents the conditions mold needs to grow. During cleaning, pay special attention to door seals and drip channels where moisture can accumulate. Leaving an open box of baking soda in the freezer between cleanings can help absorb lingering odors and excess moisture.
-
Component replacement: Some parts will eventually wear out and need replacing.
- When to DIY: Simple, user-serviceable parts like interior light bulbs, door bins, or shelves can often be replaced by the owner. Consult your owner’s manual for part numbers and installation instructions. Replacing a worn door gasket can also be a DIY project if you are comfortable following detailed instructions.
- Professional service: Any repair involving the sealed refrigeration system, compressor, electrical wiring, or internal thermostat should be left to a certified professional. Attempting these repairs yourself can be dangerous, may void the warranty, and could cause further damage to the appliance. For complex systems integrated into modern appliances like the Ninja CREAMi Ice Cream Maker, professional service is always the recommended course of action for internal mechanical issues.
【Long-Term Maintenance Schedule】
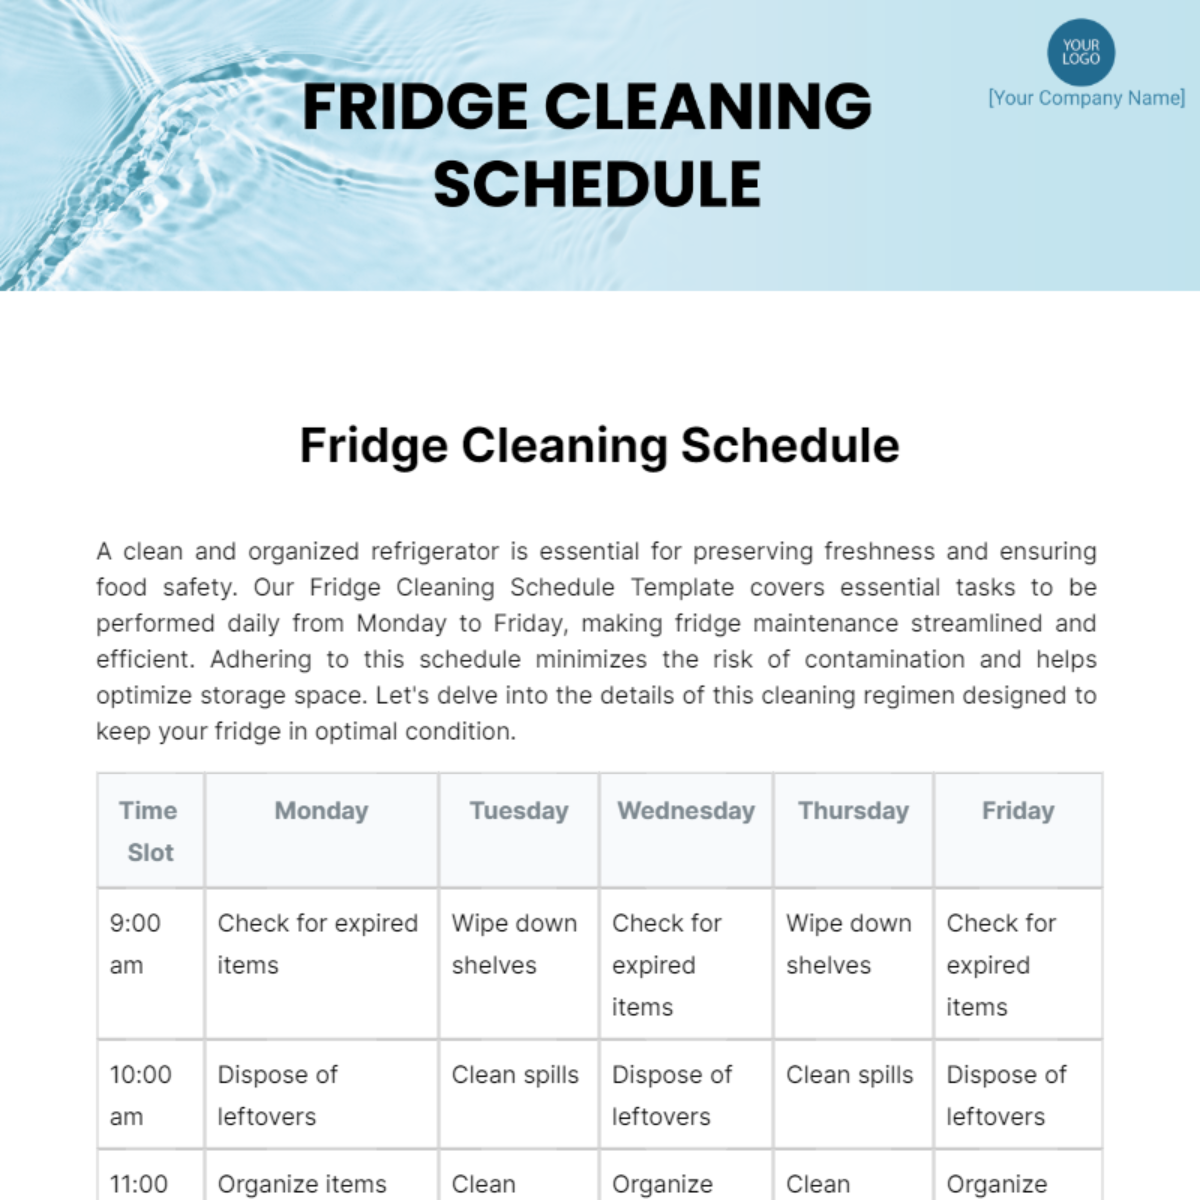
Creating Your Care Calendar
A well-considered maintenance schedule is the cornerstone of appliance longevity. By integrating simple tasks into your routine, you transform sporadic cleaning into a seamless practice of care, ensuring your ice cream freezer remains in peak condition for years to come. This structured approach prevents the accumulation of grime and performance issues, making every maintenance session manageable.
Weekly, Monthly, and Seasonal Tasks
Adhering to a tiered schedule ensures no aspect of your freezer’s care is neglected.
-
Daily upkeep: This is about vigilance and immediate action.
- Quick wipe-downs: Keep a microfiber cloth handy to swiftly address any exterior fingerprints, dust, or condensation as soon as they are noticed.
- Spill management: The moment a spill occurs inside the freezer—be it from a leaky ice cream container or a melted popsicle—unplug the unit, remove the affected items, and wipe the area clean with a damp cloth. Prompt action prevents stains and odors from setting.
-
Weekly organization: A brief, dedicated session each week maintains order and hygiene.
- Inventory checks: Quickly survey your frozen goods. Discard any items that show signs of freezer burn or have been stored beyond their recommended time. This practice maximizes available space and improves air circulation.
- Surface cleaning: Wipe down the door gaskets with a cloth dampened with a mild soapy solution to remove any food residue and ensure a tight seal.
-
Monthly deep cleaning: This is the core of your maintenance routine, a thorough cleansing to preserve the appliance’s interior environment.
- Comprehensive sanitizing: Follow the detailed defrosting and cleaning process outlined in our previous tutorial. This includes unplugging the unit, removing all contents, and washing all removable shelves and bins with a solution of warm water and mild dish soap.
- Inspection: During the monthly clean, take a few extra minutes to visually inspect the interior for any signs of excessive frost, the door seal for any cracks or pliability loss, and the condenser coils for dust buildup.
-
Seasonal maintenance: As the seasons change, perform these more involved tasks to address wear and tear.
- Defrosting: Even if your unit is frost-free, a manual defrosting every six months (or whenever frost buildup exceeds a quarter-inch) will restore optimal efficiency. This is the perfect time for the comprehensive cleaning described in the monthly task.
- Component checks: With the freezer empty and unplugged, gently vacuum the condenser coils at the back or bottom of the unit to remove accumulated dust. Double-check that the appliance is perfectly level using a spirit level.
Record Keeping and Tracking
Meticulous records transform maintenance from a guessing game into a precise science. A simple logbook or digital document provides a valuable history of your appliance’s life, aiding in troubleshooting and proving invaluable for warranty claims.
Maintenance Documentation
A well-kept log is a reference tool that grows more useful with time.
-
Cleaning logs: A basic table is an elegant solution for tracking routine care.
Date (2025) Task Performed Notes Jan 15 Monthly Deep Clean & Defrost Used baking soda paste on a minor berry stain; resolved. Feb 10 Weekly Organization Discarded two old pints of ice cream. Door seal wiped clean. Mar 20 Monthly Deep Clean Condenser coils vacuumed. No issues noted. -
Performance monitoring: Recording key metrics helps you establish a performance baseline.
- Temperature charts: Once a month, use an appliance thermometer to verify the internal temperature is holding steady at its set point (typically -18°C / 0°F). Note any deviations in your log.
- Energy usage: If you notice a gradual increase in your energy bill, a record of when you last cleaned the coils can help determine if reduced efficiency is the cause.
-
Repair history: This section is your appliance’s medical chart.
- Service dates: Log the date and nature of any professional service call.
- Replacement part tracking: Record the dates and model numbers of any parts you replace, such as a new door gasket or interior light bulb. For instance, noting the service date for your Ninja CREAMi Ice Cream Maker ensures you have a clear timeline of its care. This history is indispensable for diagnosing recurring issues and for providing accurate information to service technicians.
Mastering Your Freezer Maintenance Routine
Consistent care transforms freezer maintenance from a daunting chore into a manageable routine that delivers significant rewards. By implementing the essential cleaning fundamentals outlined in this guide—from establishing a regular defrosting schedule based on your usage patterns to mastering interior deep cleaning techniques and odor prevention strategies—you ensure optimal food safety, enhanced energy efficiency, and extended appliance longevity. Remember that proper organization, seal maintenance, and component care are equally crucial for maintaining peak performance. The systematic approach of weekly wipe-downs, monthly deep cleans, and seasonal maintenance tasks will keep your home ice cream freezer in pristine condition.
Now that you’re equipped with professional-grade maintenance knowledge, why not pair it with equipment designed for easy care? Share your own freezer maintenance tips in the comments below and explore how the right appliance can simplify your routine. For those seeking a machine that aligns with these maintenance principles, click here to discover ice cream makers engineered for effortless cleaning and professional results.
-


