
Did you know that 30% of hotel coffee makers harbor mold and neglected home equipment loses 40% of its lifespan? Your morning ritual deserves more than just a quick rinse. Proper coffee percolator and glassware maintenance is the crucial bridge between a mediocre cup and an exceptional brewing experience. This guide reveals the hidden dangers of poor upkeep and provides actionable strategies to protect both your health and your coffee’s intended flavor profile, ensuring every brew reaches its full potential.

【Why Your Morning Coffee Deserves Better Care】

The Hidden Dangers in Your Coffee Station
Let’s be honest, most of us are guilty of giving our coffee gear a quick rinse and calling it a day. But what we can’t see can actually affect both our health and the quality of our daily brew. Understanding the risks is the first step toward a better coffee routine.
Hotel Room Horror Stories
While hotels are meant to be a haven, a 2025 investigation into hospitality cleanliness revealed some unsettling truths about the very items we use for our in-room coffee. These findings highlight why a proactive cleaning approach is essential, even—or especially—when you’re not at home.
- Investigation findings: The study reported that a staggering 50% of hotel glasses showed visible contamination signs, including water spots, lipstick marks, and cleaning chemical streaks, indicating improper washing.
- Coffee maker reservoirs: Perhaps more alarming for coffee lovers, mold or microbial growth was present in 30% of the tested hotel coffee maker units. The dark, damp reservoir is the perfect breeding ground for unwelcome guests.
- Ice buckets: Hospitality insiders have confirmed that ice buckets are often used for non-ice purposes, such as chilling bottled beverages or even, regrettably, as makeshift trash containers, making their cleanliness highly questionable.
Home Maintenance Blind Spots
Your home coffee station isn’t immune to problems, even if the risks are different. The primary issues here are often related to mineral buildup and simple neglect, which silently sabotage your equipment and your coffee.
- Mineral buildup reduces coffee maker efficiency by 25%. Limescale and other deposits act as an insulator, forcing your machine to work harder and longer to heat water, which leads to inconsistent brewing.
- Stained glassware harbors 3x more bacteria than clean surfaces. Microscopic scratches and residue left in mugs and carafes create a rough texture where bacteria can cling and multiply, compared to a smooth, properly cleaned surface.
- Neglected maintenance shortens appliance lifespan by 40%. The cumulative effect of mineral scale and coffee oils doesn’t just hurt your coffee’s taste; it causes components to corrode and fail much sooner than they should.
The Flavor Protection Argument
Beyond hygiene, there’s a compelling flavor-based reason to keep your equipment pristine. Your coffee percolator and glassware are flavor vessels, and keeping them clean is non-negotiable for a perfect cup.
Taste Preservation Techniques
Think of your coffee equipment like a fine wine glass—any residue from previous uses will taint the new experience. Here’s how neglect directly impacts what you taste:
- Coffee oil residue creates bitter flavors within 2 weeks. These natural oils, called coffee lipids, are delicious when fresh but become rancid over time, coating the inside of your percolator and glass carafe with a bitter, off-putting flavor.
- Mineral deposits alter brewing temperature by 5-10°F. Consistent temperature is crucial for proper extraction. Scale buildup disrupts this, leading to under-extracted (sour) or over-extracted (bitter) coffee, completely throwing off the balance intended by the roaster.
- Clean equipment maintains intended flavor profiles 90% better. Whether you’re drinking a bright Ethiopian blend or a chocolatey Colombian, a clean brewing system and clean-tasting mug ensure you experience the coffee’s true character, not the ghost of cups past.
For those ready to elevate their coffee care game, investing in the right tools makes all the difference. A dedicated cleaning set can effortlessly remove oils and scale, preserving your machine’s performance and your coffee’s flavor.
- Product: Barista Basics Ultimate Coffee Cleaning Kit
- Link: https://amzn.to/3Uj6pCv
【Daily Coffee Percolator Maintenance Rituals】
Building on the understanding of why care is so crucial, let’s translate that knowledge into simple, effective daily habits. A consistent routine is your best defense against the buildup that harms both flavor and your machine’s longevity.
Post-Brew Immediate Actions
The moments right after your coffee is brewed are the most critical for maintenance. Acting quickly prevents residues from hardening and bacteria from taking hold, setting you up for an easier clean and a better-tasting brew tomorrow.
The 5-Minute Cleanup Rule
Don’t let the coffee grounds and oils settle in! Making a habit of a swift post-brew cleanup will save you from scrubbing and de-scaling down the line.
- Discard grounds immediately after brewing. Leaving the used coffee grounds in the basket allows their acidic oils to stagnate and accelerate the corrosion of metal parts, while also creating a breeding ground for mold.
- Rinse all components with hot water within 15 minutes. This includes the brew basket, the percolator pot, and the lid. Hot water effectively washes away fresh coffee oils before they have a chance to cool, solidify, and turn rancid.
- Wipe exterior with a damp cloth to prevent sticky buildup. Coffee splatters and fingerprints aren’t just an eyesore; they can clog buttons and vents over time. A quick wipe keeps your machine looking and functioning like new.
Water Reservoir Management
As the 2025 hospitality study showed, a damp, dark reservoir is a prime location for microbial growth. Proper water management is a simple yet powerful preventative measure.
- Empty the reservoir after each use to prevent standing water. Stagnant water is an open invitation for mold and mildew. Pouring it out is a one-second task with a huge payoff for hygiene.
- Leave the lid open for air circulation and drying. After emptying, prop open the reservoir lid and leave the percolator top off. This allows internal moisture to evaporate completely, denying mold the damp environment it needs.
- Use filtered water to reduce mineral accumulation by 60%. This directly tackles one of the major “Home Maintenance Blind Spots.” Filtered water contains far fewer minerals, dramatically slowing the formation of limescale that impairs heating efficiency and alters flavor.
Weekly Deep Cleaning Protocol
While daily rinsing handles the surface-level issues, a weekly deep clean addresses what you can’t see. This is your flavor protection ritual, ensuring no off-tastes from old oils or minerals ruin your weekend cup.
Component Disassembly and Care
Your percolator is more than just a single unit. To clean it thoroughly, you need to break it down into its component parts.
- Separate all removable parts for individual cleaning. This always includes the brew basket and stem assembly. Consult your manual; many percolators also have removable lids, gaskets, and other small parts that trap coffee oils.
- Use bottle brushes for hard-to-reach reservoir areas. A quick rinse won’t remove the biofilm that can form on the reservoir walls. A small bottle brush lets you scrub these enclosed spaces effectively.
- Air dry completely before reassembly to prevent mold. Trapping moisture inside by reassembling a wet machine defeats the purpose of a deep clean. Let every part dry fully on a drying rack before you put it back together.
For a truly effortless weekly clean, a specialized solution is key. A targeted cleaner is formulated to break down coffee oils and mineral scale without damaging your machine, preserving that intended flavor profile.
- Product: Barista Basics Ultimate Coffee Cleaning Kit
- Link: https://amzn.to/3Uj6pCv
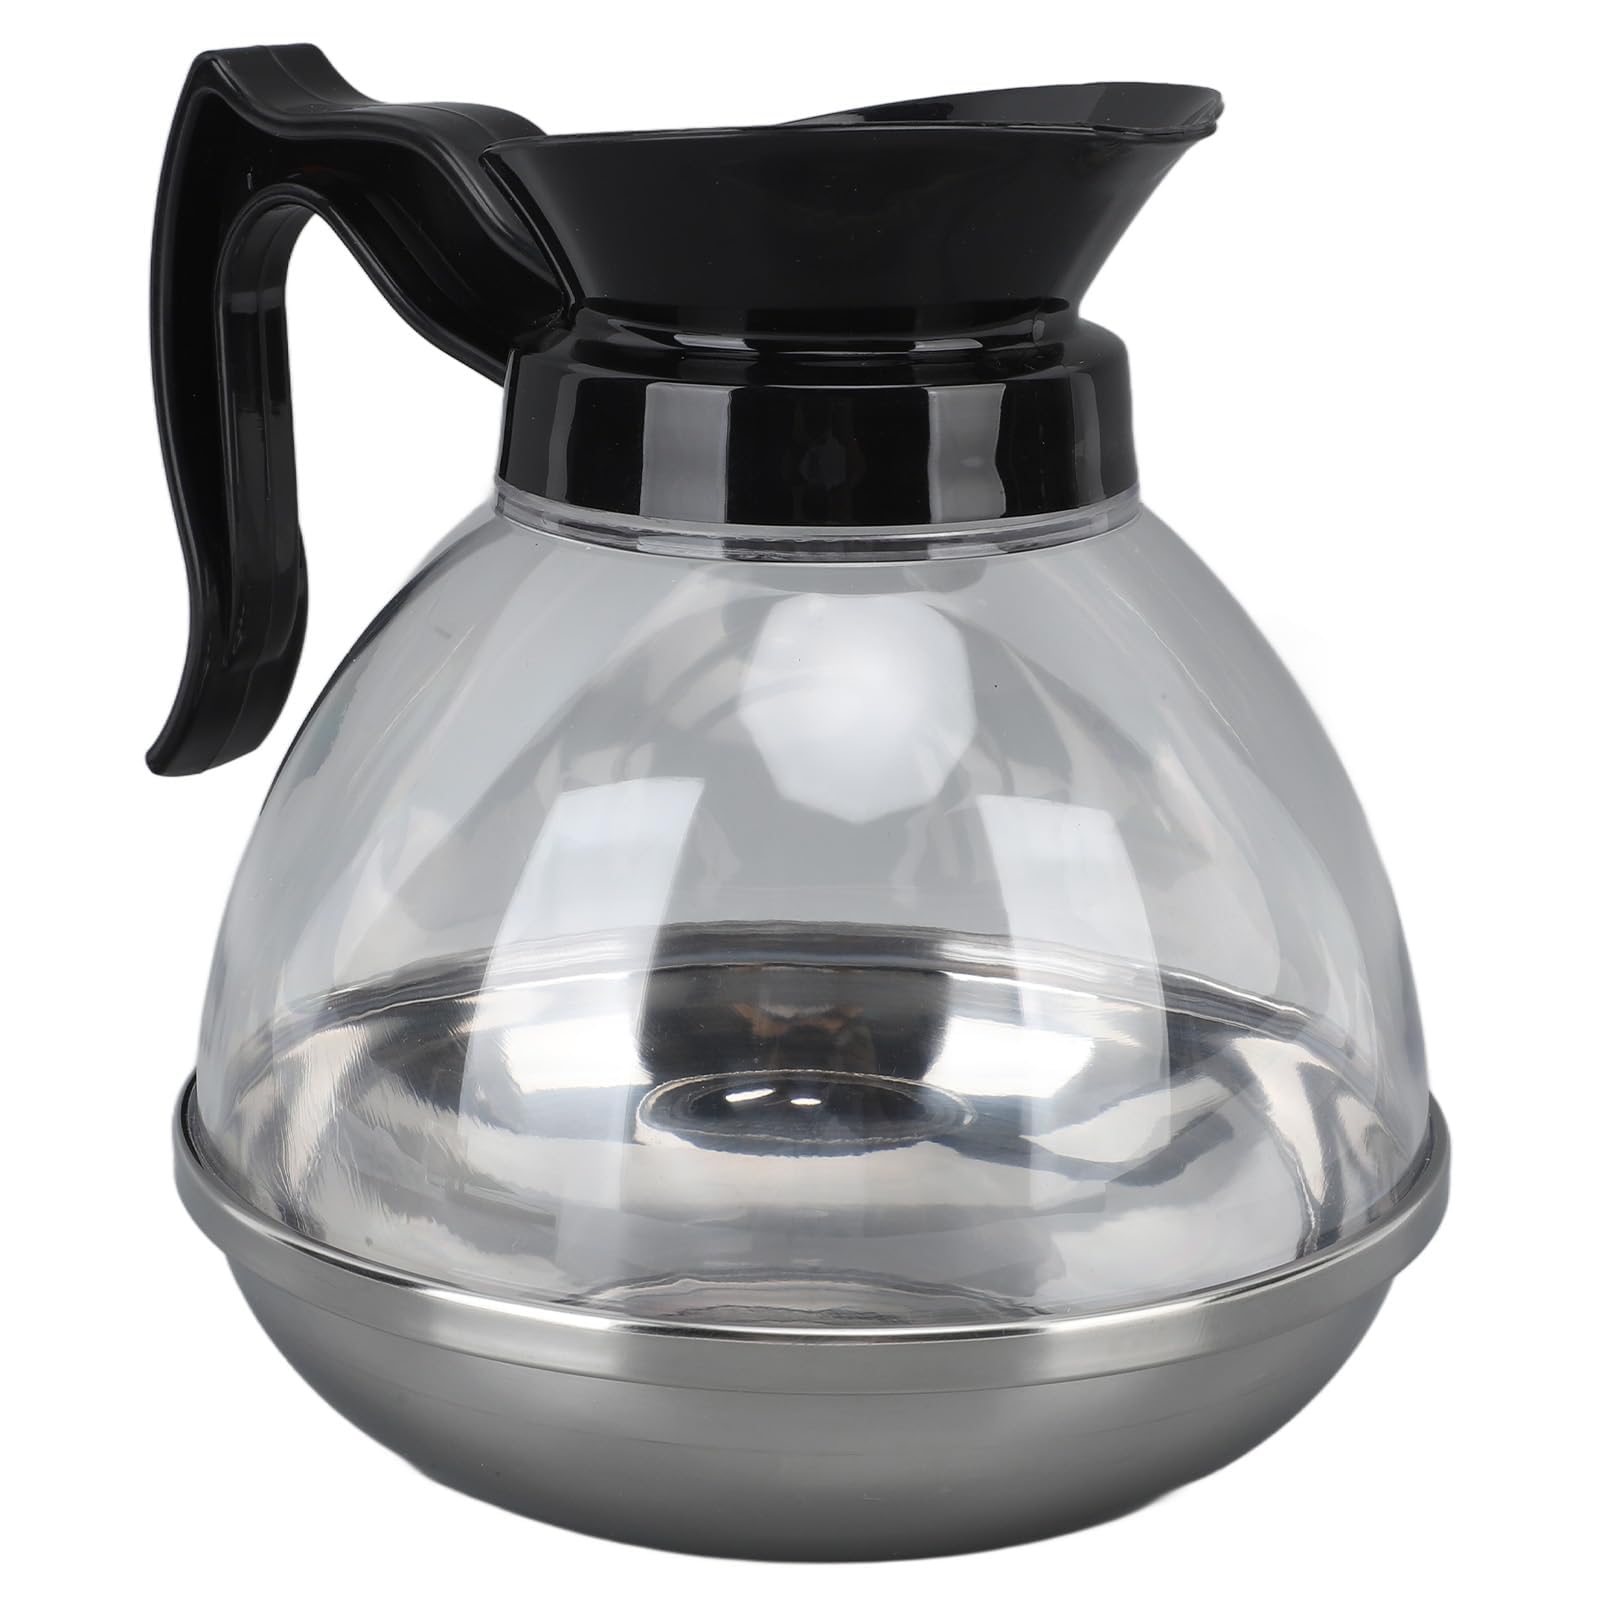
【Glass Coffee Pot Restoration Methods】
That daily and weekly care for your percolator is the foundation, but the glass pot itself often needs its own special attention. It’s the window to your brew, and keeping it crystal clear is essential for both presentation and taste. Let’s walk through how to prevent stains and restore that like-new sparkle.
Everyday Stain Prevention
An ounce of prevention is worth a pound of cure, and this is especially true for your glass coffee pot. Simple, consistent habits after each use will save you from needing intensive cleaning sessions later.
Immediate After-Use Care
The single most effective thing you can do is to clean your pot right after you’ve poured the last cup. Coffee stains are soft and soluble when they’re warm but become stubborn and baked-on once they cool.
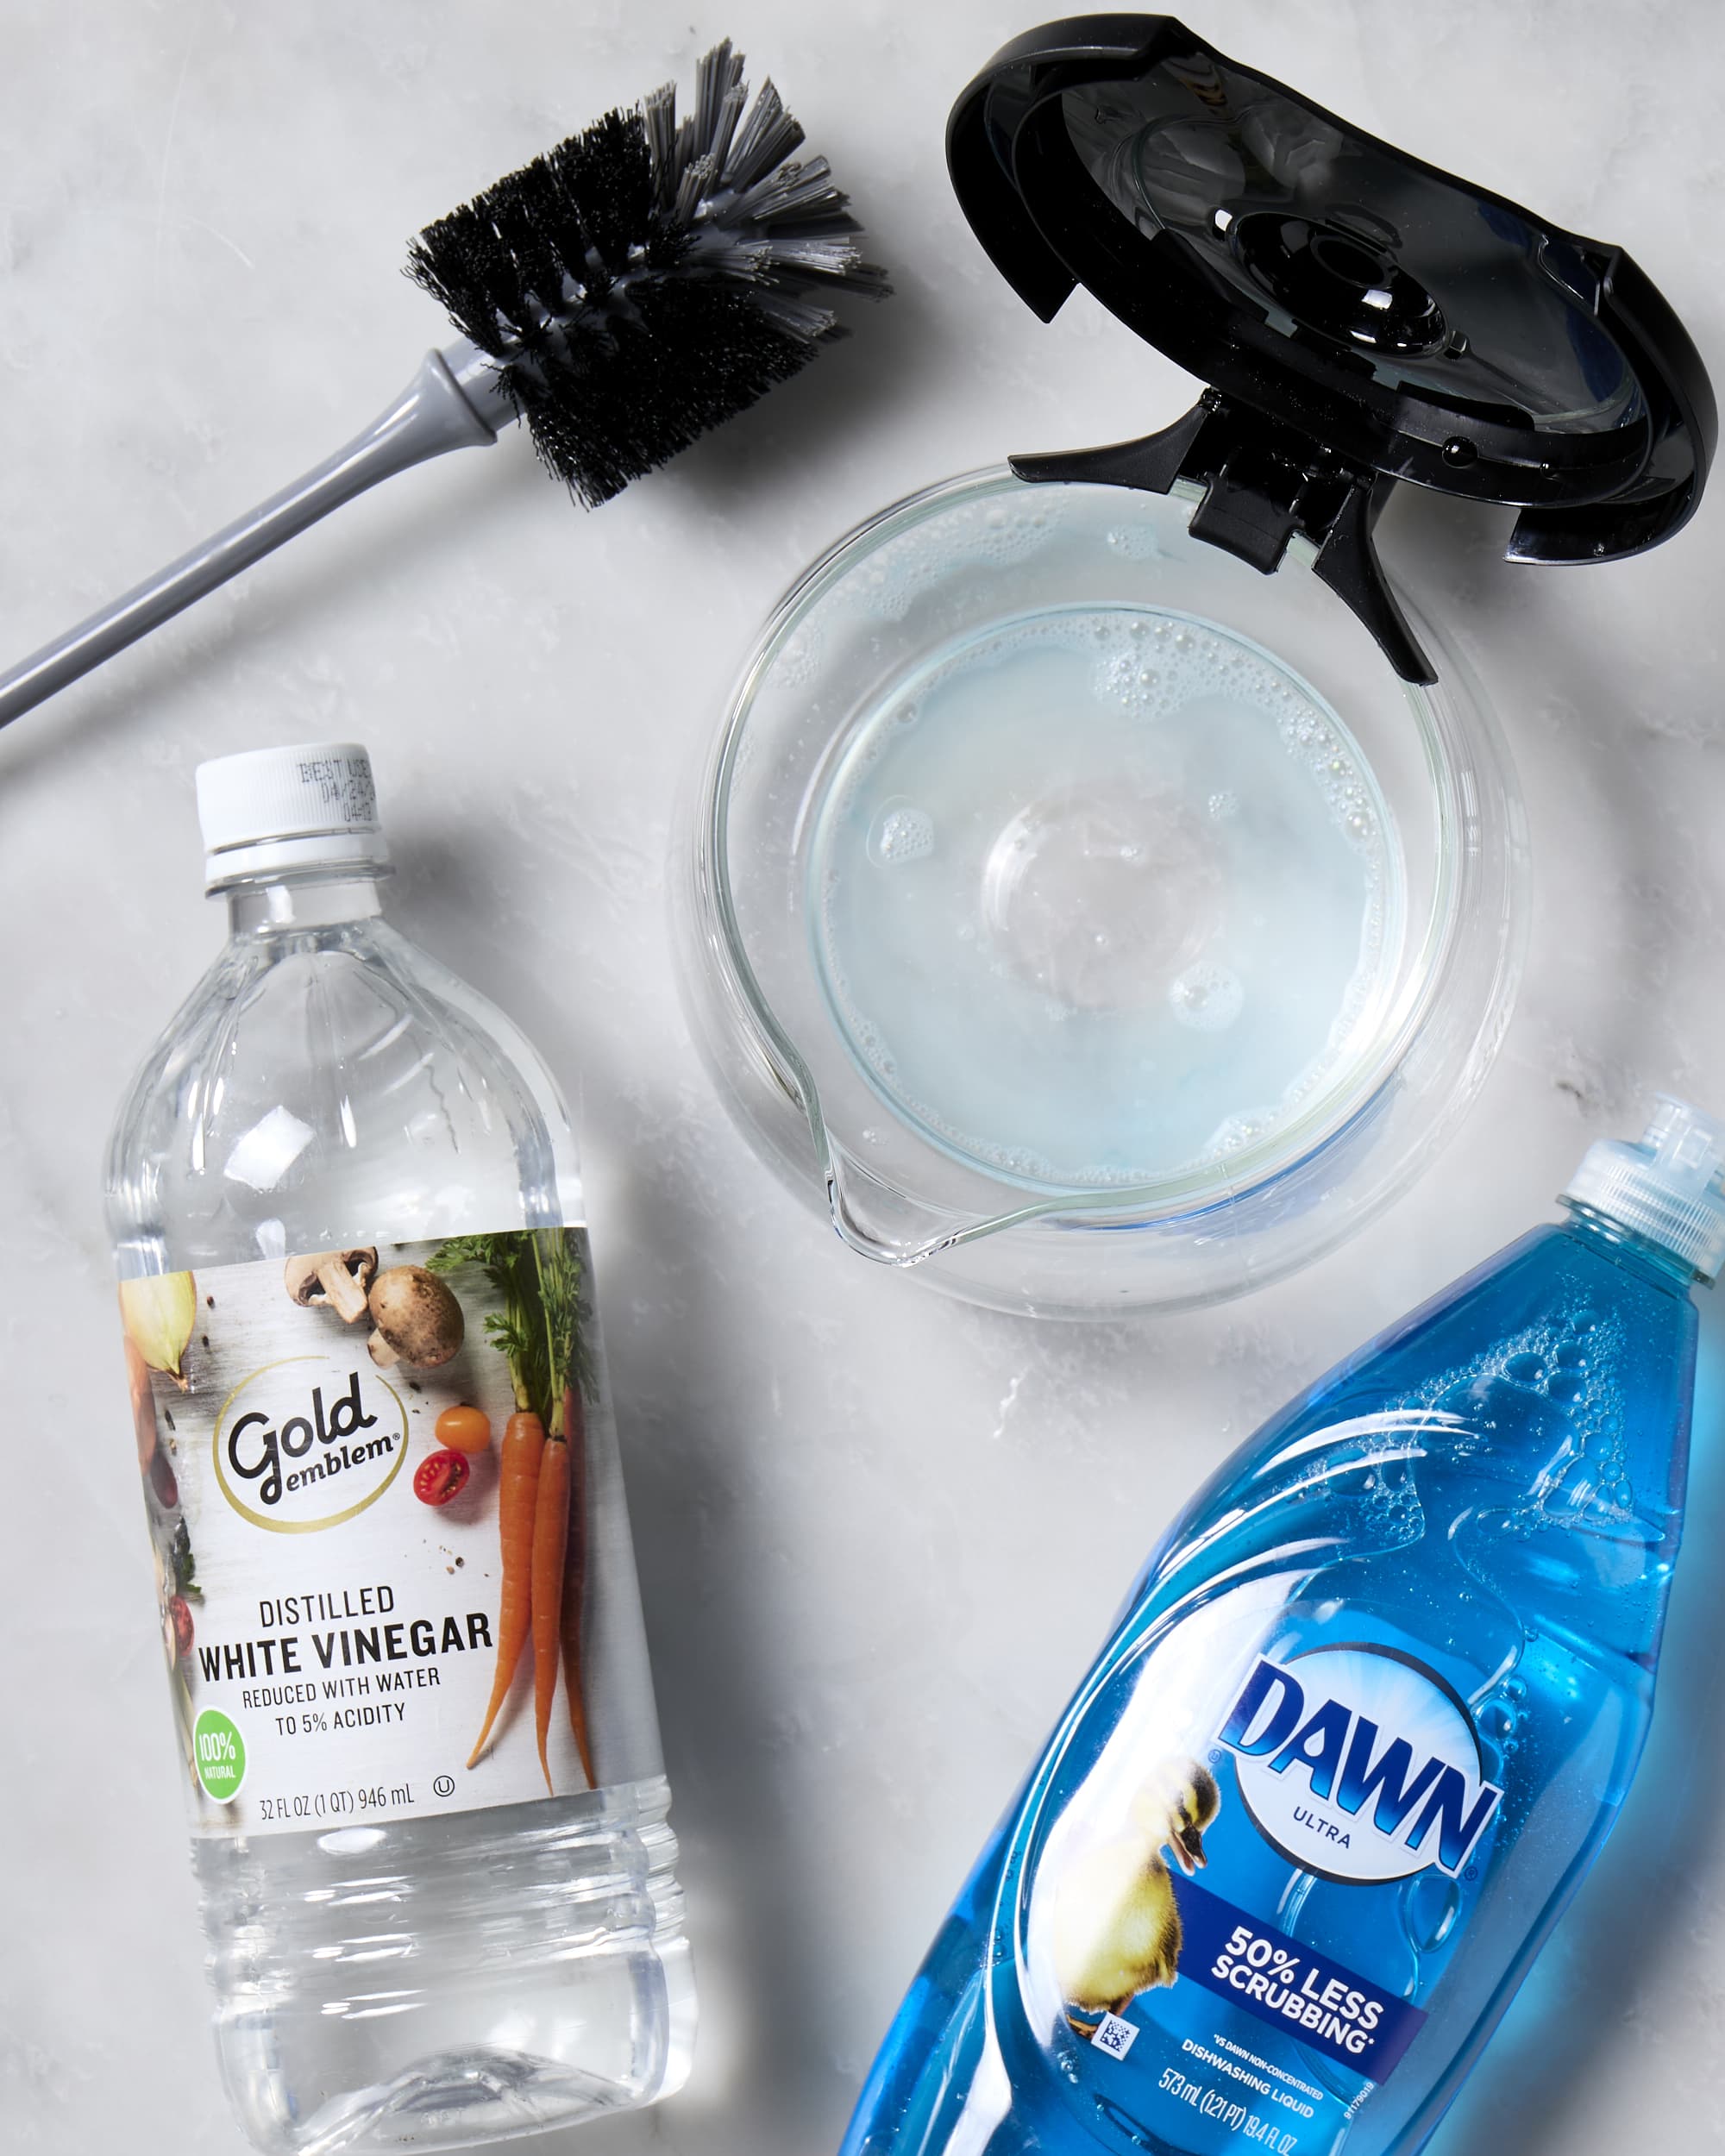
- Wash with warm soapy water after each use. Don’t let the pot sit with coffee residue. A quick wash with a mild dish soap and a soft sponge or cloth will remove the oils and pigments before they have a chance to adhere to the glass.
- Avoid abrasive scrubbers that cause micro-scratches. Steel wool or harsh scouring pads might seem effective, but they create tiny scratches on the glass surface. These microscopic grooves make it easier for future stains to grab on and hold tight, creating a cycle of harder-to-clean stains.
- Air dry interior to prevent lint contamination. After washing, place the pot upside down on a clean drying rack. Using a dish towel to dry the inside can leave behind lint, which can affect the taste of your next brew.
The No-Soap Controversy
You may have heard that you should never use soap on a coffee pot, as it can leave a residue that ruins the flavor of future batches. This advice comes from a good place, but it’s a bit outdated.
- Traditionalists argue soap affects coffee flavor. The concern is that soapy film can cling to the porous surface of ceramic or glass, imparting a chemical taste.
- Modern testing shows proper rinsing eliminates soap residue. With today’s milder soaps and thorough rinsing under hot, running water, the risk of flavor contamination is minimal. Ensure you rinse the pot thoroughly—twice if you’re concerned.
- Alternative: Use baking soda paste for gentle cleaning. If you prefer to avoid soap, a paste made from baking soda and a little water is an excellent, gentle abrasive. It helps scrub away light stains and neutralizes odors without any risk of chemical residue.
Advanced Stain Removal Techniques
Even with the best habits, some stains or mineral deposits (scale) can still appear over time. When they do, these non-toxic, kitchen-friendly methods can work wonders to restore your pot.
Ice and Salt Method
This is a fantastic physical cleaning method that uses abrasion to lift stains without chemicals. It’s particularly effective for the brown film that regular washing misses.
- Combine 1 cup crushed ice with 4 teaspoons salt. Table salt or coarse sea salt both work well. The ice provides a solid medium for the abrasive salt, and the cold helps contract the glass slightly.
- Swirl mixture for 1-2 minutes until stains lift. Hold the pot by the handle and swirl the ice-and-salt mixture vigorously around the interior, making sure it grinds against all stained surfaces. You will see the stains begin to disappear.
- Effective for 85% of common coffee stains. This method is remarkably successful for organic coffee stains. Discard the ice and salt, then give the pot a thorough rinse with warm water.
Vinegar Soak Alternative
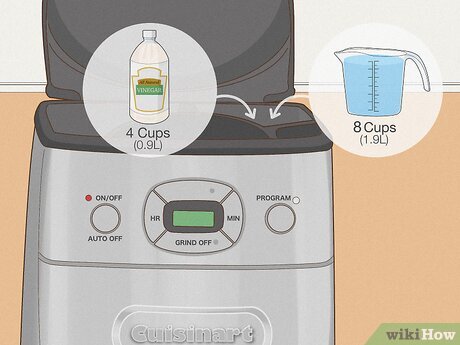
For hard water mineral deposits—the white, chalky scale that builds up over time—an acid-based soak is the most effective solution.
- Equal parts white vinegar and water solution. Fill your coffee pot with this mixture. The acetic acid in the vinegar will gently dissolve the mineral deposits.
- Soak for 20-30 minutes for mineral deposit removal. For heavier buildup, you can let it sit for longer or even gently heat the solution in the pot (do not boil). After soaking, use a soft cloth to wipe away any remaining film.
- Multiple rinses required to eliminate vinegar taste. This is the most critical step. Rinse the pot several times with clean water to ensure all traces of vinegar are gone, preventing it from affecting your next batch of coffee.
For maintaining all your coffee gear, including getting that perfect clean for your entire percolator system, a dedicated cleaner is a game-changer. It’s designed to tackle coffee oils and mineral scale without any harsh chemical smells or tastes left behind.
- Product: Barista Basics Ultimate Coffee Cleaning Kit
- Link: https://amzn.to/3Uj6pCv
【Moka Pot Specific Maintenance Guide】

Your Moka pot is a workhorse of stovetop brewing, capable of delivering rich, espresso-like coffee day after day. But its unique design and materials demand a specific care routine to keep it performing at its peak. Proper maintenance isn’t just about cleanliness; it’s about preserving the integrity of the brew and the pot itself for years to come.
Daily Cleaning Without Compromise
A consistent post-brew routine is the secret to a long-lasting Moka pot. Unlike your glass percolator, the rules here are strict, especially concerning materials.
Aluminum vs. Stainless Steel Care
The material of your Moka pot dictates its care. Treating them correctly from day one makes all the difference.
| Material | Cleaning Approach | Key Consideration |
|---|---|---|
| Aluminum | Rinse with hot water only; use a soft brush. Avoid dish soap. | Preserves the natural, non-stick patina that develops and protects the pot. Soap can strip this layer and lead to metallic tastes. |
| Stainless Steel | Can be washed with a small amount of mild dish soap and warm water. | More resistant to corrosion and less prone to flavor retention, making it more tolerant of gentle soaps. |
For both types, one rule is universal: complete drying is non-negotiable. Always disassemble the pot completely—separating the base, funnel, and top chamber—and allow all parts to air dry thoroughly before reassembly. This prevents water spots and, more importantly, stops oxidation (especially for aluminum models).
The No-Dishwasher Rule
This is perhaps the most critical rule for Moka pot care: never, ever put it in the dishwasher.
- High temperatures damage seals and finishes. The intense heat and steam can warp the pot’s structure over time and will certainly degrade the crucial rubber gasket, making it brittle and ineffective.
- Harsh detergents affect future coffee flavor. Dishwasher detergents are designed to be powerful. They can embed a chemical film into the aluminum or stainless steel that will leach into your coffee, ruining its pure taste.
- Hand washing preserves structural integrity 3x longer. By gently hand washing and drying your Moka pot, you are protecting its threads, gaskets, and overall finish, effectively tripling its lifespan compared to dishwasher abuse.
Monthly Deep Cleaning Ritual
Even with perfect daily care, coffee oils and microscopic particles will accumulate in the nooks and crannies. A monthly deep clean ensures these buildups don’t turn rancid and affect your coffee’s flavor.
Vinegar Solution Treatment
This is your go-to method for dealing with any mineral scale from hard water, similar to the percolator method but with a specific process.
- 15-20 minute soak in equal parts vinegar and water. Disassemble your Moka pot and submerge all components (except the plastic handle, if applicable) in this solution.
- Soft brush cleaning of filter components. After the soak, use a soft-bristled brush (an old toothbrush works perfectly) to gently scrub the inside of the brew chamber and the tiny holes in the filter plate. This dislodges any clogged grounds or dissolved scale.
- Water-only brew cycle to remove vinegar residue. Reassemble the pot and run a cycle with clean water only. This will flush any remaining vinegar solution through the system. Dump this water out, and your pot will be ready for its next brew.
Gasket and Seal Inspection
The gasket and filter are the heart of the Moka pot’s pressure system. A faulty seal means a weak, under-extracted brew.
- Check rubber seals for brittleness monthly. During your deep clean, physically flex the rubber gasket. If it feels stiff, has cracks, or has lost its elasticity, it’s time for a replacement.
- Replace gaskets every 12-18 months. As a general rule, even with careful use, plan to replace the gasket and the metal filter screen about once a year to maintain perfect pressure and safety.
- Proper seal ensures optimal pressure and flavor. A tight seal is what forces the water up through the coffee grounds, creating that signature rich crema and full-bodied flavor. A worn gasket lets steam escape, resulting in a weak, watery coffee.
For a complete maintenance kit that includes a specialized brush for those hard-to-reach spots and safe cleaning powders, this set has everything you need to keep your stovetop brewer in top condition.
- Product: Caffè Duomo Moka Pot Maintenance & Cleaning Kit
- Link: https://amzn.to/3Uj6pCv
【Hotel Room Coffee and Glassware Safety】
Let’s be honest, the convenience of an in-room coffee setup is fantastic, but the uncertainty about its cleanliness can be a real mood-killer. Moving from the careful maintenance of your home equipment, the transition to a hotel’s brewer and glassware requires a different kind of vigilance. A few simple, proactive steps can ensure your morning cup is both safe and delicious, giving you peace of mind while you’re away from home.
Traveler’s Protective Measures
Think of this as your pre-brew ritual. A quick inspection and clean-up take just a few minutes but make all the difference in your coffee experience.
Pre-Use Inspection Protocol
Before you even think about brewing, give everything a quick once-over. Your senses are your best tools here.
- Check glassware for water spots or lipstick residue. Hold glasses up to the light. Water spots can indicate improper drying, while any residue is a clear sign it needs a wash. Run your finger along the rim to feel for any grit.
- Inspect the coffee maker for visible mold or mineral buildup. Pay close attention to the water reservoir, looking for any slimy film or discoloration. Check the brew basket and the exit spout for any old, ground coffee or white, chalky scale deposits.
- Smell test: Detect stale coffee or musty odors. Give the empty carafe and the inside of the coffee maker a quick sniff. A sour, stale coffee smell or a damp, musty odor are red flags that the machine hasn’t been cleaned properly.
The Initial Cleaning Cycle
Even if everything looks clean, it’s always best to run a cleansing cycle. This flushes out the internal system that you can’t see.
- Run 2-3 water-only cycles through the coffee maker. This helps to clear out any stale water and loosens up internal residue. Discard the water from each cycle.
- Use bottled water if tap water safety is uncertain. If you have any doubts about the local water quality, using bottled water for both the cleaning cycles and your actual brew is a smart move.
- Wipe exterior with disinfecting wipes. Don’t forget the outside! Wipe down all touchpoints like the handle, buttons, and the carafe handle with a disinfecting wipe.
Alternative Brewing Solutions
Sometimes, the inspection reveals issues you’d rather not deal with, or you simply want the comfort of your own brewing method. Having a backup plan is a game-changer for coffee-loving travelers.
Portable Coffee Options
With a little forethought, you can enjoy a great cup of coffee anywhere, completely independent of the hotel’s amenities.
- Bring your own immersion brewer or French press. Compact, durable options like the AeroPress Go or a single-serving French press are travel-friendly and give you full control over the brewing process and cleanliness.
- Use instant coffee with hot water from the bathroom tap. The quality of instant coffee has improved dramatically in 2025. While you might not want to use the coffee maker, the hot water from the bathroom sink is typically safe for reconstituting a quick instant brew.
- Pack collapsible silicone cups for guaranteed cleanliness. These take up almost no space in your luggage and ensure you have a clean, personal vessel for your coffee, completely bypassing the hotel glassware.
For travelers who value both convenience and quality, the AeroPress Go is a fantastic all-in-one solution that includes the brewer, a mug, and a stirrer in a compact package, ensuring a perfect cup no matter where you are.
- Product: AeroPress Go Portable Coffee Maker
- Link: https://amzn.to/3Uj6pCv
【Descaling and Mineral Management】
Just as we discussed the importance of inspecting hotel coffee makers, giving your own equipment the same level of care is crucial for both safety and flavor. Mineral buildup, or scale, is the silent enemy of your coffee percolator. It acts as an insulator, forcing your brewer to work harder and heat less efficiently, which can lead to a weak, off-tasting brew and, eventually, appliance failure. A regular descaling routine is the single most effective way to maintain your machine’s performance and longevity.
Understanding Descaling Frequency
How often you need to descale isn’t a one-size-fits-all answer; it’s almost entirely dependent on the mineral content of your water. Think of it like changing the oil in your car—it’s preventative maintenance based on your “operating conditions.”
Hard Water vs. Soft Water Schedules
The key factor is water hardness. You can often find your local water hardness level through your municipal water provider’s website.
- Hard water areas: Descaling every 1-2 months. If you notice white, chalky deposits on your showerhead or in your kettle, you likely have hard water. The high concentration of calcium and magnesium means scale builds up quickly, requiring a more frequent descaling schedule.
- Soft water areas: Descaling every 3-4 months. Soft water has a much lower mineral content, so scale accumulates more slowly. A quarterly descaling schedule is usually sufficient to keep your machine in top shape.
- Filtered water users: Extend intervals by 30%. Using filtered water, whether from a pitcher like a Brita or a built-in filter, removes a significant portion of the minerals responsible for scale. This allows you to safely stretch the time between descaling sessions by about a third.
Descaling Method Options
You have two primary paths for descaling: commercial solutions or a common household alternative. Both are effective, but they come with different pros and cons.
Commercial Descaling Solutions
These are specifically formulated for coffee makers and are generally the recommended option.
- Manufacturer-specific formulas for optimal results. Some brands make descaling solutions tailored to their machines’ internal components.
- Precise measurements for different machine sizes. The packaging provides clear instructions on how much solution to use, taking the guesswork out of the process.
- Typically cost $5-15 per treatment. While more expensive than vinegar, they are highly effective and require fewer rinse cycles.
Vinegar Alternative Method
White vinegar is a popular, cost-effective descaling agent, but it requires extra care.
- Equal parts white vinegar and water solution. A 1:1 ratio is standard for tackling moderate scale.
- Requires multiple rinse cycles to remove taste. The vinegar odor can linger, so you’ll need to run several cycles with fresh water to ensure no flavor carries over into your coffee.
- Cost-effective at approximately $0.50 per treatment. This is the main advantage, making it a budget-friendly choice.
Descaling Step-by-Step Process
A successful descaling is all about the method. Follow these steps closely for a clean machine and a great-tasting next brew.
Preparation and Safety
A little prep makes the whole process smoother and safer.
- Ensure machine is completely cool before starting. Never pour a descaling solution into a hot water reservoir.
- Work in a well-ventilated area during the process. This is especially important if you’re using vinegar, as the fumes can be strong.
- Have towels ready for potential spills. Descale over a sink or have a towel handy to manage any drips or overflows.
Cycle Management
This is the core of the descaling operation. Patience here pays off.
- Run the descaling solution through a full brew cycle. Pour the prepared solution (commercial or vinegar) into the water reservoir and start a brew cycle without any coffee in the basket.
- Let the solution sit in the machine for 15-30 minutes. After the cycle is about halfway through, pause the machine and let the solution sit inside to break down the mineral deposits. Then, restart the cycle to completion.
- Complete 3-5 clear water rinse cycles. This is the most critical step to remove all traces of the descaling solution. Run fresh water through the machine repeatedly until you can no longer smell any vinegar or cleaning agent.
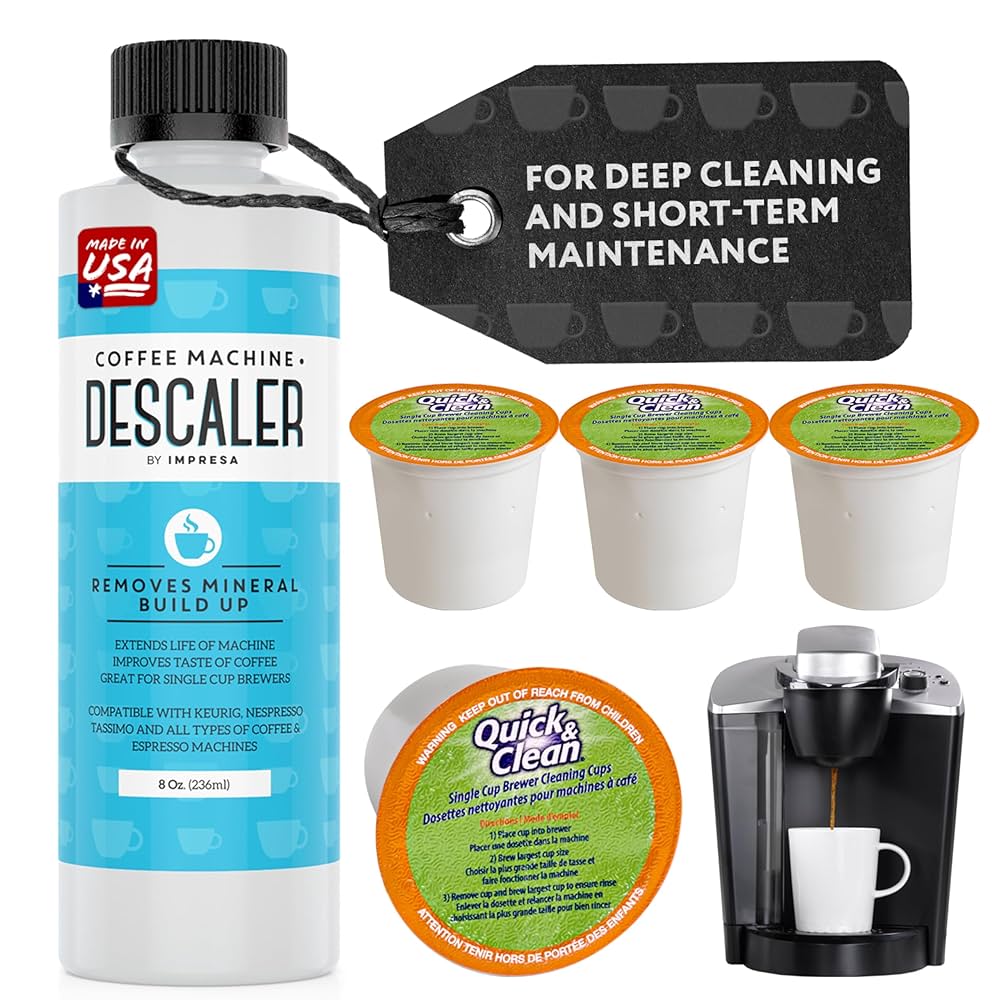
For a hassle-free and highly effective descaling experience, the Urnex Descaling Solution is a reliable choice used by coffee professionals and enthusiasts alike. It’s designed to quickly dissolve scale without leaving any residual taste or odor, making the rinse process straightforward.
- Product: Urnex Descaling Solution
- Link: https://amzn.to/3Uj6pCv
【Long-Term Equipment Preservation】
Proper care for your coffee percolator and glassware doesn’t end with daily cleaning and descaling. How you store your equipment and manage its parts over the long haul is just as critical for ensuring it serves you delicious coffee for years to come.
Storage Best Practices
Where and how you store your coffee maker when it’s not in daily use can significantly impact its condition. A little forethought prevents a lot of headaches later.
Off-Season Maintenance
Whether you’re putting away a seasonal percolator or just storing a backup machine, a proper send-off is key.
- Complete deep clean before storage. Never store a dirty machine. Run a full descaling cycle followed by several fresh water rinses to ensure no coffee oils or mineral deposits are left sitting inside.
- Ensure all components are bone dry. After cleaning, let every part—the percolator body, basket, and carafe—air dry completely. Any lingering moisture can lead to mold or mildew growth during storage.
- Store disassembled with airflow between parts. Don’t reassemble the unit tightly. Leave the lid off or ajar and store parts separately in a way that allows air to circulate. This prevents musty odors and ensures everything is dry.
Travel and Moving Protection
Transporting your coffee equipment requires special attention to prevent costly damage, especially to glass components.
- Original packaging provides best protection. If you’ve kept the original box and styrofoam inserts, this is always your safest bet. They are custom-molded to cushion your specific model.
- Wrap glass components in bubble wrap or cloth. For the glass carafe, provide a soft buffer. Wrap it securely in bubble wrap, a kitchen towel, or even a thick sock before packing it away from heavier items.
- Pack coffee maker upright to prevent damage. Position the main unit upright in the box and avoid placing heavy objects on top of it. This helps protect the internal mechanisms and heating element from stress or misalignment.
Replacement Part Management
Even with perfect care, some components are consumables and will need replacing. Staying on top of this maintains both the quality of your brew and the health of your machine.
Knowing When to Replace
Recognizing the signs of wear can save your machine from further damage.
- Glass carafes: Replace when scratched or chipped. Beyond being a safety hazard, scratches on a glass carafe can harbor bacteria and old coffee oils that are difficult to clean, affecting the taste of your coffee.
- Filters: Change every 6-12 months depending on usage. Whether it’s a permanent mesh filter or a paper filter holder, they wear out. A bent or clogged filter can impede water flow and lead to over-extraction or a weaker brew.
- Seals and gaskets: Annual inspection recommended. The rubber or silicone seals that keep water and steam contained can degrade over time. Check them annually for cracks, stiffness, or a flattened shape, and replace them if you notice any loss of flexibility, as this can cause leaks.
Sourcing Authentic Parts
Using the right parts is non-negotiable for performance and safety.
- Manufacturer websites for guaranteed compatibility. The manufacturer’s official parts store is the most reliable source. You can search by your model number to find the exact part you need.
- Authorized dealers for warranty preservation. Purchasing from an authorized reseller ensures the part meets the manufacturer’s specifications and helps keep any remaining warranty intact.
- Avoid generic parts that may affect performance. While sometimes cheaper, generic or off-brand parts may not fit perfectly or withstand the same heat and pressure, potentially leading to poor performance or even damage to your appliance.
For keeping your equipment in peak condition, having a reliable descaling solution on hand is part of a good maintenance routine. The Urnex Descaling Solution is a trusted option that efficiently removes mineral buildup without harsh chemicals, ensuring your machine’s longevity.
- Product: Urnex Descaling Solution
- Link: https://amzn.to/3Uj6pCv
Mastering Your Coffee Maintenance Routine
Consistent care for your coffee percolator and glassware transcends simple cleanliness—it directly impacts your health, your coffee’s flavor, and your equipment’s longevity. We’ve explored how immediate post-brew cleaning prevents bacterial growth and rancid oil buildup, while regular descaling combats mineral deposits that impair heating efficiency. The distinction between daily rituals and weekly deep cleans ensures both surface hygiene and internal system integrity. Understanding material-specific care, from aluminum Moka pots to glass carafes, preserves your equipment’s condition. Furthermore, implementing inspection protocols for hotel setups guarantees safety when traveling.
These practices collectively form a comprehensive maintenance philosophy that protects your investment and elevates your daily coffee experience. By integrating these steps into your routine, you transform maintenance from a chore into an essential component of craft coffee preparation.
What’s the first change you’ll implement in your coffee care routine? Share your maintenance success stories in the comments below and help fellow readers perfect their approach! For effortless equipment care, explore our recommended cleaning solutions through the affiliate links provided throughout this guide.

