Did you know that improper canning methods cause approximately 30 cases of botulism poisoning annually? Understanding water bath canning fundamentals is not just about preserving your garden harvest—it’s about ensuring food safety through proper technique. This comprehensive guide demystifies the boiling water method, distinguishing it from pressure canning while providing crucial equipment selection criteria and step-by-step processing protocols for 2025. Whether you’re preserving seasonal fruits, creating artisan jams, or pickling vegetables, mastering water bath canning empowers you to safely extend your food’s shelf life while maintaining nutritional quality and flavor integrity.

【Understanding Water Bath Canning Fundamentals】

What is Water Bath Canning?
Defining the Boiling Water Method
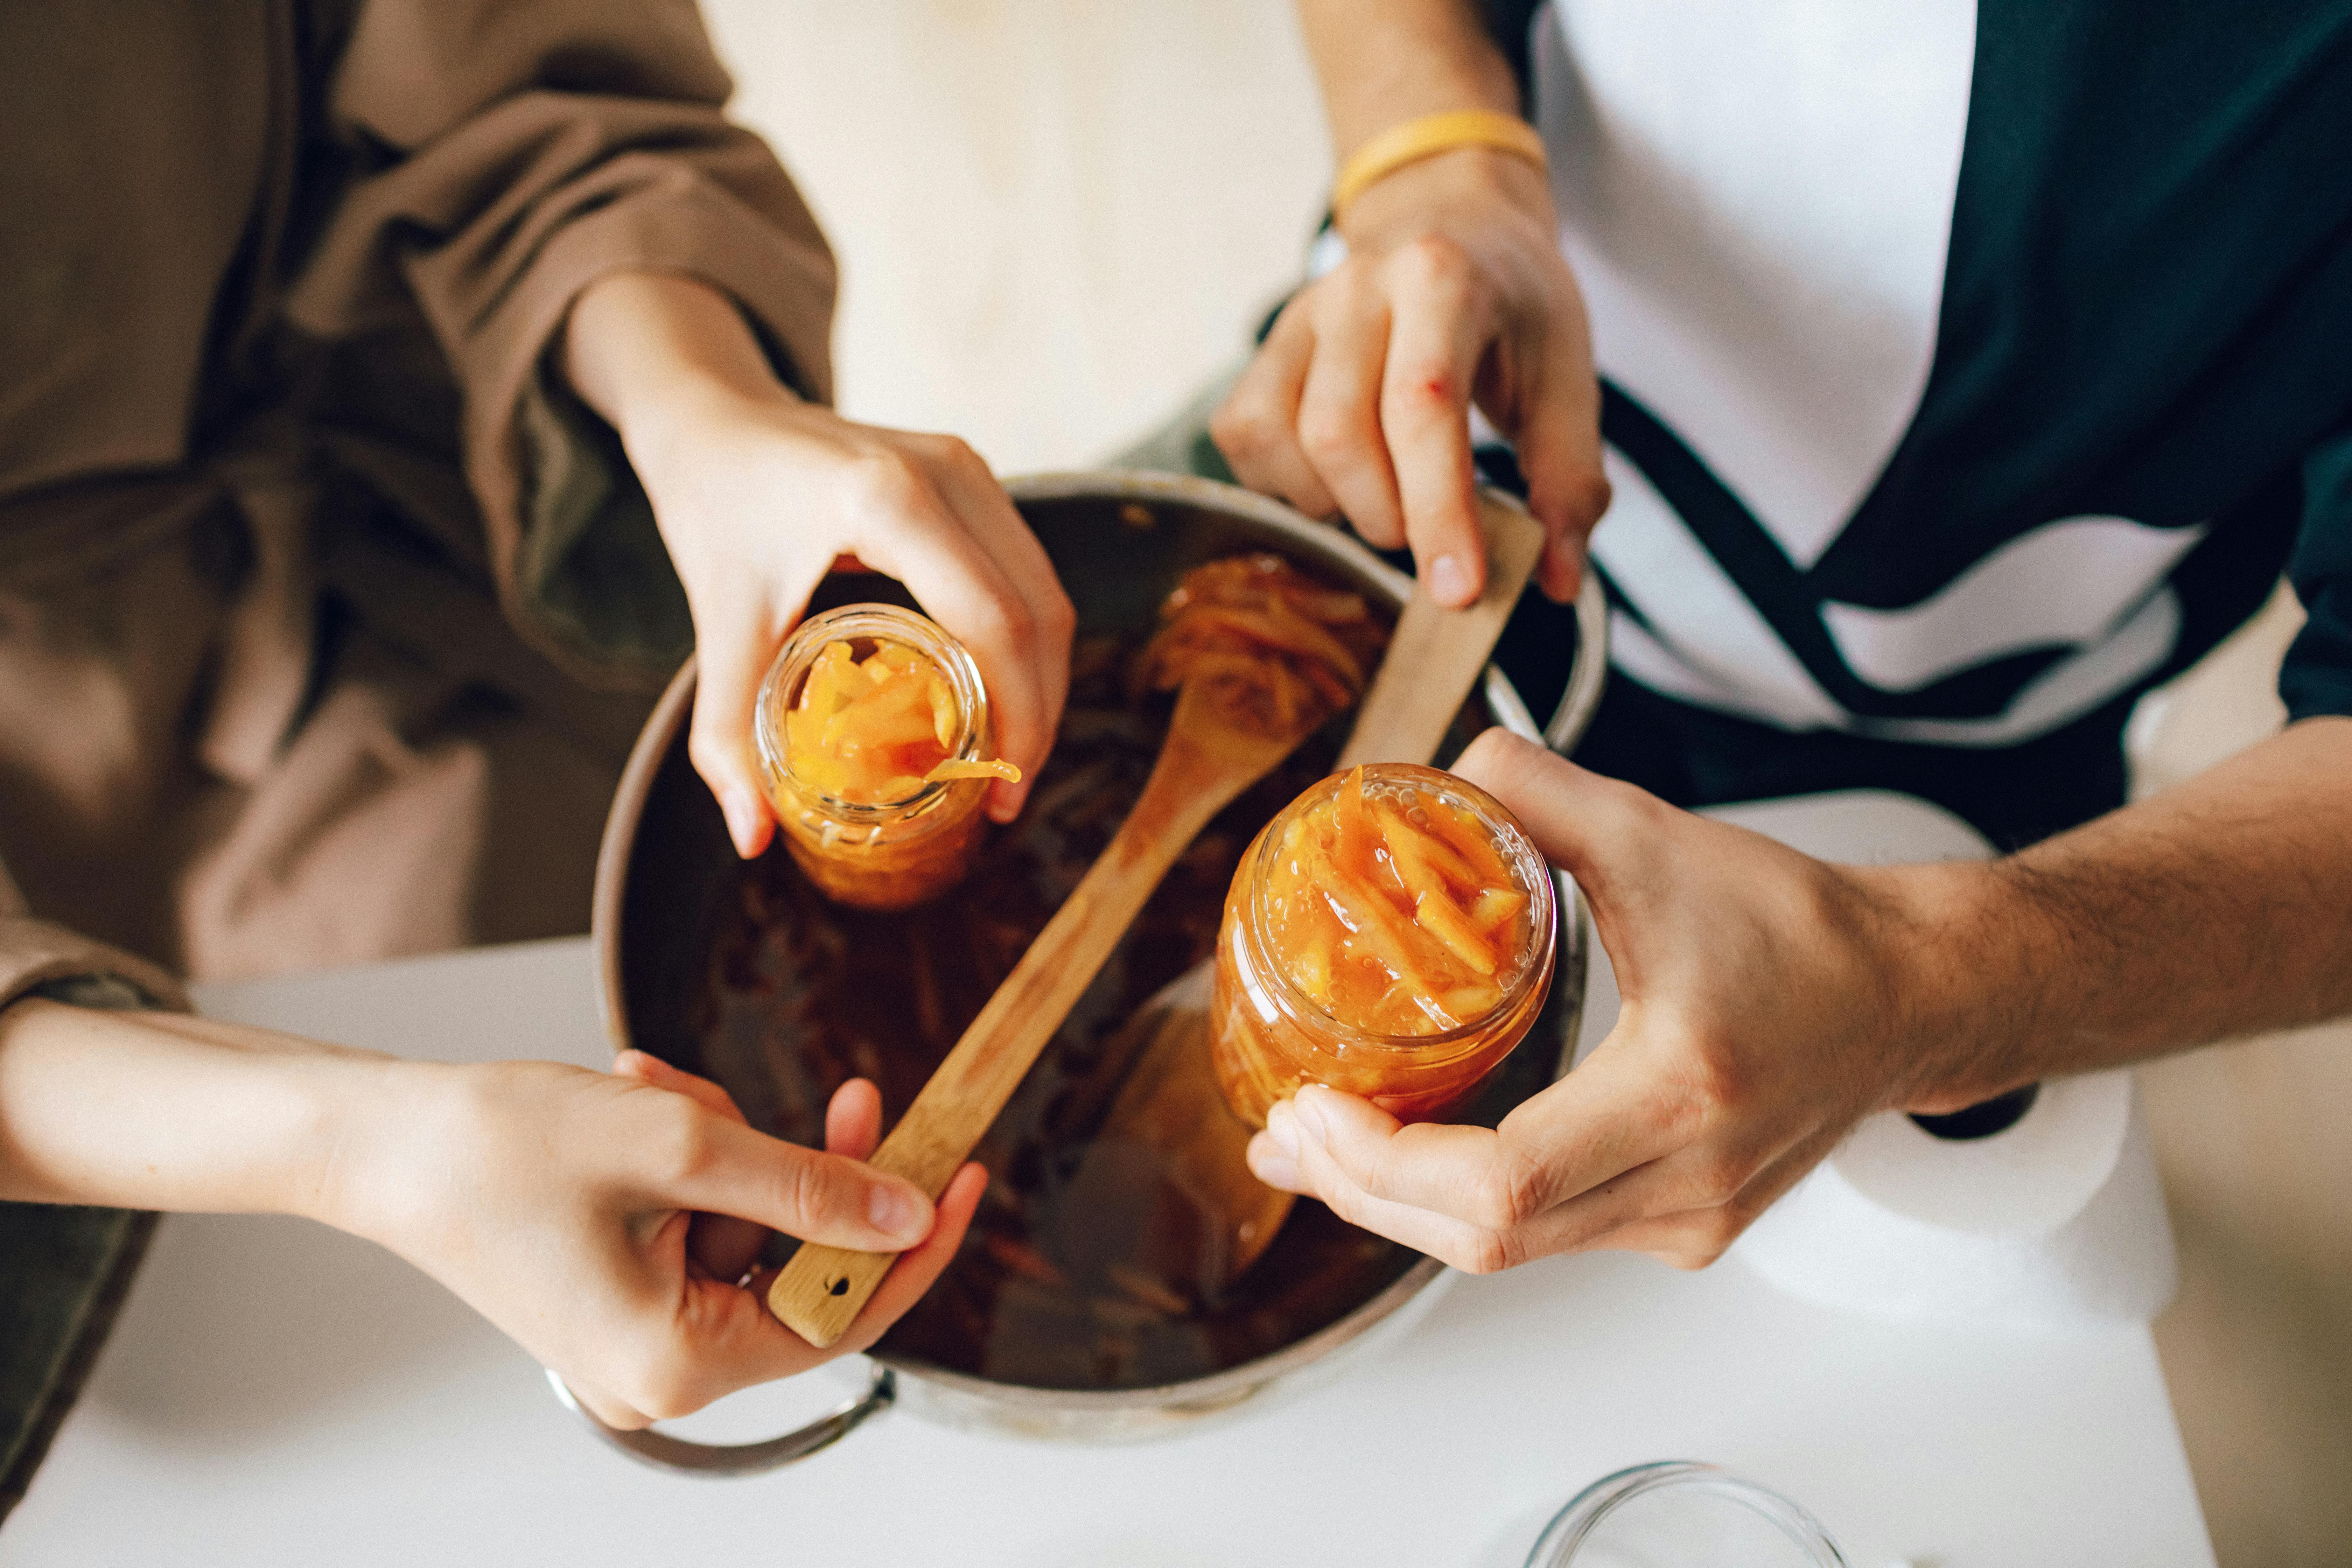
Water bath canning is the process of preserving high-acid foods by submerging sealed jars in a pot of boiling water, where they are processed at a temperature of 212°F (100°C) for a specified amount of time. This method is also commonly referred to as “hot water canning” or “boiling water bath.” The fundamental principle is that the intense heat of the boiling water is sufficient to destroy molds, yeasts, and bacteria that could otherwise spoil the food, while also driving air out of the jar to create a vacuum seal as it cools. This is fundamentally different from pressure canning, which uses pressurized steam to achieve a much higher temperature of 240°F (116°C), a requirement for safely processing low-acid foods.
Water Bath vs Pressure Canning: Critical Differences
Equipment and Temperature Variations
The distinction between these two methods begins with the equipment. A water bath canner is essentially a very large, deep stockpot fitted with a removable rack that keeps the glass jars from directly contacting the bottom of the pot. Its operation is straightforward, relying on a vigorous boil to maintain a constant 212°F temperature. In contrast, a pressure canner is a specialized piece of equipment with a locking lid, a rubber gasket, a vent port, and a pressure gauge or weighted regulator. It functions as a sealed system, trapping steam to build pressure and raise the internal temperature well above the boiling point of water, often to 240°F or higher.
This core difference in equipment and operating temperature directly impacts processing times. Water bath processing is relatively quick, typically ranging from as little as 5 minutes for some jellies up to 30 minutes for many fruits and pickles. Pressure canning, due to the nature of the foods it preserves, requires significantly longer processing times, generally falling between 20 and 100 minutes to ensure safety.
Food Safety Applications
The choice between a water bath and a pressure canner is not a matter of preference but one of food chemistry and safety. The high heat of a water bath canner is only effective for preserving high-acid foods, where the natural or added acidity (a pH of 4.6 or lower) creates an environment that inhibits the growth of Clostridium botulinum, the bacterium that causes botulism. This category includes most fruits, jams, jellies, marmalades, fruit syrups, pickles, relishes, chutneys, and properly acidified tomatoes and salsas.
Pressure canning is the only safe method for processing low-acid foods. The elevated temperature of 240°F is necessary to destroy the heat-resistant spores of C. botulinum. This category is broad and includes all meats (poultry, red meat, and game), seafood, poultry, dairy products, beans, corn, carrots, and virtually all other vegetables not pickled. Using a water bath canner for these foods creates an extreme risk of botulism poisoning. For the home canner in 2025, understanding this fundamental safety distinction is the most critical first step before any food is prepared or jarred. For those ready to begin, a high-quality water bath canner is an essential first investment. A product like the Vermont Castings Water Bath Canner with Rack provides the durability and capacity needed for successful and safe high-acid preservation.
Essential Water Bath Canning Equipment
Core Canning Tools
Must-Have Canning Supplies
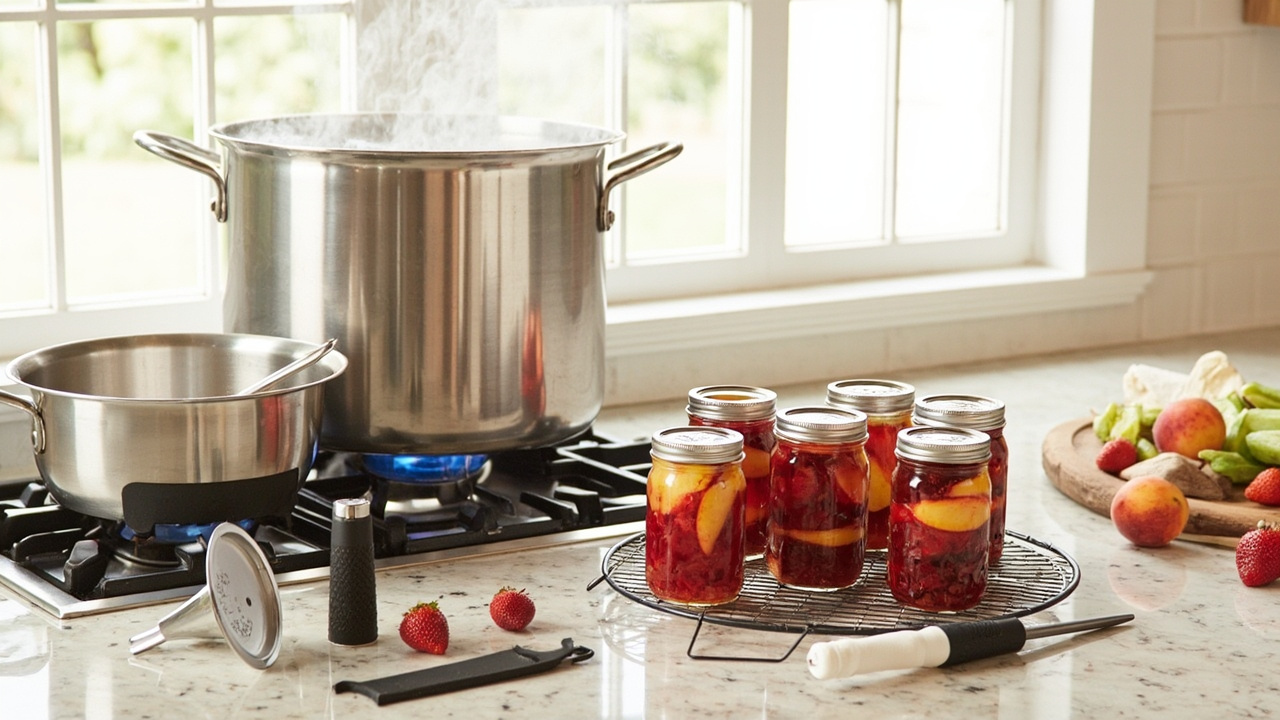
The foundation of successful water bath canning begins with assembling the proper equipment. Each component serves a specific, non-negotiable purpose in the preservation process.
- Boiling Water Canner or Large Stockpot: At minimum, a 21-quart capacity is required to allow for at least one inch of water to cover the jars during a vigorous boil. A dedicated canner, typically enameled or made of aluminum, is designed for this purpose, but a large, heavy-bottomed stockpot of sufficient depth can suffice.
- Jar Rack: This removable rack is critical. It elevates the jars off the direct bottom surface of the pot, allowing water to circulate freely underneath and preventing the glass from contacting intense heat spots that could cause thermal shock and breakage.
- Canning Jars: Only jars specifically designed for home canning, such as Mason, Ball, or Kerr jars, should be used. These are manufactured from thermally stable glass to withstand the repeated thermal stress of boiling and cooling. Always inspect jars for nicks, cracks, or scratches before each use.
- Lids and Bands: You must use new, flat lids for every canning session. The sealing compound on the underside is designed for one-time use to ensure an airtight vacuum. The screw bands, however, can be reused indefinitely, provided they are clean and free of rust or bends that could prevent a proper seal.
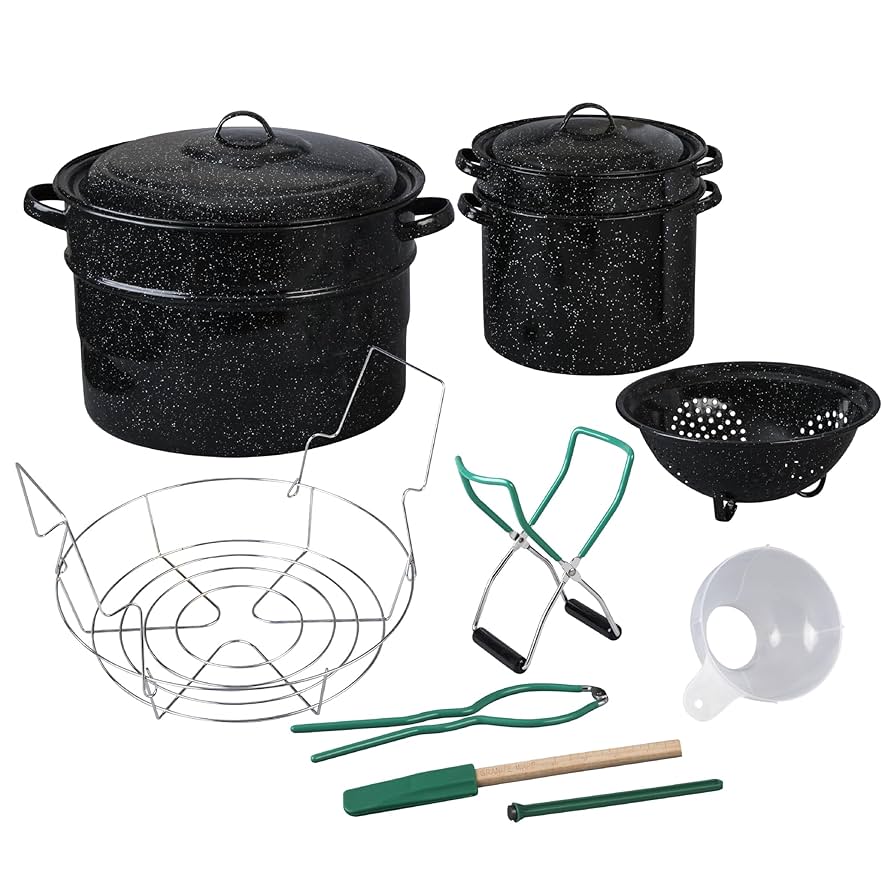
Specialized Canning Tools
While you could theoretically process jars without them, the following tools transform a potentially hazardous and messy task into a safe, streamlined, and repeatable procedure.
- Canning Funnel: A wide-mouth funnel designed to fit the opening of standard canning jars. It is indispensable for cleanly transferring hot, often sticky, liquids like syrups, brines, and jams into jars without contaminating the jar rim.
- Jar Lifter: This is arguably the most crucial safety tool. Its rubber-coated, locking grips are shaped to securely hold the neck of a hot, slippery jar, allowing you to lower it into and lift it out of the boiling water bath with confidence and control.
- Bubble Remover and Headspace Tool: This simple plastic or wooden tool serves two functions. First, it is run around the inside of the jar to release trapped air bubbles that could affect the headspace measurement and potentially harbor food particles. Second, its notched end provides a quick, accurate way to measure the required headspace—the distance between the top of the food and the underside of the lid.
- Magnetic Lid Wand: This tool keeps the process sanitary. Before sealing, the flat lids must be softened in a pan of hot (but not boiling) water. The magnetic wand allows you to retrieve a single lid without touching it with your fingers or dipping your hand into the hot water, preventing contamination of the critical sealing surface.
Equipment Safety Considerations
Stovetop Compatibility Issues
The interface between your canner and your stovetop is a point of significant safety concern, particularly with the prevalence of smooth-top, electric, and induction ranges in 2025. The consequences of incompatibility range from inefficient processing to permanent damage to your stove or even personal injury.
- Flat-Bottom Canners are Mandatory: For glass-top stoves, the canner must have a perfectly flat and smooth bottom. Any warping, ridges, or a concave/convex shape can create an air gap, leading to inefficient heat transfer and, more dangerously, causing the glass ceramic surface to overheat and crack.
- The Danger of Ridged Bottoms: Many traditional stockpots and some older canners have ridged or concentric circles on their base. These ridges concentrate heat in small areas, creating extreme temperature differentials that the glass cooktop cannot dissipate effectively, making thermal fracture a high probability.
- Follow Manufacturer Guidelines: The USDA explicitly advises canners to consult their stove manufacturer’s use and care guide for specific warnings and weight limitations related to canning. Some manufacturers void warranties if damage occurs from using incompatible or oversized canners. For those using modern stovetops, selecting a canner designed for this purpose is essential. The All-American Smooth Top Canner, for instance, is engineered with a reinforced, milled-flat bottom specifically for use on glass and induction ranges, ensuring both safety and optimal performance.
Water Bath Canner Selection Guide
Types of Water Bath Canners
Traditional Enamel Canners
The classic speckled enamel-on-steel canner, often recognized as Granite Ware, remains a popular and budget-conscious choice. These models typically range from 15.5-quart to 33-quart capacities, accommodating everything from a few half-pint jars to a full batch of quart jars. Their primary advantage is low initial cost and widespread availability. However, they are not compatible with induction stovetops due to their steel core. The enamel coating, while attractive, is the system’s vulnerability; it is prone to chipping from impacts, and if the underlying steel is exposed to moisture, it will rust. This makes their long-term durability entirely dependent on meticulous care.
Stainless Steel Alternatives
For a more durable and modern approach, stainless steel canners from brands like Victorio, NutriChef, and Cook N Home offer significant advantages. Constructed from high-quality, food-grade stainless steel, these pots are inherently rust-resistant and far less susceptible to damage from dings and scratches compared to their enameled counterparts. Many are designed with fully clad or layered bases, making them compatible with all cooktops, including induction. Their capacity is generally optimized for standard home canning batches, typically holding between 20 and 24 quarts, which is sufficient to process 6 to 8 quart-sized jars at once. While the initial investment is higher, their resilience often makes them a more cost-effective solution over many years.
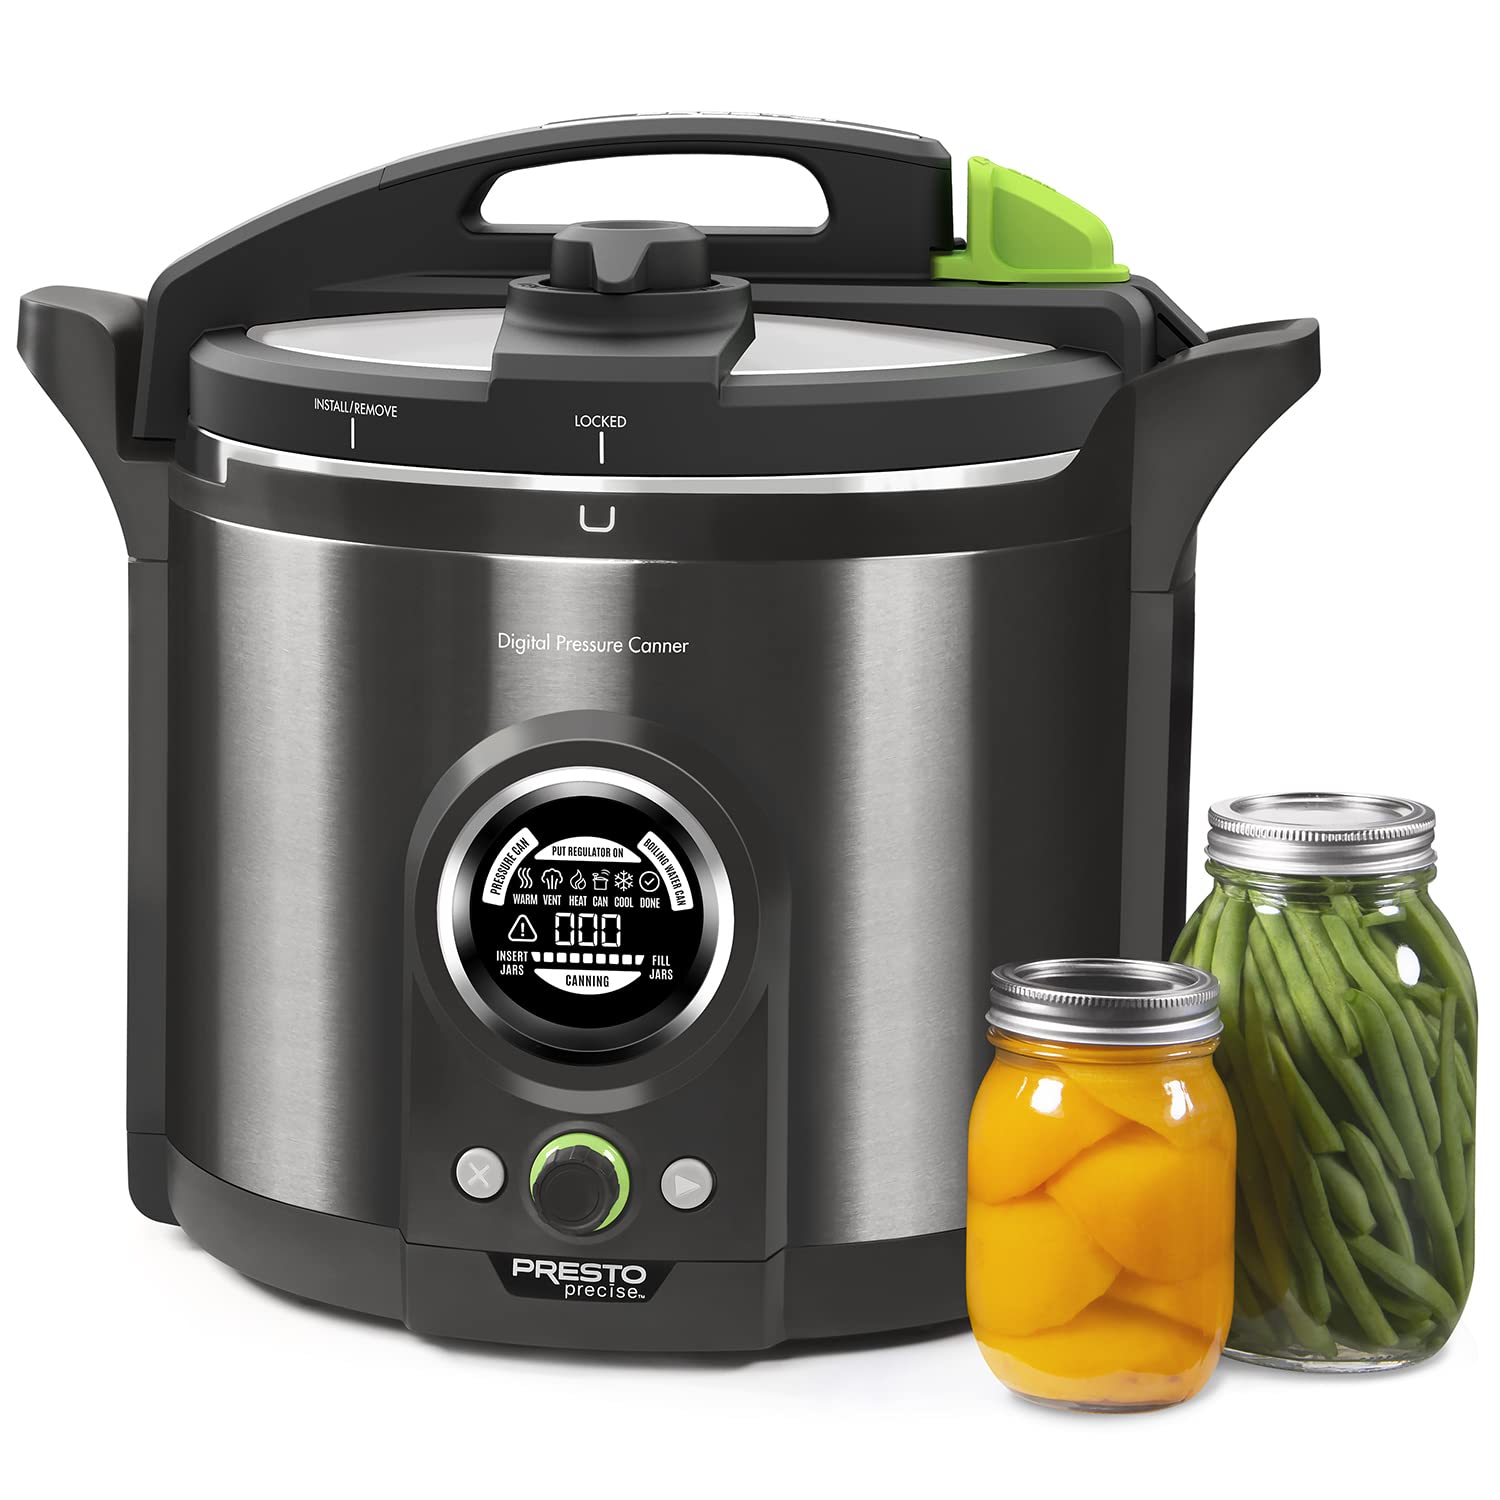
Electric Water Bath Canners
Modern Canning Solutions
Electric water bath canners represent a significant evolution in home preserving, moving the entire boiling process off the stovetop. Models like the Ball EasyCanner Electric (21-quart capacity) and the Presto Precise Digital (available in 12-quart and 17-quart models) are self-contained units. They feature integrated heating elements and digital controls that can precisely maintain a rolling boil for the entire processing time, theoretically reducing operator error. The primary benefit is the liberation of stovetop space, which is particularly valuable in kitchens with limited burner space or for those who wish to can outdoors. The trade-off is an absolute dependence on a dedicated electrical outlet and counter space. For those seeking a modern, set-and-forget approach, the Ball® EasyCanner Electric Water Bath Canner provides a streamlined and consistent canning experience directly on your countertop.
Proper Jar Preparation Techniques
Cleaning and Sterilization Methods
Jar Sterilization Protocols
Sterilization is a non-negotiable step in the canning process, directly tied to the safety and longevity of your preserved goods. The rule is straightforward: jars must be sterilized if the scheduled water bath processing time is less than 10 minutes. For processing times of 10 minutes or more, the processing itself accomplishes the sterilization. The protocol is simple and effective. Start with impeccably clean jars, free of any nicks or cracks. Submerge them completely in your water bath canner or a large pot of water. Bring the water to a vigorous boil and maintain that boil for a full 10 minutes. Timing begins once the water is at a full boil. To keep the jars sterile and hot until you are ready to fill them, reduce the heat and hold them in simmering water at or above 180°F (82°C). A hot jar going into a hot canner is less likely to crack from thermal shock.
Lid Preparation Best Practices
The lid is the gatekeeper of your jar’s seal, and its preparation is a precise operation. Always use new, unused flat lids for each canning session; the sealing compound is designed for a single use and may not form a reliable seal a second time. The bands can be reused if they are not rusty or bent. The key step is to simmer the lids—do not boil them. Place the lids in a small saucepan of water and heat them to 180°F (82°C), maintaining that temperature for about 10 minutes. This warming process softens the food-grade sealing compound, making it pliable and ready to form a tight seal against the jar rim. Boiling the lids can damage this compound, leading to seal failures. The bands should be clean but do not need to be heated.
Jar Filling Procedures
Headspace Management
Headspace, the unfilled air gap between the top of the food and the underside of the lid, is critical for creating a proper vacuum seal. Too little headspace can force food up under the lid during processing, breaking the seal. Too much headspace may prevent a vacuum from forming, as there is not enough food to drive out the excess air. The general guidelines are precise:
- 1/4-inch headspace: This is typically used for high-sugar, viscous products like jams, jellies, and conserves.
- 1/2-inch headspace: This is the standard for most other high-acid foods, including whole or sliced fruits, tomatoes, and pickles.
Using a headspace measuring tool is the most reliable way to ensure accuracy.
Air Bubble Removal
After filling the jar, the work is not yet done. Trapped air bubbles can rise to the top, displacing liquid and reducing the effective headspace. This can lead to a false seal or cause discoloration of the food at the top of the jar. To remove these bubbles, use a dedicated plastic bubble wand or a non-metallic spatula. Gently slide the tool down between the food and the inside wall of the jar, moving around the jar’s circumference. Pressing inward slightly will help dislodge stubborn bubbles. You may need to add more liquid after this step to restore the correct headspace. This simple, one-minute task is a vital investment in the quality of your final product. A well-maintained canner is the foundation for this entire process, and for 2025, the Granite Ware 21-Quart Water Bath Canner with Rack remains a classic, reliable choice for executing these techniques flawlessly.
Step-by-Step Canning Process
Pre-Canning Preparation
Recipe and Workspace Setup
A successful canning session begins with organization. Before a single jar is filled, your workspace must be a model of efficiency. This starts with your recipe selection. Use only scientifically tested recipes from authoritative sources like the USDA Complete Guide to Home Canning or the Ball Blue Book Guide to Preserving. These recipes guarantee the correct acidity and processing time for safety. Once you have your recipe, assemble all equipment—your water bath canner with its rack, jar lifter, funnel, bubble remover, clean towels, and prepared jars—and measure all ingredients. A chaotic kitchen is the enemy of a safe, sealed jar. Begin heating your water bath canner; it should be about half-full of water and brought to a simmer. This pre-heating ensures the canner and water are ready when your hot, filled jars are.
Altitude Adjustment Requirements
Ignoring altitude is one of the most common, and dangerous, errors in home canning. The boiling point of water decreases as elevation increases, which means water boils at a lower temperature. A lower boiling temperature is less effective at destroying potential spoilage microorganisms. Therefore, processing times must be extended as you go higher above sea level. The standard rule for water bath canning is to increase the processing time by 1 minute for every 1,000 feet (approximately 305 meters) of elevation above the point specified in your recipe. For precise adjustments, always consult the altitude adjustment charts provided in your tested recipe source. For example, a recipe processed for 10 minutes at sea level would need to be processed for 15 minutes at 5,000 feet.
The 10-Step Canning Method
Jar Filling and Sealing
With your prepared, simmering-hot jars, you now move to the critical filling and sealing phase. The sequence is deliberate and must not be rushed.
- Place your canning funnel securely in the mouth of a hot jar.
- Ladle the prepared product into the jar, maintaining the correct headspace as detailed in the previous section on headspace management.
- Remove air bubbles by sliding a plastic bubble wand or non-metallic spatula around the inside of the jar. Adjust the headspace with more liquid if necessary.
- Wipe the jar’s rim meticulously with a clean, damp cloth or paper towel. Any residue—a speck of food, a grain of salt, a drop of syrup—can prevent a perfect seal.
- Apply a prepared, warm flat lid onto the clean rim.
- Screw the metal band on until it is “fingertip-tight.” This means applying only the resistance you can easily overcome with your fingertips. Do not crank it down with force, as air needs to escape during processing to form the vacuum seal.
Processing and Cooling Protocol
The final stage is the water bath itself, where the preservation is finalized.
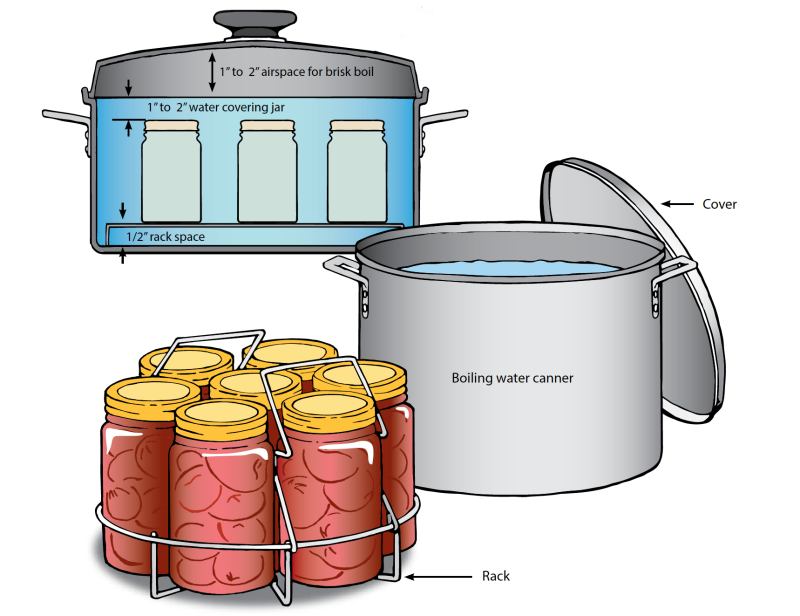
- Using a jar lifter, lower the filled jars gently onto the rack in the simmering water bath canner. Ensure the jars are not touching each other or the sides of the pot, allowing water to circulate freely.
- Once all jars are in the canner, add additional boiling water if needed to cover the jar tops by at least 1 to 2 inches.
- Place the lid on the canner and bring the water to a full, rolling boil. Only then do you start your processing timer for the duration specified in your altitude-adjusted recipe. This is typically between 10 and 30 minutes for most high-acid foods.
- When the processing time is complete, turn off the heat and remove the canner lid. Let the jars sit in the hot water for 5 minutes before using the jar lifter to transfer them to a wire cooling rack or a towel-lined, draft-free countertop. This resting period helps prevent siphoning (liquid loss from the jar). Let the jars cool, undisturbed, for 12 to 24 hours. You should hear the satisfying “ping” of the lids sealing as they cool. A well-maintained canner is essential for this entire operation, and for 2025, the Granite Ware 21-Quart Water Bath Canner with Rack provides the consistent, even heating required for perfect results.
Post-Processing and Storage
Jar Cooling and Seal Verification
The 12-24 Hour Cooling Period
The work of processing is done, but the final act of preservation is still underway inside the jars. After turning off the heat, let the jars rest in the water bath canner for 5 to 10 minutes. This resting period equalizes the pressure inside and outside the jar, significantly reducing the chance of siphoning—where liquid is forced out of the jar, compromising the seal and leaving you with a low-liquid product.
After this brief hold, use your jar lifter to transfer the jars to a towel-lined countertop or a wire cooling rack. Place them with at least 2 inches of space between each jar to allow air to circulate freely. Do not tilt the jars. Most importantly, do not retighten the metal bands. The sealing compound on the lid is soft and pliable, and the vacuum seal is in the process of forming. Disturbing the bands can break this nascent seal. Let the jars cool, undisturbed, for a full 12 to 24 hours. Drafts can cause jars to cool unevenly and crack, so keep them away from open windows or air vents.
Seal Testing Methods
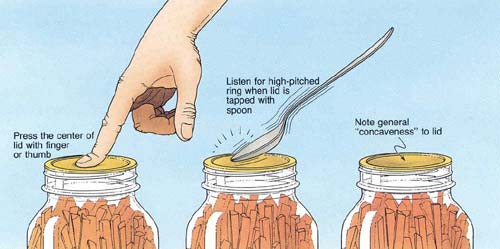
After the 12-24 hour cooling period, it is time to verify your work. A proper seal is non-negotiable for safe storage. Use these methods to test every jar:
- The Finger Press Test: Press down firmly on the center of the lid. If it is concaved and does not flex or pop back, the seal is good. A lid that moves up and down under pressure has failed.
- The Band-Off Lift Test: Remove the screw band entirely. Carefully lift the jar by the very edges of the flat lid, about an inch off the counter. The vacuum should hold the jar’s weight. Perform this test over a towel-lined surface in case the seal fails.
- The Audible Test: As the jars cool, you will often hear a distinct “ping” or “pop” as the lid is pulled down and the vacuum seal forms. While a welcome sound, it is not a substitute for the physical tests described above.
Proper Storage Guidelines
Ideal Storage Conditions
Once you have confirmed a good seal, you can prepare your preserves for long-term storage. Wipe the jars clean with a damp cloth to remove any residual food or mineral deposits from the canning water. This simple step prevents the bands from sticking and keeps your pantry tidy. It is essential to label every jar. Use a permanent marker to write the contents and the date of processing on the lid. For 2025, your memory of what is in that jar and when you made it will be unreliable.
Store the jars in a cool, dark, and dry place. An ideal storage temperature is between 55°F and 70°F (13°C and 21°C). Heat can degrade the quality of the food and the seal, while light can cause discoloration. While properly canned goods are safe well beyond a year, the quality—flavor, texture, color, and nutritional value—is at its peak within the first 12 months. Plan to consume your home-canned goods within one year for the best experience.
Handling Failed Seals
If you discover a jar that did not seal, all is not lost, but immediate action is required. You have two safe options:
- Refrigerate: Place the unsealed jar in the refrigerator immediately. Treat it as you would any other open, cooked food and consume it within 3 weeks.
- Freeze: If the product is suitable for freezing, you can decant the contents into a freezer-safe container and freeze it for up to one year.
You may also reprocess the food within 24 hours. To do so, you must completely start over: empty the jar, reheat the contents, wash and reheat a new jar, use a brand new lid, and process again for the full, altitude-adjusted time. This is often more work than it is worth and can result in a mushy, overcooked product. Refrigeration or freezing is usually the superior choice. The entire process, from a meticulous canning session to confident storage, relies on a reliable vessel. A well-maintained canner is the foundation, and for 2025, the Granite Ware 21-Quart Water Bath Canner with Rack continues to be a benchmark for durability and consistent performance.
Water Bath Canner Maintenance

The finality of a sealed jar and a tidy pantry is the reward for your effort, but the work is not truly complete until your equipment is cared for. A well-maintained canner is as crucial to the process as a sharp knife is to a chef; it is a foundational tool that, when treated with respect, will provide years of reliable service. Proper maintenance is not merely about cleanliness—it is about preserving the tool’s integrity to ensure safe, effective processing for every batch you put up in 2025.
Routine Cleaning and Care
The single most important rule for any canner is to never put it away wet. Residual moisture is the primary enemy of metal, leading to rust and corrosion that can compromise the vessel’s structure and, in the case of enamel, its protective coating.
Aluminum and Enamel Canner Maintenance
After use, empty the canner and wash it with warm, soapy water using a soft sponge or cloth. For enamel-coated canners, avoid drastic temperature changes, such as pouring cold water into a hot canner, as this can cause the enamel to craze or crack. For both aluminum and enamel, it is critical to dry the canner thoroughly inside and out with a towel after washing. Do not let it air dry. Once dry, store the canner with the lid slightly ajar or place a folded towel between the pot and the lid to allow for air circulation and prevent moisture buildup, which leads to mold and mildew. Always avoid abrasive scouring pads or harsh chemical cleaners, as they can scratch and dull the surfaces.
Stainless Steel Canner Care
Stainless steel is renowned for its durability, but it is not impervious to damage or staining. Clean it with non-abrasive cleaners and soft cloths to maintain its finish. A common issue is hard water mineral deposits, which appear as a white, chalky film. To remove these, fill the canner with a solution of one part white vinegar to three parts water and let it soak for several hours. Gently scrub the interior with a plastic brush or non-scratch pad, then rinse thoroughly. For a brilliant shine, you can periodically polish the exterior with a specialized stainless steel cleaner.
Equipment Longevity Tips
Your canner is a system comprised of the pot itself and its ancillary parts. Neglecting any one component can undermine the entire operation.
Jar Rack Maintenance
The jar rack is the workhorse of the setup, bearing the weight of your filled jars and preventing them from direct contact with the scorching bottom of the pot. After each use, clean the rack immediately to remove any food residue that can accelerate corrosion. For wire racks, inspect them regularly for signs of rust. Surface rust can often be scrubbed off with a wire brush, but a rack with significant, flaking rust should be replaced, as it can stain your jars and weaken structurally. For added stability, especially with smaller pint or half-pint jars, consider using a flat, perforated canning rack that provides a more solid base.
Seasonal Equipment Check
Before the canning season begins in earnest, conduct a thorough inspection of your entire toolkit. Examine each mason jar for hairline cracks, chips on the rim, or any other imperfections that would prevent a seal. Lay your empty canner on a flat surface and check for any significant dents or warping of the base, as an uneven bottom can lead to poor heat distribution. Finally, test your jar lifter. Ensure the grips are secure, not worn smooth, and that the mechanism opens and closes properly to securely grasp jars. A failing lifter is a safety hazard. For those looking to build or refresh their toolkit for 2025, the comprehensive Granite Ware 21-Quart Water Bath Canner with Rack set provides a robust pot and a durable, coated wire rack designed to withstand years of seasonal use.
Mastering Water Bath Canning: Your Path to Preservation Success
Water bath canning represents both an art and a science, combining precise techniques with fundamental food safety principles. Throughout this guide, we’ve established that successful preservation hinges on understanding core concepts: the exclusive application for high-acid foods, mandatory equipment specifications including jar racks and proper canners, meticulous jar preparation with correct headspace management, and vital altitude adjustments for processing times. The distinction between water bath and pressure canning remains non-negotiable for safety, while proper post-processing verification and storage protocols ensure your preserved goods maintain quality.
The journey from selecting appropriate recipes to hearing that satisfying ‘ping’ of sealed lids requires attention to detail at every stage. Proper equipment maintenance extends your toolkit’s lifespan, while consistent methodology builds confidence season after season. Remember that food preservation evolves, with 2025 bringing improved equipment designs and updated safety recommendations from authoritative sources.
Now that you understand the complete water bath canning process, which technique are you most excited to try first? Share your preservation plans or success stories in the comments below—our community benefits from collective experience! If you’re ready to begin your canning journey, ensure you have the proper foundation by investing in quality equipment designed for safety and durability.
